Create an Initiative
Initiatives are created by users who are assigned the Initiative Creator user role by the system administrator. Initiative creators can view all Initiatives.
NOTE: In the system, the person who created an Initiative is referred to as the Requestor of that Initiative.
As an Initiative creator, you can add new Initiatives from the following locations in Axiom Strategy Management:
- Initiatives page
- Perspectives page > Objective section > Initiatives option selected
- Objectives page > above Initiative list area on the right
Regardless of where you are in the system when you start creating an Initiative, the system displays a form to complete before taking you to the new Initiative plan file Files for modeling and saving Initiative planning and configuration data. Each Initiative has a unique plan file that is dynamically generated based on a template. where you finish creating the Initiative.
You can create an Initiative and save it without submitting it, to work on it later.
IMPORTANT: Be aware that once you submit the Initiative for review, you cannot make changes to it unless it is rejected and sent back to you at some point in the approval process.
To create an Initiative:
- Do one of the following:
- From the main Initiatives page, on the right under the row of status filters, click the Create New Initiative link.
- From the Perspectives page, in the Objectives area, click the Initiatives option and then on the right, click the Add Initiative link.
- From the Objectives page, on the right above the list of Initiatives, click the Add Initiative link.
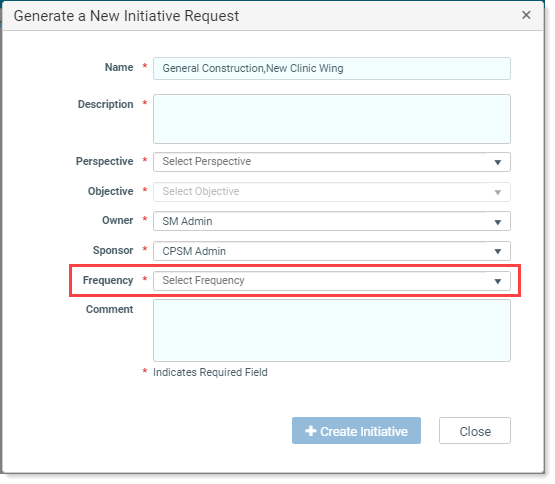
The Generate a New Initiative Request form displays.
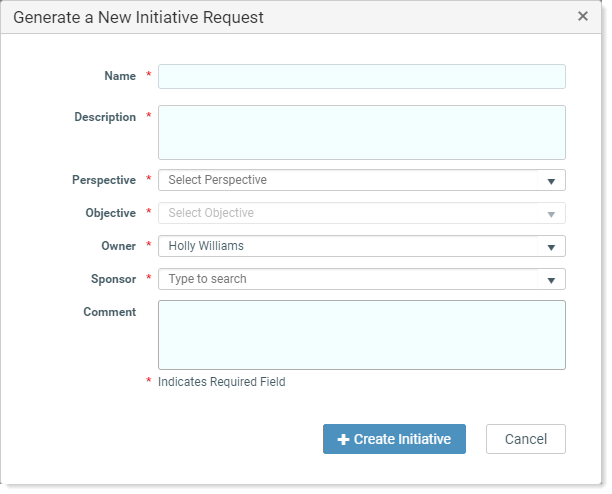
NOTE: Fields with a red asterisk cannot be left blank. Ensure you complete all required fields. The Create Initiative button on the form is disabled until all of the required fields are populated.
- In the Generate a New Initiative Request dialog, do the following:
In the Name field, type a name for the Initiative.
Give the Initiative a unique name; if you need to use the same name as an existing Initiative, differentiate it somehow; for example, add a dash followed by the department the Initiative applies to.
- In the Description field, type a description.
- From the Perspective drop-down, select the Perspective the Initiative is associated with.
- From the Objective drop-down, select the Objective the Initiative is associate with.
From the Owner drop-down, select the user who will be responsible for executing the Initiative and updating its data.
IMPORTANT: Be aware that you should not change the owner after you have saved the Initiative; changing the owner after saving can create data errors.
IMPORTANT: Be aware that you should not change the sponsor after you have saved the Initiative; changing the sponsor after saving can create data errors.
- (Optional) In the Comment field, type a comment.
Click Create Initiative.
NOTE: If the Create Initiative button remains inactive, it means that either there is something wrong with at least one of your entries in the form, or that not all of the required fields are populated. If all the required fields are populated, verify that you have given the Initiative a unique name.
A new plan file opens.
The Overview tab provides some instructions for completing the Initiative, including an overview of steps in the New Initiative Process section.
-
Click the Setup tab and do the following:
NOTE: Fields with a red asterisk cannot be left blank. Ensure you complete all required fields. If you do not, you will receive an error when you try to save the Initiative.
- From the Workstream drop-down, select the workstream impacted by this Initiative, or leave the default (None).
- From the Category drop-down, select a category or leave the default (None).
- To respond to Opportunities:
- Click the Opportunities tab.
In the Enter Comments here fields, enter information as directed by the questions. This field has a 250-character limit.
NOTE: Responding to Opportunity questions / instructions is optional. The options in this tab depend on your organization’s preferences as set up by your system administrator.
- Click the Resourcing tab and select resourcing:
For each resource that the Initiative impacts, click the toggle to On.
- If desired, in the Comments field, type some notes about the resource need, or instructions for the users providing the resource.
-
Add milestones to the Initiative.
IMPORTANT: New Initiatives come with two default milestones: Initiative Kickoff and Initiative Completion. If you delete both of these Initiatives without adding any others, and then save the file, and then go back to the plan file page, the default Initiatives will be restored. (However, if the milestones are deleted during the owner or sponsor review stages, the Initiatives are not restored.) This is a safeguard to prevent creating Initiatives with no milestones. While you can save an Initiative without milestones, the best practice recommendation is to have at least one Milestone per Initiative. This is especially important because Initiative status is based on milestone status. You do not have to add all the milestones before submitting the Initiative for approval; the Initiative owner or sponsor can add milestones before the Initiative is approved to Active Tracking The Initiative approval process stage in which Initiative owners and system admins can update Initiative measure data and milestone status..
- If desired, attach a file to the Initiative.
- Click the Summary tab and review your selections.
- Do one of the following:
- To save the Initiative and return later to make changes before submitting, click Save.
- To save and submit the Initiative, click Save, and then click Submit. In the submission dialog, enter a comment, and click Submit.
NOTE: After you submit the Initiative, it goes to the Initiative owner for review.