AX1800
Installing the Axiom Cloud Integration Service
In order to perform the installation, you must have obtained a copy of the Axiom Software installation package (ZIP file) and extracted the contents of this package to the server where you want to install the Cloud Integration Service. The installation package can be obtained from the help files or from Axiom Support.
The logged in user must have administrator rights on the server to run the installation.
IMPORTANT: In order to complete the install, you must know the encryption key for your Axiom Cloud Service system. If you do not know this key, contact Axiom Support for assistance.
NOTE: Once you enter the installation screens, there is no Cancel button. To cancel an installation, move to a different location within the Axiom Software Manager, or close the Software Manager.
To install the Axiom Cloud Integration Service:
-
Navigate to the location where you extracted the Axiom Software installation package, and then double-click
AxiomSoftwareManager.exe. -
From the Home screen of the Software Manager, click Manage Software.
TIP: You can also click Installation Manager > Manage Software Packages on the menu bar.
-
On the Installation Manager screen, under Install new software package, click Cloud Integration Service.
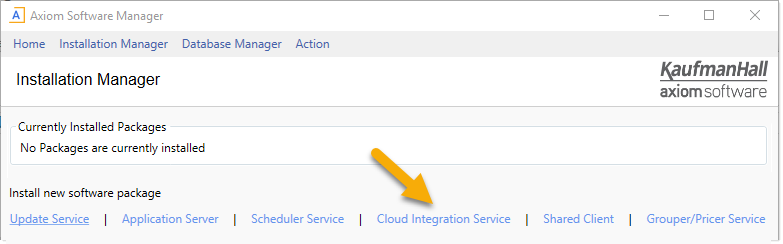
The Axiom Cloud Integration Service begins. The installation is performed within the Software Manager—a separate installer program is not launched. While using the installer, do not use the menu to move to other locations in the Software Manager, unless you want to cancel the installation.
- On the License Agreement screen, click I accept and then click Next.
-
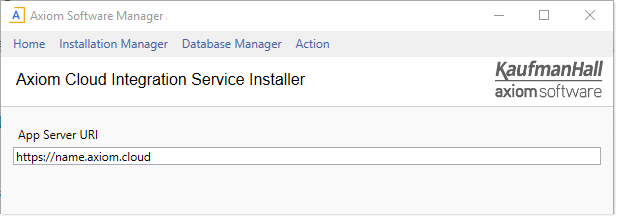
On the App Server URI screen, specify the URI to the Axiom Application Server, and then click Next.
This is the URI that you use to access the web page for your cloud system.
-
On the Installation Folder screen, specify the installation location for the Cloud Integration Service program files, and then click Next.
You can accept the default installation location, or click Browse to select a different location. By default, the location is:
C:\Program Files (x86)\Axiom EPM\Axiom EPM Cloud Integration Service\
-
On the Service Name screen, specify the name of the Cloud Integration Service, and then click Next.
The default name is Axiom EPM Cloud Integration Service.
-
On the Axiom Server Encryption Key screen, specify the encryption key for your cloud system, and then click Next.
This key is used by the cloud system to authenticate requests from the Cloud Integration Service. The key must match the key defined for your cloud system. If you do not know the key, contact Axiom Support for assistance.
-
Optional. On the Accessible Folders screen, specify the folders that the Cloud Integration Service can access, and then click Next.
This setting can be used to limit the service to accessing a specific folder or folders in your organization's network. You can leave this blank to allow the service to access any folder (as permitted by the network file system permissions for the service), or you can list one or more specific folder paths. Separate multiple folder paths with semi-colons.
If you list specific folders, you must use the same file path format used by the Axiom Software feature that you intend to run using the Cloud Integration Service. For example, if an import utility specifies the file as
\\Server\Folder\filename.xls, then you must specify\\Server\Folderin this setting. If instead you specifyN:\Sharename\Folder, the service will not be able to access the file for the import.NOTE: After installation, the list of accessible folders can be viewed in the remote data connection properties, in Scheduler. However, the accessible folders cannot be defined or modified from Scheduler. If you need to edit the accessible folders after installation, you must repair the Cloud Integration Service.
- On the Ready to Install screen, click Install to begin the installation.
A status bar displays the progress of the installation. When the installation is complete, click Done to exit the installer. You are returned to the Installation Manager screen, where you can see the details of the newly installed package.
Post-installation steps
Axiom Software will attempt to automatically start the Cloud Integration Service after the installation. If you discover that the service is not running, you can start it manually as follows:
- In Windows Administrative Tools, go to Services.
- Right-click Axiom EPM Cloud Integration Service and then select Start.
If you will be using the Cloud Integration Service to access files on your network, then the account used to run the service must have the appropriate network security permissions to access these files. Please contact Axiom Support for assistance in configuring this access for the service account as needed.
Saving a copy of the Software Manager
It is recommended to leave the Software Manager file on the machine where you installed the Cloud Integration Service, so that it is available in case you later need to repair or uninstall the service. The Windows Control Panel cannot be used to perform these activities. If you have deleted the Software Manager file and you need to perform a repair or uninstall, you can obtain a copy of the installation package from the Kaufman Hall Support site or from the platform Help files.
