Manage CFWC settings
Designate the settings to be applied and calculated to display results on various pages throughout Cash Flow / Working Capital.
-
On the Treasury Cash Management page, click Administration > Cash Flow / Working Capital.
-
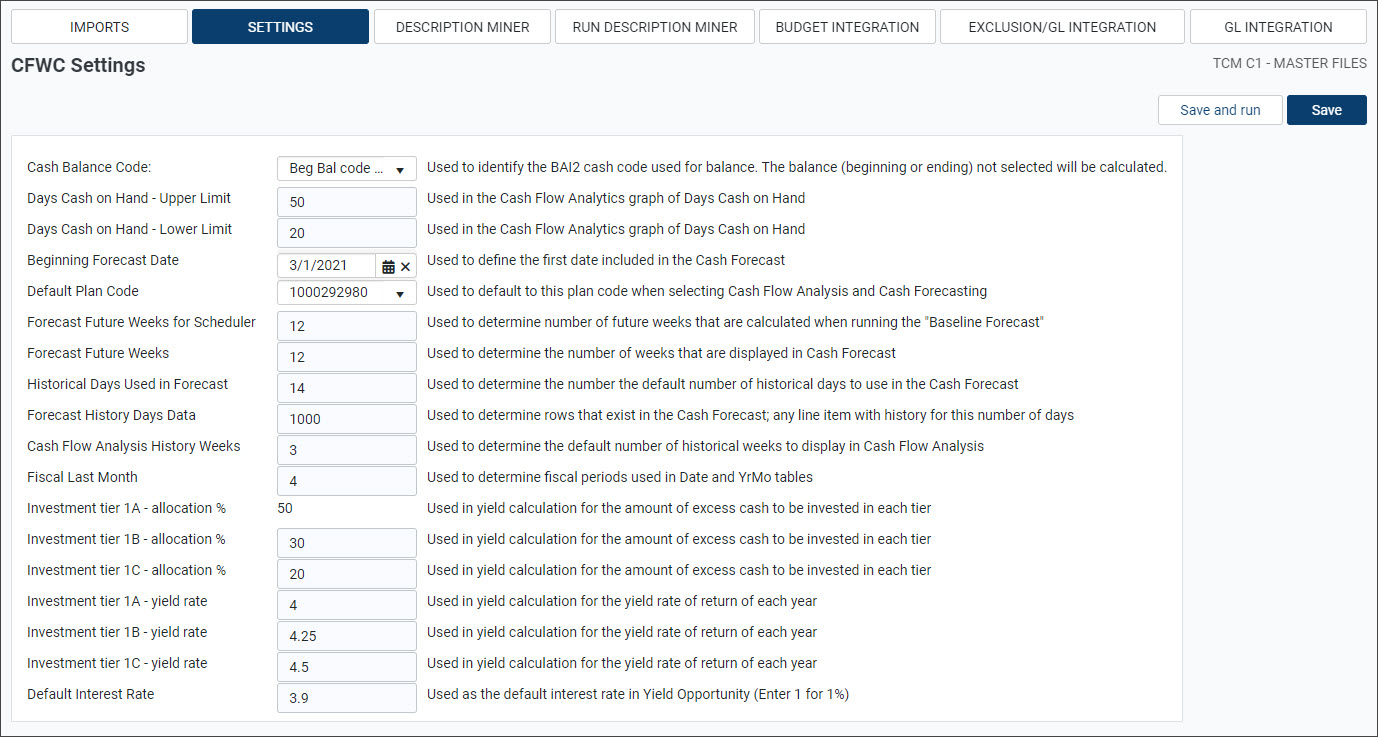
Click Settings.
-
Select the applicable code from the Cash Balance Code drop-down menu.
-
Enter the applicable number in the Days Cash on Hand - Upper Limit field, to be used on the Cash Flow Analytics page.
-
Enter the applicable number in the Days Cash on Hand - Lower Limit field, to be used on the Cash Flow Analytics page.
-
Enter or select a Beginning Forecast Date to be used on the Cash Forecast page.
-
Select the Default Plan Code to be used by default on the Cash Forecast and Cash Flow Analytics pages.
-
Enter the number of future weeks to calculate in the Axiom scheduler.
-
Enter the number of future weeks to calculate on the Cash Forecast page.
-
Enter the number of historical days to calculate on the Cash Forecast page.
-
Enter the number of Forecast History Days Data to calculate the number of rows displayed on the Cash Forecast page.
-
Enter the number of historical weeks to calculate the number of rows displayed on the Cash Flow Analytics page.
-
Enter the two-digit month to determine the Fiscal Last Month (for example, 12 = December).
-
Enter the allocation percentage for Investment tier 1B and 1C.
NOTE: The percentage for Investment tier 1A - allocation % is automatically calculated by subtracting the allocation percentages for 1B and 1C from 100% to ensure that the sum of all tiers is 100%. The percentages are used in the yield calculation to determine the amount of excess cash to be invested in each tier.
-
Enter the yield rates for Investment tier 1A, Investment tier 1B, and Investment tier 1C.
NOTE: The rates entered in these fields are used as the Assumptions on the Yield Opportunity page to calculate the potential annual return for each tier.
-
Enter the Default Interest Rate.
NOTE: The value entered in the Default Interest Rate field is used as the default on the Yield Opportunity page.
-
Click one of the save options:
-
To save your information, click Save.
-
To calculate the forecast for the defined number of weeks from the specified forecast date, click Save and run.
-
