AX1518
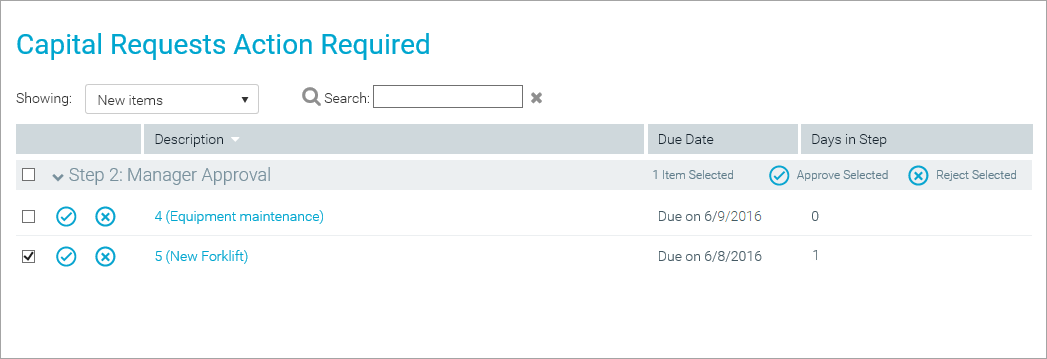
Using the Process Tasks page of the Web Client, users can view all of their current process tasks, and can complete tasks individually or in batch. The following screenshot shows an example of this page.
The primary use case for this page is when plan files are form-enabled, and the main client for end users is the Web Client. The page can also be used with spreadsheet plan files, but in this case you must consider the user experience between the Web Client and the Desktop Client. For example, if users normally access the Web Client and only use the Desktop Client when they need to open a spreadsheet plan file, then it makes sense to provide users with access to this page so that users can complete tasks without needing to launch the Desktop Client. However, if the Desktop Client is the main client for end users, then it may be confusing for users to be directed to the Web Client to complete their process tasks.
NOTE: The Process Tasks page is a deprecated feature, supported for backwards-compatibility only. The Process Directory page should be used instead.
Accessing the Process Tasks page
There is no built-in way to access this page; you must manually create the URL. In most cases, you will generate the URL and then include it in a home page (or a similar landing page), so that users can simply click a link to be taken to the page.
To access this page, use the following URL:
<baseURLtoAxiom>/process/processID/user?login=loginname
The login parameter can be omitted, and the page will show the tasks for the currently logged in user. If a login name is specified, then Axiom Strategic Financial Planning for Higher Education verifies that the current user is the specified user, or that the current user is an administrator or an owner of the process.
For example, if the process ID is 5988 and you want the page to show tasks for the current user, the URL would look as follows:
https://ClientName.axiom.cloud/process/5988/user
If you want the page to show tasks for user jdoe, then the URL would look as follows
https://ClientName.axiom.cloud/process/5988/user?login=jdoe
In this example, the URL will only work for user jdoe, an administrator, or a process owner. Any other user will see an error if they attempt to use the link.
You can find the ID for a process by using the GetProcessInfo function, or by hovering over the process definition in the Explorer task pane.
Completing process tasks
Tasks are displayed in groups by step. You can expand and collapse each group by clicking the step header. You can also:
-
Change the page view to only show certain tasks, by using the Showing drop-down list. By default, the page shows All tasks, but you can change this view to show only New items, Due soon, or Overdue items.
-
Use the Search box to find a particular task or tasks. You can find tasks based on the plan code or description.
- Click any column header to sort the list of tasks by that column.
Up to 10 tasks per step are displayed on the page by default. If you have more than 10 tasks in a step, the number of total tasks displays at the bottom of the step list, such as "Showing 10 of 37 items." If necessary, you can click show all next to this text, to bring in all tasks for the step (as filtered by the current view).
To complete a single task, click the appropriate icon next to the plan file name:
-
 Click the check mark icon to submit or approve the plan file (depending on the step type). This will move the plan file to the next step.
 -
 Click the X icon to reject the plan file. This will return the plan file to the prior step. The reject action is only available for approval steps.
To complete multiple tasks, select the check boxes for the tasks that you want to complete. You can click the check box in the step header to select all tasks in that step (as filtered by the current view). The action to complete the tasks depends on the type of step:
- For Edit Plan File steps, click Submit Selected in the step header to move the plan files to the next step.
- For Approval steps, click Approve Selected in the step header to approve the plan files and move them to the next step. Or, click Reject Selected to reject the plan files and send them back to the prior step.
