AX1437
Administrators and process owners can move one or more plan files to a different step in a plan file process. When this occurs, the plan file is aborted in the current step and made active in the target step.
You can move plan files to a different step using either the Process Status dialog in the Desktop Client, or the Process Directory page in the Web Client.
NOTE: Plan files that have completed all steps are no longer active in the process and cannot be moved to any step. If a completed plan file needs to be placed back in a prior step, then you must first activate the plan file in the process (which starts it over at step 1) and then move it to the desired step. For more information on activating a plan file, see Starting new plan files in a plan file process.
Move current step versus overriding step ownership
There are two different options available for administrators and process owners to move a plan file to a different step. These options are intended to be used for different circumstances as follows:
-
Complete step should be used when you need to override step ownership for a plan file, but the step should be completed as normal and the plan file should move on to the next step. For example, the owner may have forgotten to complete the step before leaving for vacation, so they have asked an administrator to complete it for them. Using the Reject and Approve options serve the same purpose for approval steps.
-
Move current step should be used when you need to make administrative adjustments to plan files in the process. When moving a plan file to a different step, the current task for the plan file is aborted instead of completed, and the plan file is made active in the target step. Any steps in between the aborted step and the target step are simply not started for the plan file.
Using the Process Status dialog to move plan files to different steps (Desktop Client)
In the Desktop Client, you can use the Process Status dialog to move plan files to different steps.
To move one or more plan files to a different step:
-
Open the Process Status dialog using one of the following options:
-
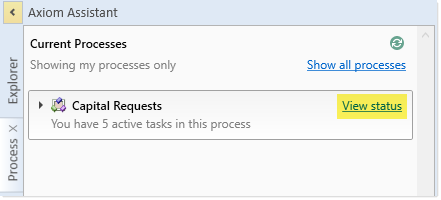
In the Process task pane (or a custom task pane configured to show the process control), click the View status link for the process.
-
In the plan file process definition, click the View status details link in the top right corner.
-
On the Axiom tab, in the Administration group, click Manage > Process Management > Current Processes. Select the process in the list, then click View Details.
NOTE: In systems with installed products, this feature may be located on the Admin tab. In the Workflow group, click Process Management > Current Processes.
-
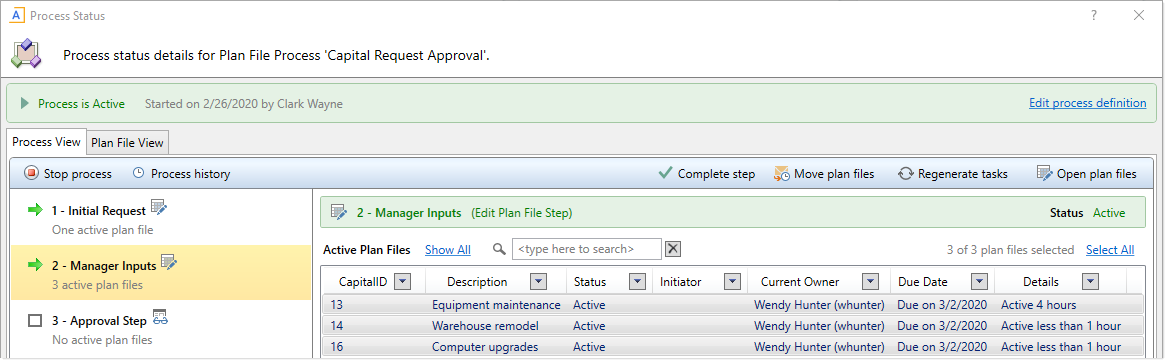
In the Process Status dialog, select the plan files that you want to move.
-
If you are on the Process View tab, then you must first select a step in order to select plan files in that step. For example, you can select step 3 to see the list of plan files that are currently active in step 3, then you can select one or more of those plan files. If you want to move plan files that are currently in a Multiple Approvals step, then you must select the parent step instead of a child step.
-
If you are on the Plan File View tab, you can select any plan file that you want to move, regardless of which step it is currently in. For example, you can select plan files that are active in steps 2 and 3, in order to move them all to the same target step.
Regardless of which tab you are on, you can use the following features to find and select plan files from the grid:
- You can use the Shift key or the CTRL key to select multiple plan files.
- To select all plan files shown in the grid, click the Select All link at the top right-hand corner of the grid. If you have selected all plan files and now you want to clear this selection, click on any plan file in the grid.
- To find a particular plan file, you can use the filter box at the top of the grid, or you can sort and filter the grid using standard Axiom grid functionality.
NOTE: The Process Status dialog is limited to showing the first 500 plan files that meet the current display criteria. If all plan files are not currently showing, a message displays at the bottom of the plan file grid. If you need to perform an action on all plan files, you can click Retrieve all in this message to load all plan files.
-
-
With the desired plan files highlighted in the dialog, click Move plan files. In the following example, all three plan files in step 2 are selected to be moved.
-
In the Move Current Step dialog, do the following:
-
Select the step that you want to move the plan files to.
-
If you want to send notifications to the new step owners for the target step, select Send notifications to users affected by this current step change. If this check box is selected, then you can also optionally enter a comment to be included in the notification and stored with the process. By default, notifications are not sent to new step owners when moving plan files to a different step.
If you choose to send notifications, the Step Activated notification is sent for the target step. Because the currently active step is aborted instead of completed, no Step Completed notifications will be sent.
- Click OK to move the plan files to the target step.
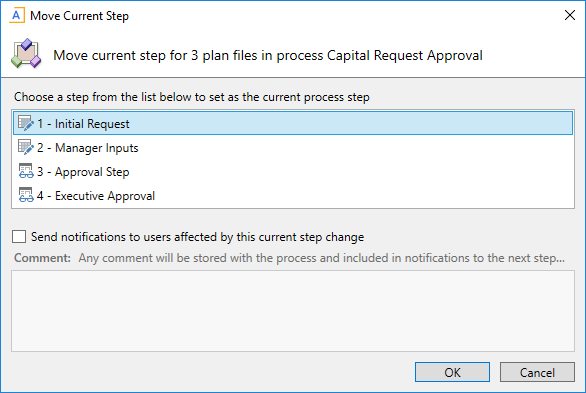
Example Move Current Step dialog
-
The current step is aborted for the selected plan files, and the target step is activated.
NOTE: Plan files are not saved as part of moving steps, because the current step is aborted instead of completed. If Save and validate plan file before advancing to next step is enabled for the step you are moving from, that setting is ignored.
Using the Process Directory page to move plan files to different steps (Web Client)
In the Web Client, you can use the Process Directory page to move plan files to different steps.
-
Open the Process Directory page from a product asset or a custom asset.
NOTE: There is no built-in way to navigate to the Process Directory page. If you are using this page, this means that you have an installed product that provides navigation to the page, or you have created a custom asset to open the page. For more information, see Using the Process Directory page.
-
Filter or search the page as needed to locate the plan files for which you want to complete the step.
-
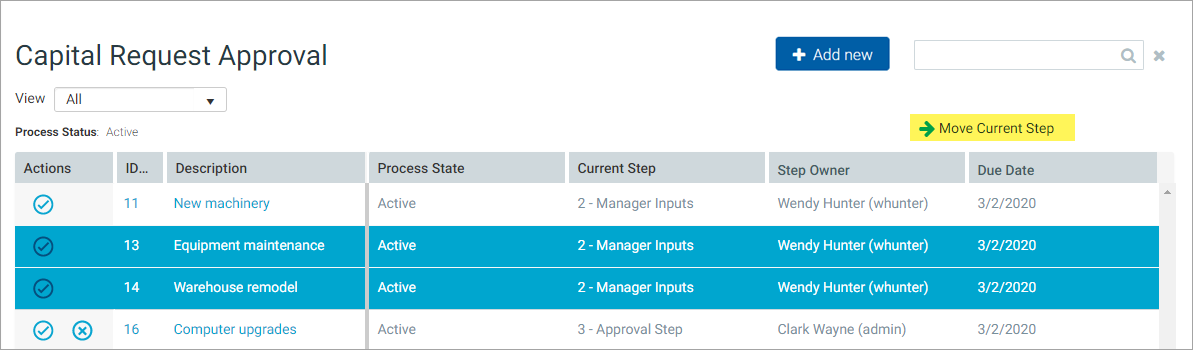
Select the plan file(s) that you want to move. If you only want to move a single plan file, click on the row for that plan file to select it. You can use the SHIFT and CTRL keys to select multiple rows.
-
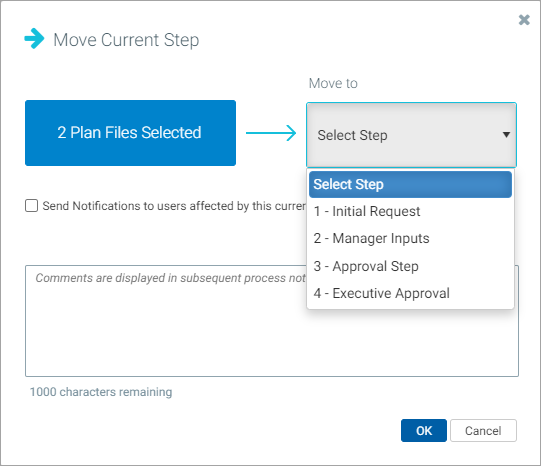
Click Move Current Step to move the selected plan files. In the following example, two plan files are selected to be moved:
-
In the Move Current Step dialog, do the following:
-
Use the Select Step drop-down list to select the step that you want to move the plan files to.
-
If you want to send notifications to the new step owners for the target step, select Send notifications to users affected by this current step change. If this check box is selected, then you can also optionally enter a comment to be included in the notification and stored with the process. By default, notifications are not sent to new step owners when moving plan files to a different step.
If you choose to send notifications, the Step Activated notification is sent for the target step. Because the currently active step is aborted instead of completed, no Step Completed notifications will be sent.
- Click OK to move the plan files to the target step.
-
TIP: Administrators and process owners can also move the current step when viewing the Process Routing page for a plan file.
