Manage APM data and processes
Use this page to manage Accounts Payable Management (APM) data and processes.
- Import files
- Manage payment types
- Manage vendor types
- Manage vendor exclusion terms
- Manage vendor exclusion adjustments
- Filter records
Use this tab to specify network paths for and import transaction and vendor files.
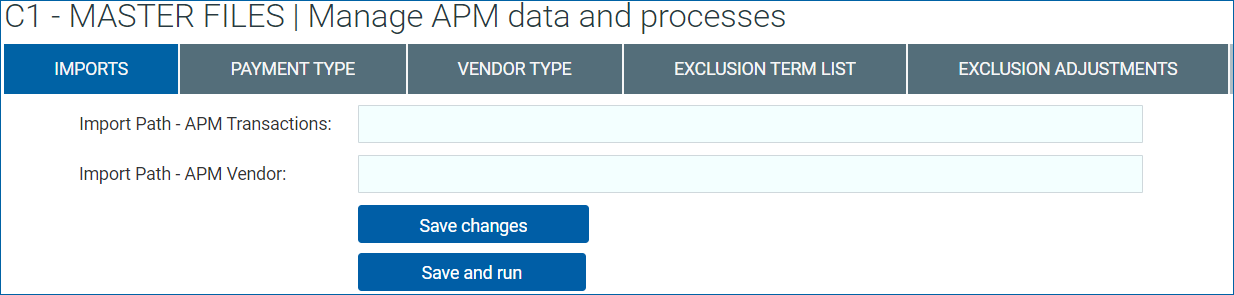
Imports tab (click to enlarge)
-
Enter the network path to one or both of the following import files:
-
Import Path - APM Transactions: Enter the network path for the Accounts Payable Management (APM) transactions file.
-
Import Path - APM Vendor: Enter the network path for the APM vendor file.
-
-
Click one of the save options:
-
If you want to save this configuration to use with an automated import or just save it to run later, click Save changes.
-
If you want to save this configuration and run the import immediately, click Save and run.
-
NOTE: This import can be set up to run automatically in the Axiom scheduler also. See the "Automated APM Data Integration" job in the Scheduler to set up an automated import schedule.
Use this tab to manage payment types included in the vendor file you imported.

Payment Type tab (click to enlarge)
-
For each payment type, enter or modify the description.
-
Select a payment type master.
-
To filter records, click Data filter, enter and select criteria, and click OK.
-
When you have finished, click Save.
Use this tab to manage vendor types included in the vendor file you imported.

Vendor Type tab (click to enlarge)
-
For each vendor type, enter or modify the description.
-
Select a vendor type master.
-
To filter records, click Data filter, enter and select criteria, and click OK.
-
When you have finished, click Save.
Use this tab to exclude vendors from reports; for example, you can exclude a vendor who does not generate enough transactions.

Exclusion Term List tab (click to enlarge)
-
To add a term: In the Add new terms section, enter a term and description.
-
To modify an existing term: In the Existing terms section, modify the term and description.
-
To delete a term: Select that term’s check box in the Delete? column.
-
To filter records, click Data filter, enter and select criteria, and click OK.
-
When you have finished, click Save.
Manage vendor exclusion adjustments
Use this tab to manage the vendor exclusion list, based on revenue and exclusion term.
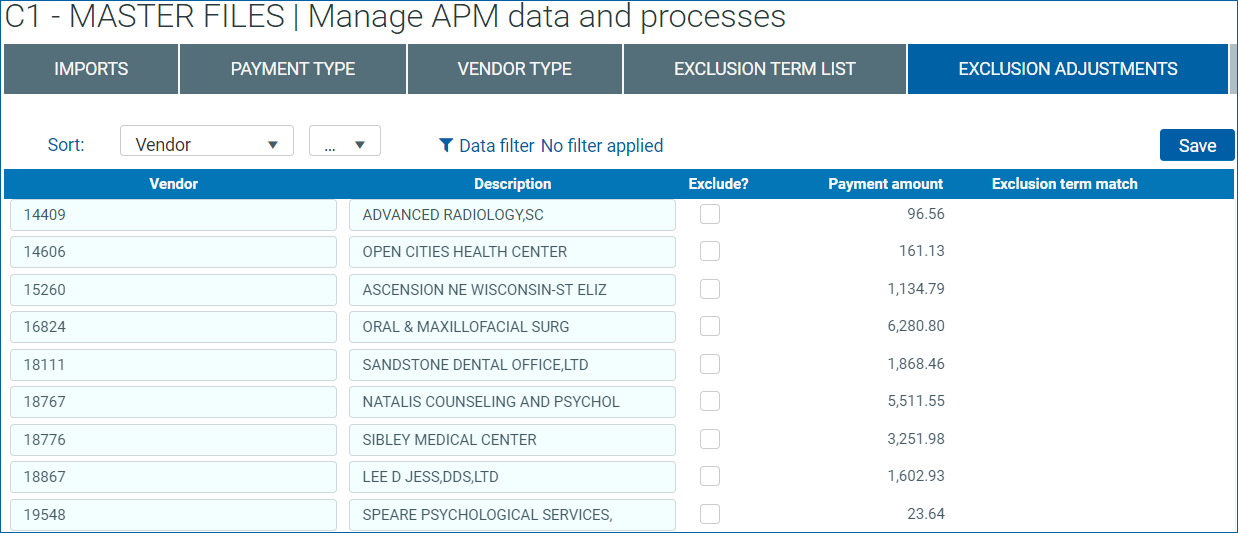
Exclusion Adjustments tab (click to enlarge)
- Select a sort option: Vendor; Vendor Description; Amount.
-
Indicate whether to sort records in ascending (ASC) or descending (DESC) order.
-
For each vendor: Enter or modify the vendor name and description.
-
To exclude a vendor, select that vendor’s check box in the Exclude? column.
-
To filter records, click Data filter, enter and select criteria, and click OK.
-
When you have finished, click Save.
-
Click Data filter.
-
On the Filter Wizard, enter and select criteria.

Example Filter Wizard (click to enlarge)
-
Click OK.

