KB1016
Summary
This article provides steps to grant network file permissions to the Axiom Cloud Integration Service (CIS) used by Axiom Software cloud systems, when the CIS needs to access files that do not reside on the same server where the CIS is installed.
Details
When automating imports or exports of data to or from flat files for an Axiom Software cloud system, the recommended best practice is for the source or destination files to reside on a local disk on the server where the CIS is installed. In some cases, it may be necessary for the files to instead reside on a network location that is external to this server. If this is a requirement, your Information Technology department needs to grant the necessary permissions to the CIS so that it can access the network location.
Resolution
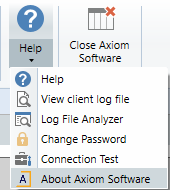
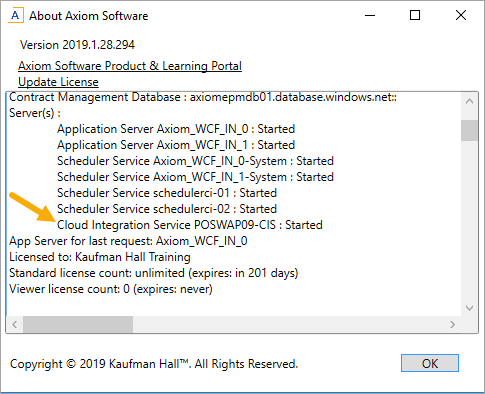
The following steps provide an example of how to grant the CIS server permission to the network share and security. The specific steps may vary depending on the operating system and other factors. These steps require administrative permissions and should be performed by a qualified Information Technology professional. If you do not know the name of the server where the CIS is installed, you can look it up.
-
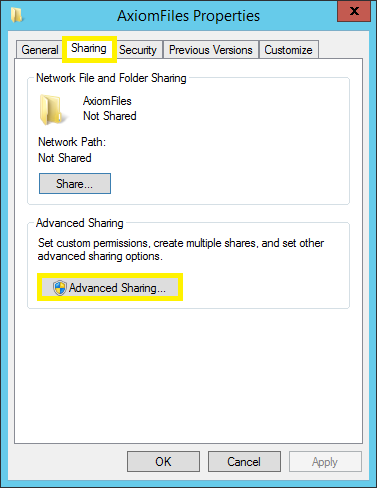
Right-click on the folder where the files will reside, then select Properties.

-
In the Properties dialog, on the Sharing tab, click Advanced Sharing.
-
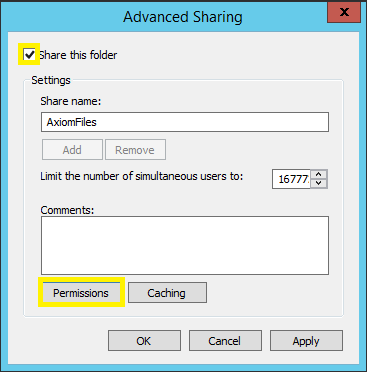
In the Advanced Sharing dialog, select Share this folder, then click Permissions.
-
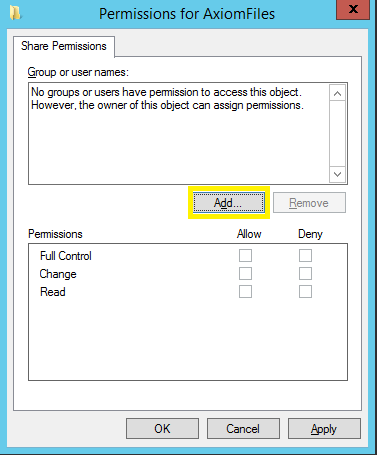
In the Permissions dialog, click Add.
-
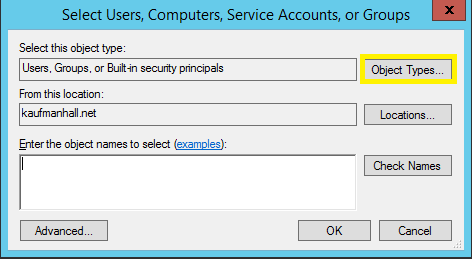
In the Select Users, Computers, Service Accounts, or Groups dialog, click Object Types.
-
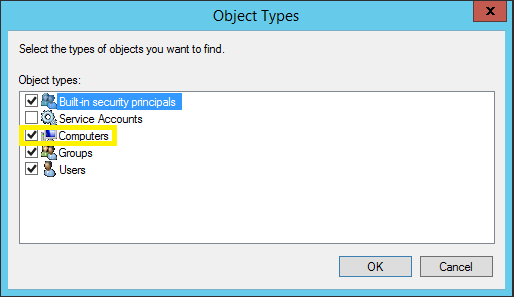
In the Object Types dialog, select Computers, then click OK.
-
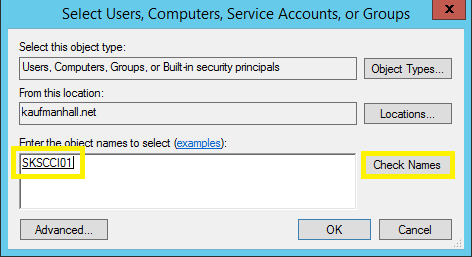
In the Select Users, Computers, Service Accounts, or Groups dialog, type the name of the server where the Axiom Cloud Integration Service is installed, then click the Check Names button. The server name becomes capitalized and underlined when it is found. Click OK.
In the following example, the name of the server is skscci01.
-
In the Permissions dialog, for the Full Control permission, select Allow. Click Apply, and then click OK.

-
In the Advanced Sharing dialog, click Apply, then click OK.

-
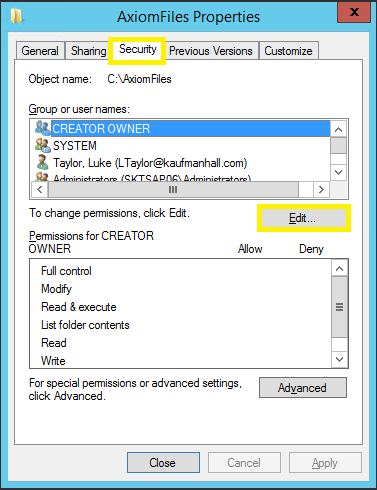
In the Properties dialog, on the Security tab, click Edit.
-
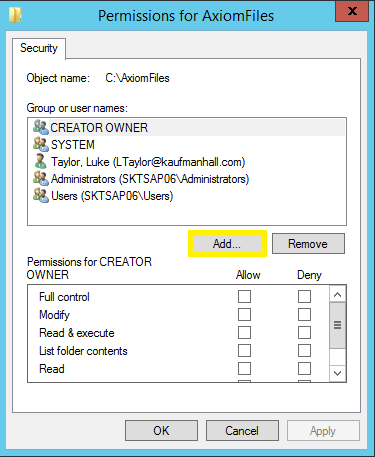
In the Permissions dialog, click Add.
-
In the Select Users, Computers, Service Accounts, or Groups dialog, click Object Types.

-
In the Object Types dialog, select Computers, then click OK.
-
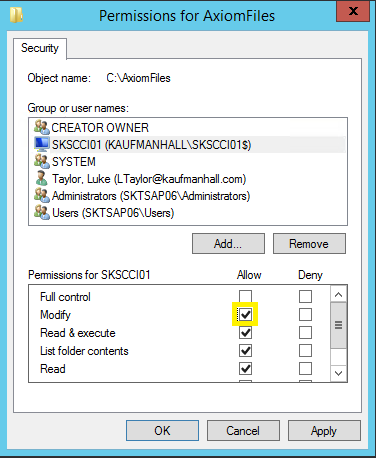
In the Select Users, Computers, Service Accounts, or Groups dialog, type the name of the server where the Axiom Cloud Integration Service is installed, then click the Check Names button. The server name becomes capitalized and underlined when it is found. Click OK.
-
In the Permissions dialog, for the Modify permission, select Allow. Click Apply, and then click OK.
-
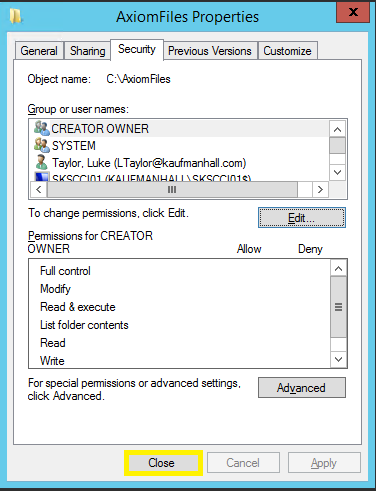
In the Properties dialog, click Close.
Outcome
The CIS should now be able to access the folder location in order to read files (such as for imports), or to save files (such as for exports).
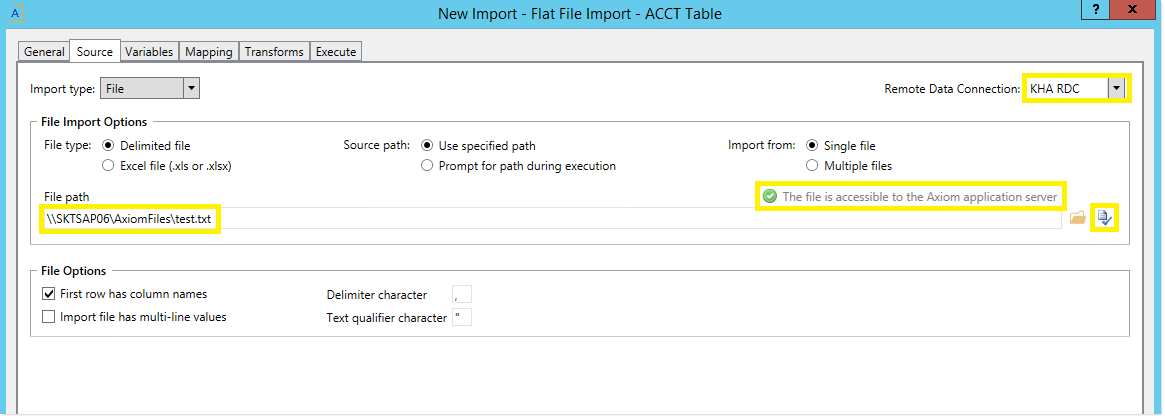
You can use the Import Wizard to verify the ability to access files in the folder location. The following example shows how an import can be configured to read a file from a network folder location. You can use the validate button ![]() to the right of the File path to verify that Axiom Strategy Management can access the file. The Remote Data Connection tells the import to use the CIS for this purpose.
to the right of the File path to verify that Axiom Strategy Management can access the file. The Remote Data Connection tells the import to use the CIS for this purpose.
See also
- Managing remote data connections
- Export Wizard: Destination tab
- Importing from one or more source files
- Troubleshooting file access
Article information
|
Category |
General |
|
Applies To |
All versions, cloud systems only |
|
Tags |
Cloud Integration Service, Remote Data Connection, Imports, Exports, File Is Not Accessible, File Access, Network File Permissions |
|
Issue Number(s) |
N/A |
