Set up Axiom ETL import for flat files
Use these instructions to set up folder and file options for importing flat files using the Axiom ETL importer. These instructions are for system implementers setting up new systems and for support technicians setting up import folders for additional flat file types.
IMPORTANT: When copying an existing flat import file, you must add an underscore (_) and a number or other character to the end of the copied file name: a copy of a file named CM_TempXXX would be named CM_TempXXX_y; so a copy of the file CM_TempClaimAddDRG could be named CM_TempClaimAddDRG_2.
To set up import file and folder options:
- In the Axiom Windows Client, from the Axiom ribbon tab, click Imports > Contract Management> [desired flat file import type] > Edit.
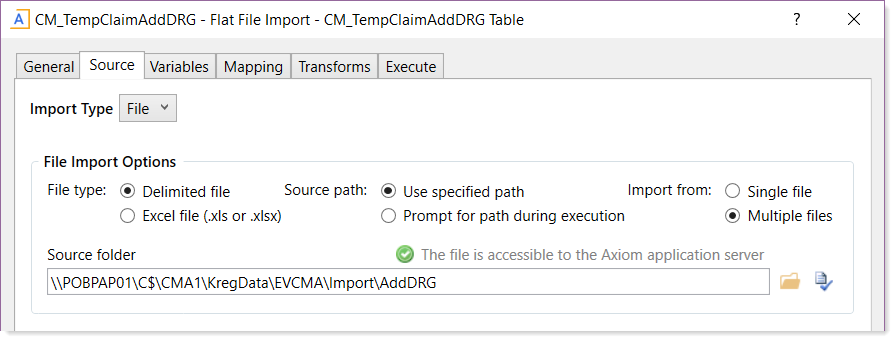
- In the Flat File Import dialog, click the Source tab.
- For Import Type, select File.
- In File Import Options, select the following:
- For File type, select Delimited file.
- For Source path, select Use specified path.
In the Source folder field, enter the path to the folder in which the client will place files. This is also the folder from which the importer picks up the files.
NOTE: This path is provided by the client. For requirements, see Client file specifications.
For Import from, select Multiple files.
- In the File Options section, select the following:
- If the first row of data in your file has column headers, select the option First row has column names.
- For Delimiter character, select the pipe delimiter (|).
For Text qualifier character, the default is quote marks. If your file uses a different qualifier character, enter it in this field.

- In the Multiple File Options section, select the following:
- For Import order, select Creation date.
For Archive folder, this is the same path as the Source folder except that instead of a folder named “Import” the folder is named “Imported,” as shown in the following example.
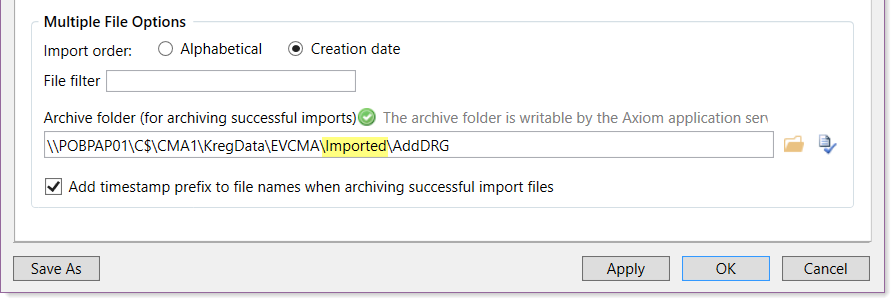
- Ensure that the option Add timestamp prefix to file names when archiving successful import files is selected.
-
If the client is using column header names in the file, click the Mapping tab and then verify that the information displayed in the Temp Table Column and Destination Column is correct.
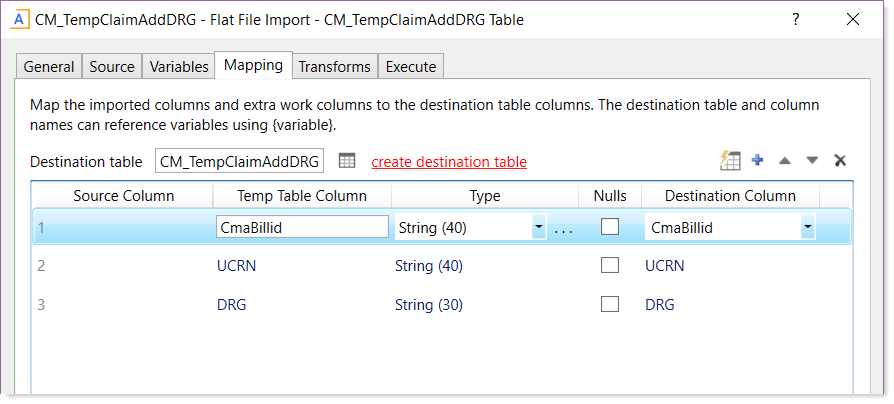
- If the information is not correct, select the line in the column and then type the correct heading.
- Click Apply and then click OK.
