Adding or modifying project groups
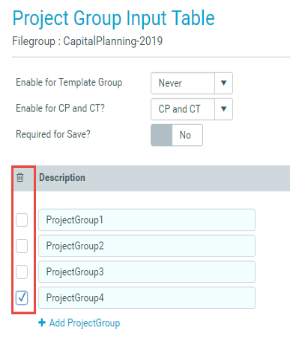
The Project Group Input Table driver allows you to define groups for aggregating multiple projects together for reporting, sorting, and tracking purposes.
To add or modify project groups:
-
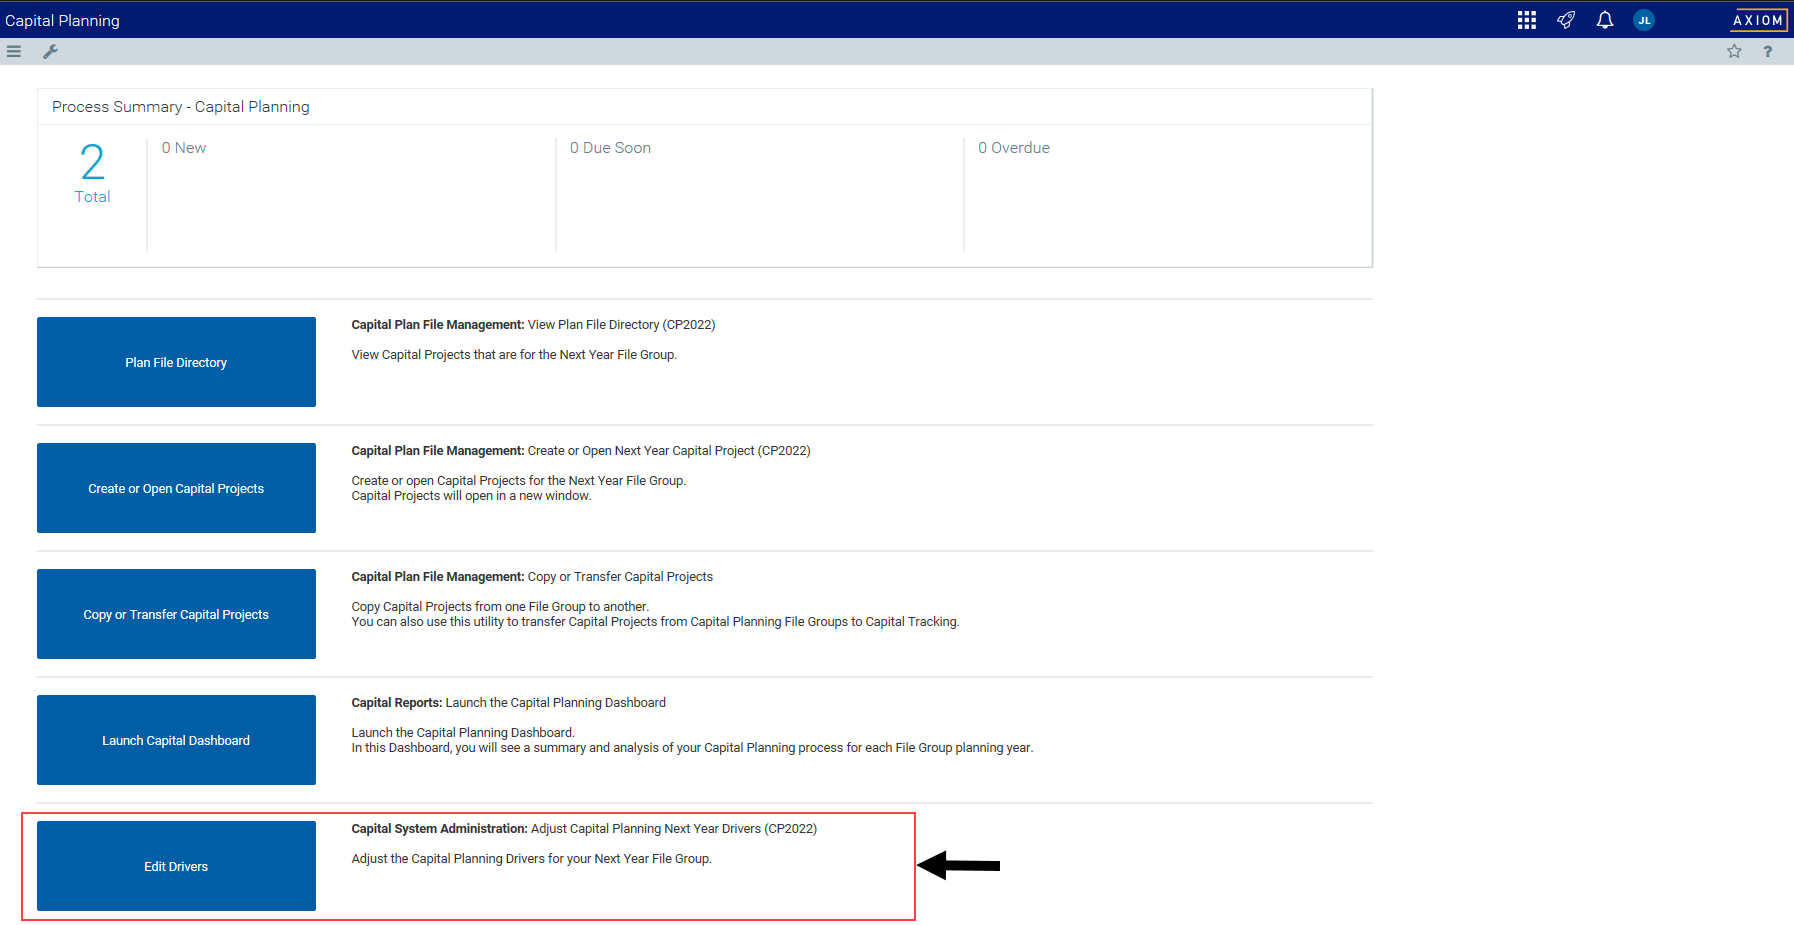
From the Axiom Capital Planning home page, click Edit Drivers.
NOTE: To access this location from the Cap Planning Admin task pane, in the Administration section, click Capital Planning Drivers, and double-click Capital Planning Drivers.

Click image to view full size
-
From the Configuration tab, click Project Group Input Table.
- From the Enable for Template Group drop-down, select when to include the project groups.
- From the Enable for CP and CT drop-down, select to enable the project groups for Axiom Capital Planning only, Axiom Capital Tracking only, or for both.
- For the Required to Save? option, do one of the following:
- To require users to select a project group before they can save the plan file, set this option to Yes.
- To not require users select a project group before saving the plan file, set this option to No.
- In the Description column, type a name for the project group.
- To add a project group, click + Add Project Group, and complete Steps 3-5.
- After making your changes, in the upper right corner of the page, click Save.
- At the confirmation prompt, click OK.
If you are making changes to this driver, make sure to process the plan files to propagate your changes.
Deleting project groups
IMPORTANT: If you delete a project group, it will be deleted in historical projects.
To delete a project group:
- In the Cap Plan Admin task pane, in the Capital Planning Commands section, navigate to the drivers for the previous year, current year, or next year.
- In the Cap Track Admin task pane, in the Administration section, double-click Capital Tracking Drivers.
-
In the Capital
-
Select the check box to the left of the project group.
- After making your changes, in the upper right corner of the page, click Save.
- At the confirmation prompt, click OK.
If you are making changes to this driver, make sure to process the plan files to propagate your changes.
