Modeling capital allocation portfolios
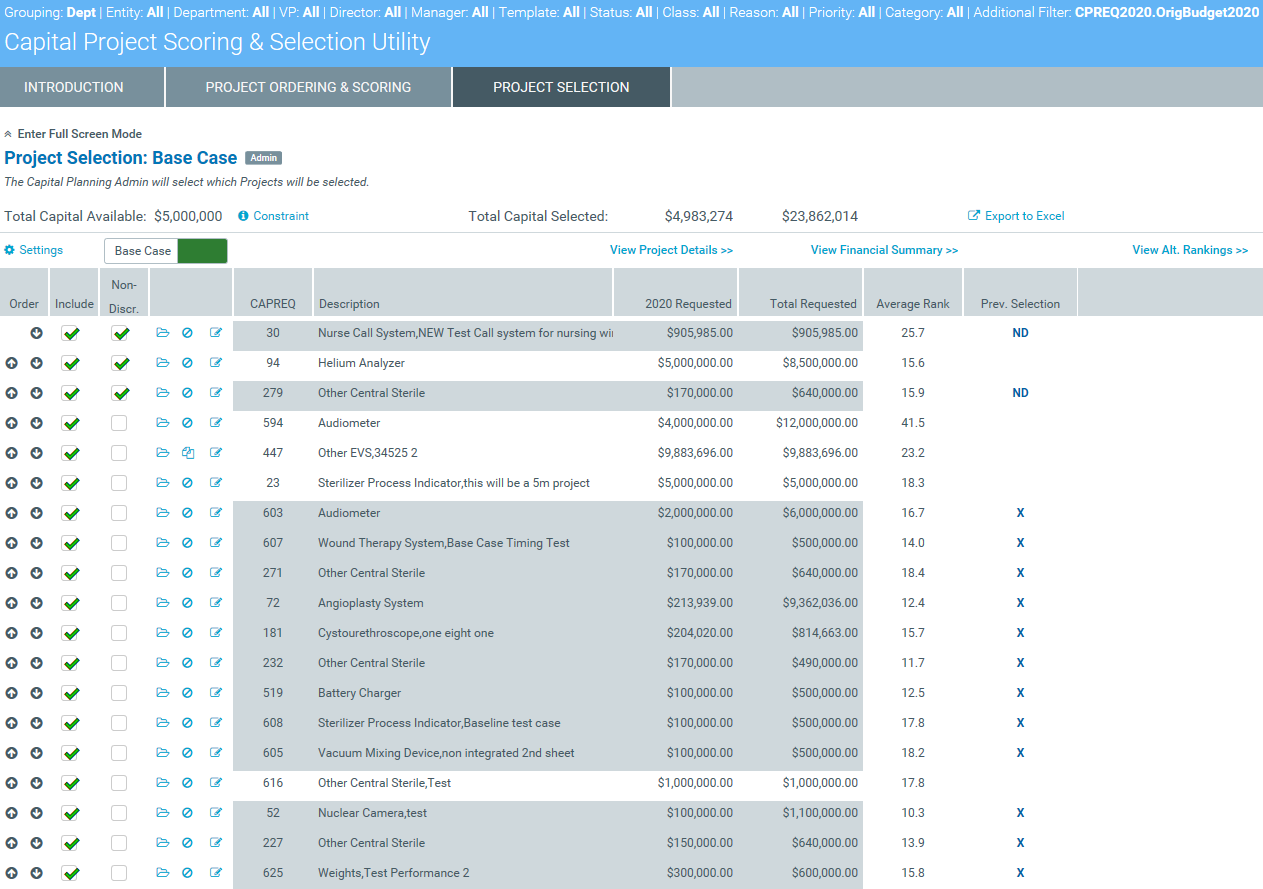
The Project Selection tab of the Capital Project Scoring and Selection utility allows the Capital Planning administrator to model different capital allocation portfolios before selecting projects to include in the final portfolio. Projects are automatically added to the portfolio in rank order based on scores provided by the Capital Committee members until all available capital has been allocated. You can also mark projects to include in a portfolio, regardless of score. For example, projects that must be completed due to regulatory mandates, prior approval, and so on.
The projects that qualify for the portfolio display in gray shading, meaning that according to their rank order (Average Rank column) and the amount requested (20XX Requested column), these projects qualify for capital dollars for the upcoming year.
NOTE: The system automatically deducts the dollar amounts for any non-discretionary projects for the purposes of determining available capital for allocation. These projects are indicated with a check mark in the Non-Discr. column. Please ensure that your Contingency dollars are accounted for.
Click image to view full size
Selecting projects for approval
To select projects for approval:
-
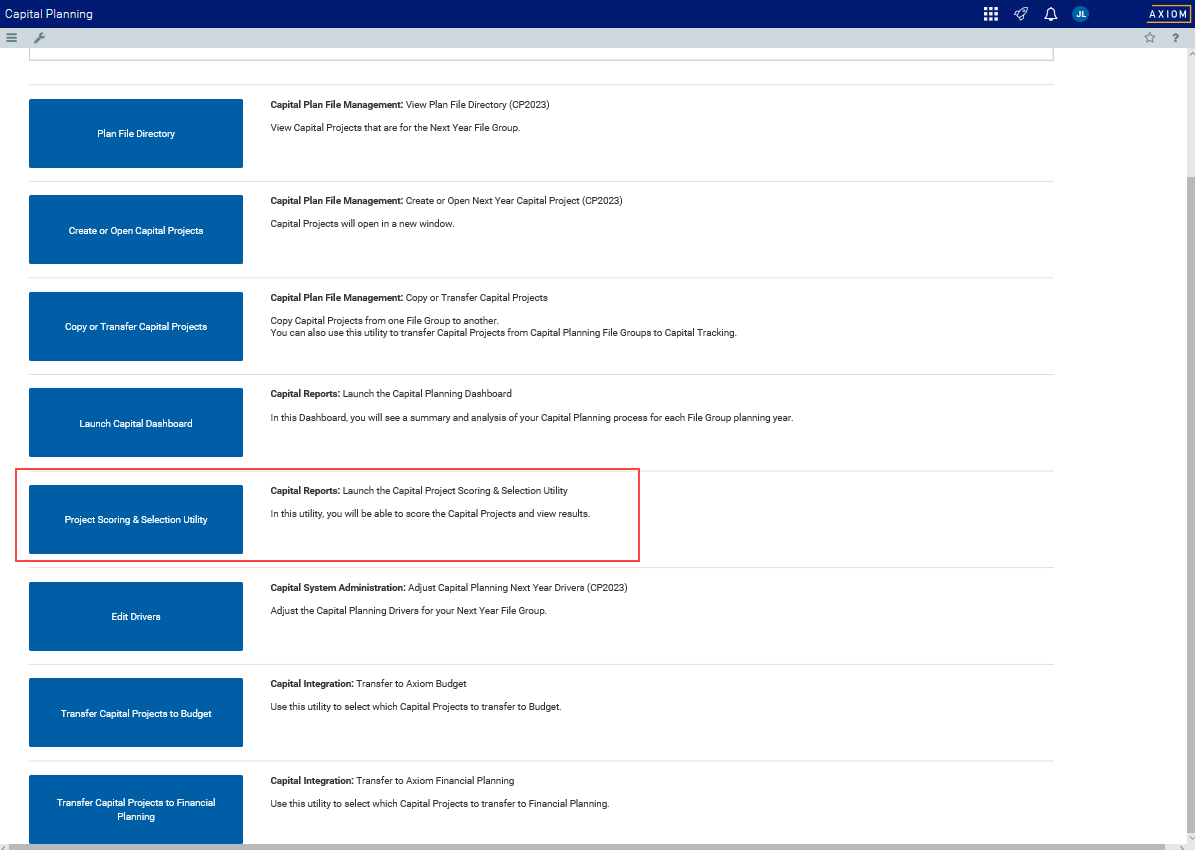
From the Axiom Capital Planning home page, click Project Scoring & Selection Utility.

Click image to view full size
NOTE: In the Cap Plan Admin task pane, in the Capital Planning Reports section, double-click Project Selection Utility.
- Click the Project Selection tab.
-
Above the table, click Settings to configure of the following options:
- Show Project Selection to Committee - Click the toggle to enable (Yes) or disable (No) the system from showing the list of selected projects to committee members.
- Activate Olympic Scoring - Click the toggle to enable (Yes) or disable (No) the system from discarding the highest and lowest score for each project for each criterion.
-
Save Approval Status - Click the toggle to enable (Yes) or disable (No) flipping the Approval Status to Approved. Disabling this option means that the Approval Status will remain as-is.
IMPORTANT: If this option is set to Yes, the system updates the approval status in the CPREQ20XX data table in the Status column when changes are saved in this utility. We recommend leaving this option set to No until the list is ready to be finalized and submitted to the final approver (usually someone in the Financial department).
-
To set the total capital amount available, do the following:
-
In the upper left corner of the page, click the
 icon.
icon.TIP: To keep the dialog open while you are working in it, click the
 icon.
icon. -
Scroll to the bottom of the Filters dialog, and in the Total Capital Available field, type the upper limit of capital project dollars that can be selected.
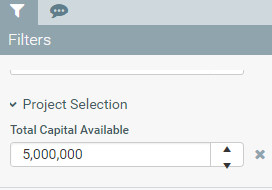
This number also displays above the table in the Project Selection tab.
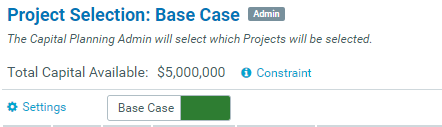
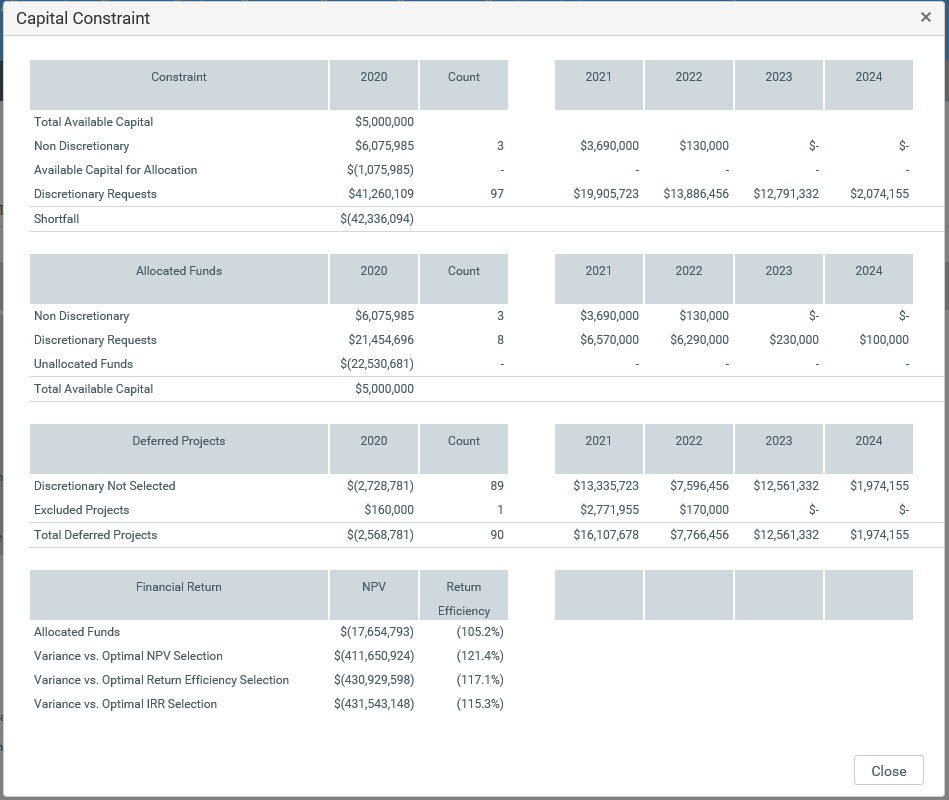
To view a financial summary of the budgeted project dollars, click Constraint (next to the Total Capital Available area above the Settings button).

Click image to view full size
- Click Apply.
-
-
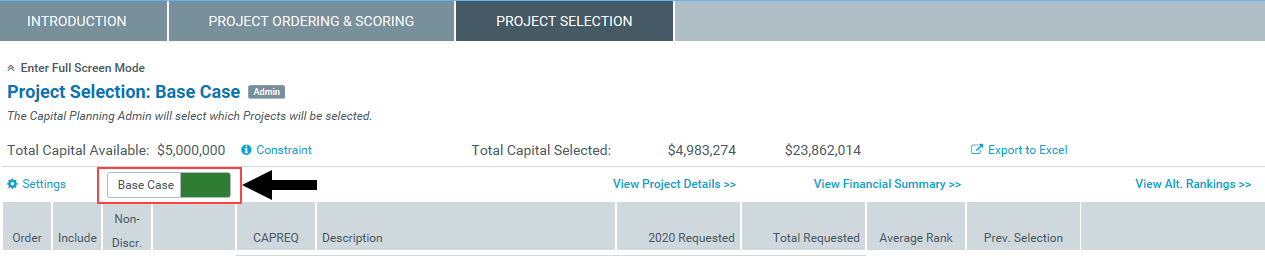
Click the scenario toggle (next to the Settings button) to Base Case.
NOTE: To see how editing project requested amounts can change the portfolio of projects, you can create a scenario to help you determine the final list of projects.
-
As you evaluate projects, you can view project information by doing the following:
- To expand or contract hidden project detail columns, clicking the View project details >>, View Financial Summary >>, or View Alt. Rankings >> links above the table.
- To open and view the plan file, click the folder
 icon.
icon. - To view associated documents, click the document
 icon. The circle
  icon means there are no documents associated with the project.
 - To enter any notes about the project, click the notepad
 icon.
icon. - The Prev. Selection column indicates the projects that were edited before the last save. ND indicates a non-discretionary project.
-
In the table, do any of the following:
Column Description Order Click the up or down arrow to move the project up or down one line at a time. Include Select the check box to force the inclusion of a must-do project that did not make the cut-off. For example, your CEO promised a physician practice that a capital project will occur in the following year. Alternatively, you can remove a check mark to defer any projects from competing for available capital dollars. This action keeps the project on the report, however, these projects will not be competing for the Capital Dollars available. Non-Descr. Select the check box if the project must be completed due to regulatory mandates, prior approval, etc. - After making your changes, click the disk
 icon in the upper right corner of the page.
 - At the Save to database completed successfully prompt, click OK.
Creating a capital portfolio scenario
Before determining the final list of projects, the Capital Planning administrator can work with a "what if" version of the project portfolio list by creating a scenario. This allows the administrator to perform all the same actions as described in Selecting projects for approval, but they can also edit the project requested amounts to see how changes might affect the budgeted projects portfolio.
NOTE: Any amounts edited in a scenario do not propagate to the original project plan file. If it is determined that the requested amounts for the project need to be adjusted based on a scenario, then the administrator or requestor will need to make the adjustments in the actual plan file. The administrator will then need to return to the Capital Project Scoring and Selection utility to review the project ordering again with the updated request amounts.
To create a capital scenario:
-
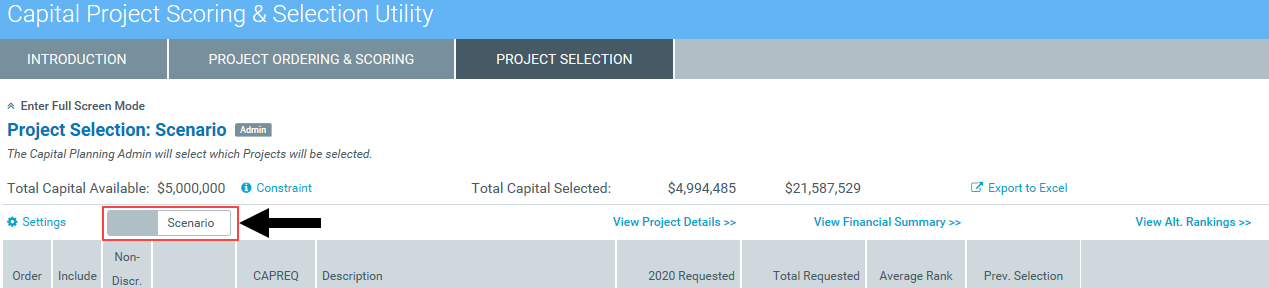
Click the scenario toggle (next to the Settings button) to Scenario.
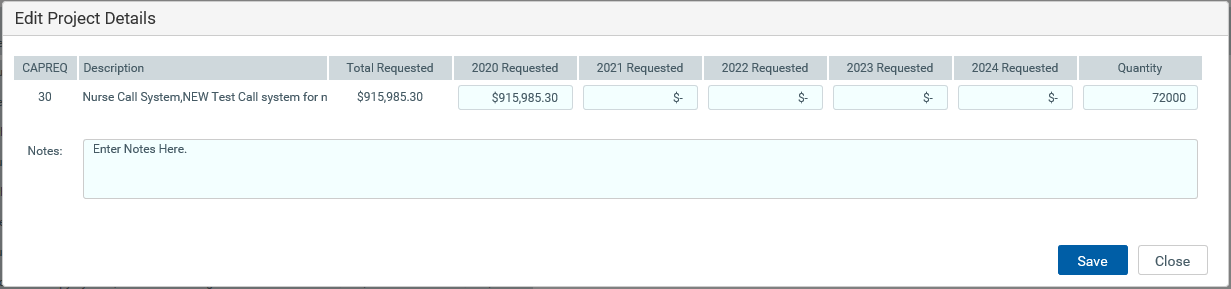
- Next to the project to edit, click the notepad icon.
-
Edit the project requested amounts as needed, and click Save.