Defining credit risk groups
The first time you enter the Profitability Data > Credit Risk page, you will be prompted to set up FICO credit risk groups for the system. Doing so will allow you to define how credit risk will be assigned to different products for organizational profitability, customer account profitability, and RPPS. You can also create two additional custom risk groups.
Setting up your credit risk groups consists of the following steps:
Once setup is complete, the Credit Risk page displays sub-tabs that allow you to manage your risk groups.
Click image to view full size
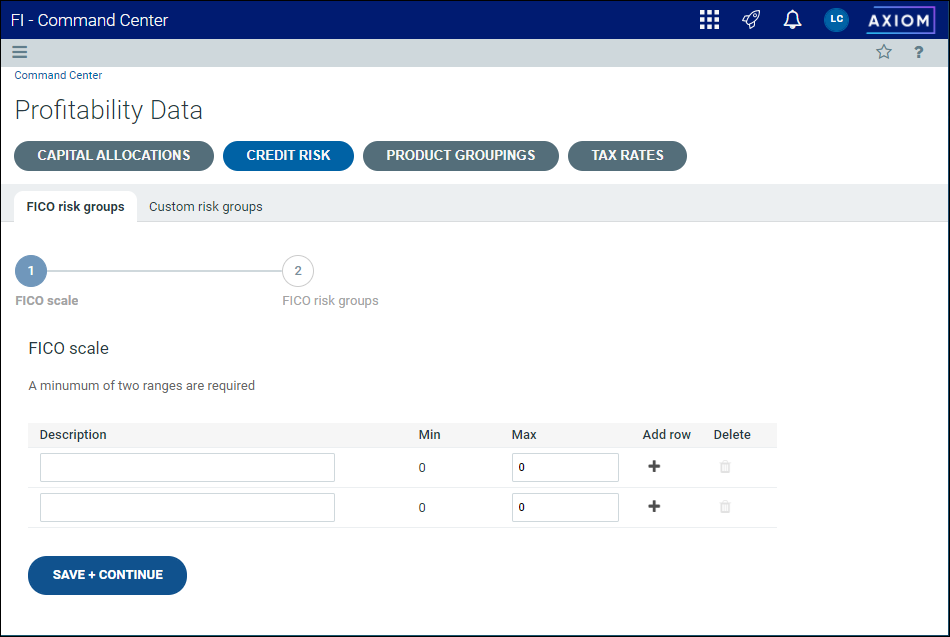
The first step when setting up FICO risk groups is to define the FICO scale.
You must have at least two bands
To define the FICO scale:
- From the Command Center, click Profitability Data.
-
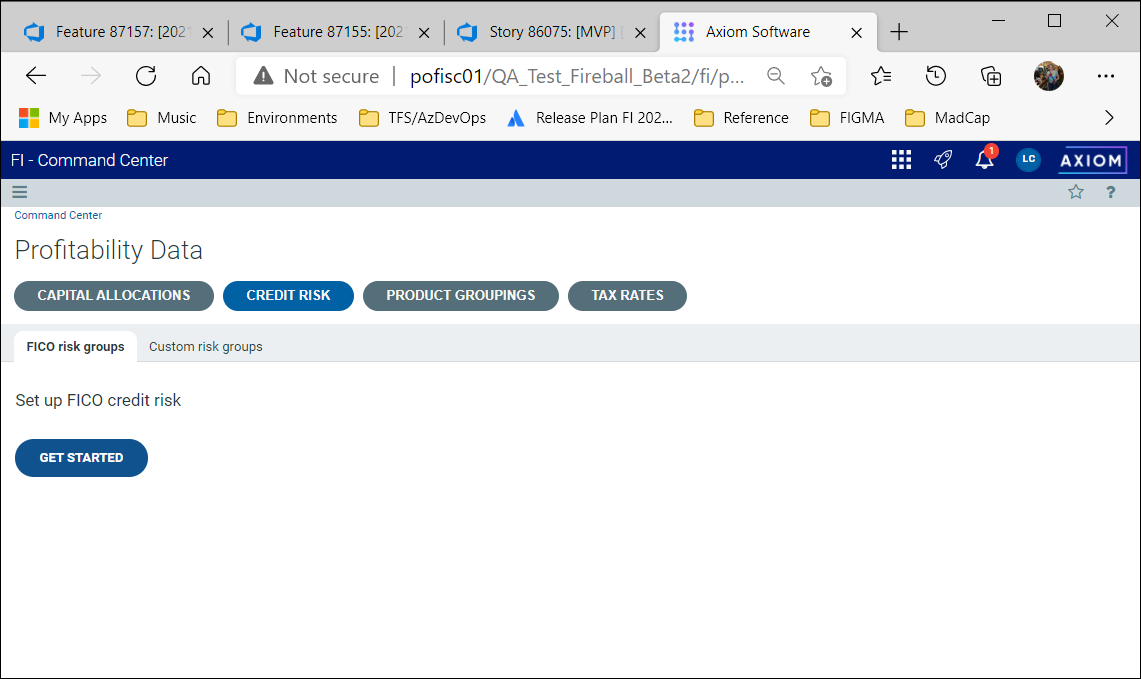
Click Credit Risk, and then click Get Started. The first page of the FICO risk group setup wizard appears.

Click image to view full size
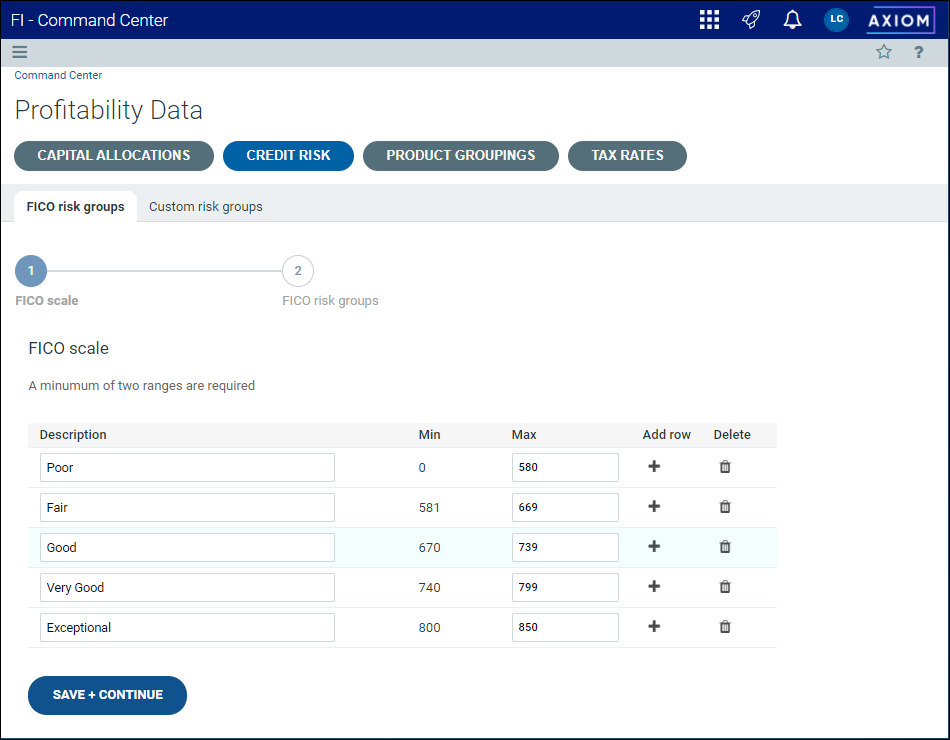
- In the first row of the Description column, type a description for the lowest credit band and enter the top value for the band in the Max column. The Min column in the next row will be updated automatically to reflect the prior column's Max setting.
- Enter a description and Max value for the second band. To add additional rows, click the + icon.
-
Enter a description and maximum value for each additional band.

Click image to view full size
-
When you have populated the necessary bands, click Save + Continue to move to Step 2.
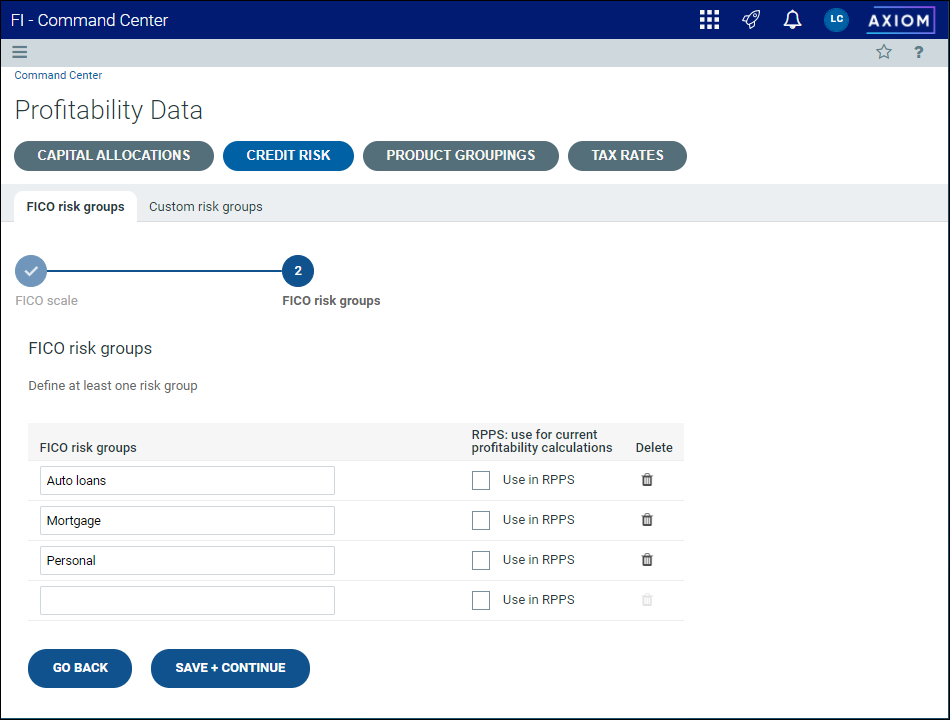
Step 2: Set up FICO risk groups
Next, you will need to define at least one FICO risk group.
To set up a FICO risk group:
-
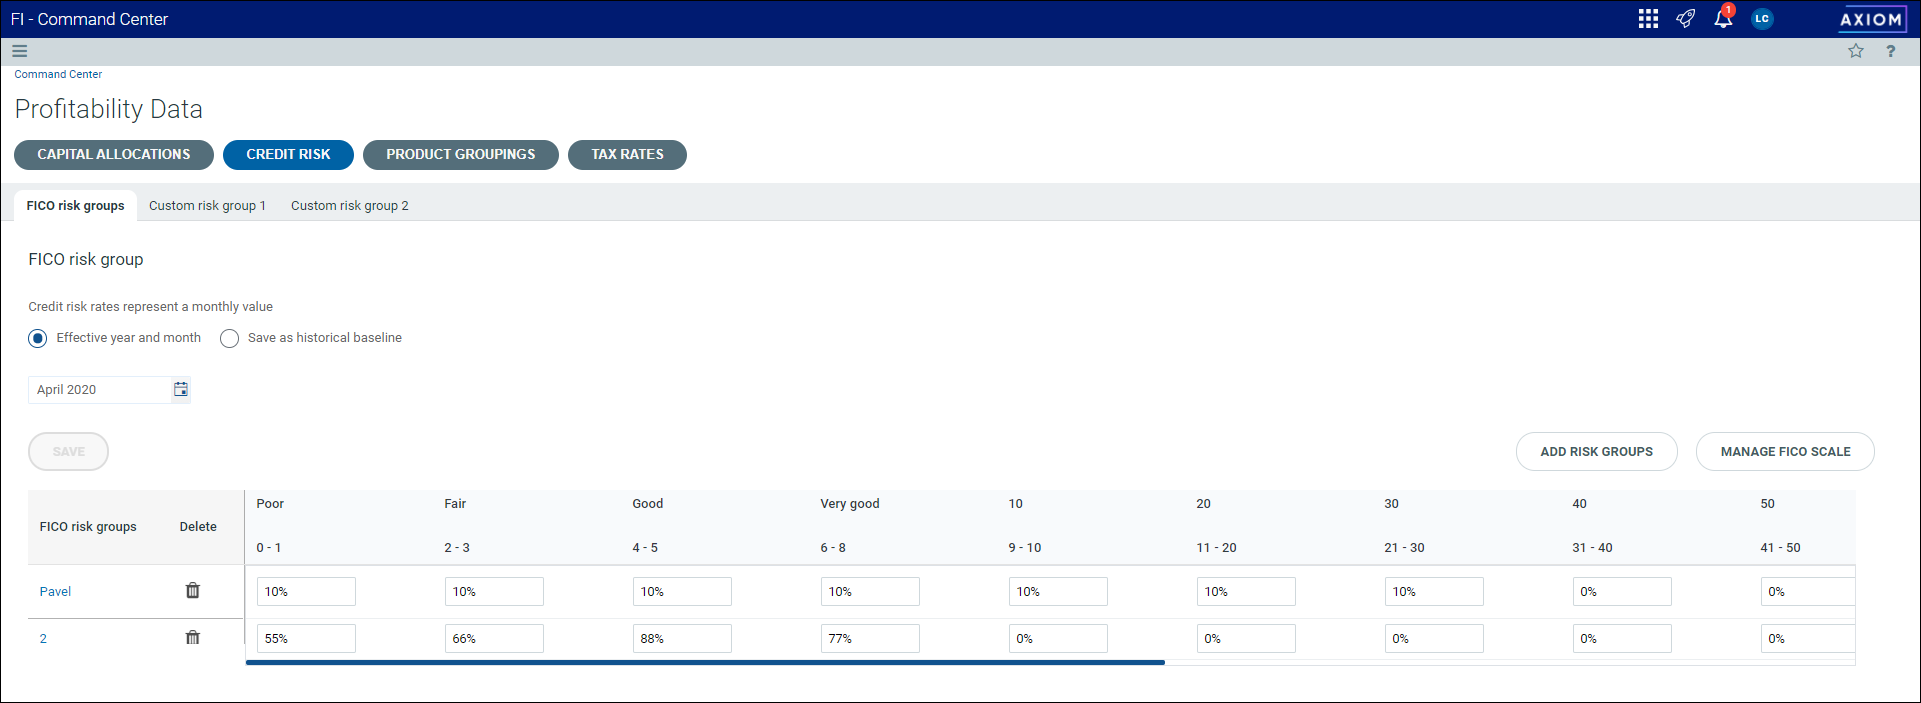
On the FICO risk groups page of the setup wizard, enter the name for the group in the FICO risk groups field.
-
[Optional] Select the RPPS: Use for current profitability calculations check box, if desired.
NOTE: This option allows you to calculate current profitability rather than importing profitability data.
-
Add additional FICO risk groups as needed.

Click image to view full size
NOTE: A new blank row will appear when you enter data for an existing row. You cannot delete the final blank row.
- When complete, click Save + Continue.
Before you can continue to set up custom risk groups, you need to establish an historical baseline for your group.
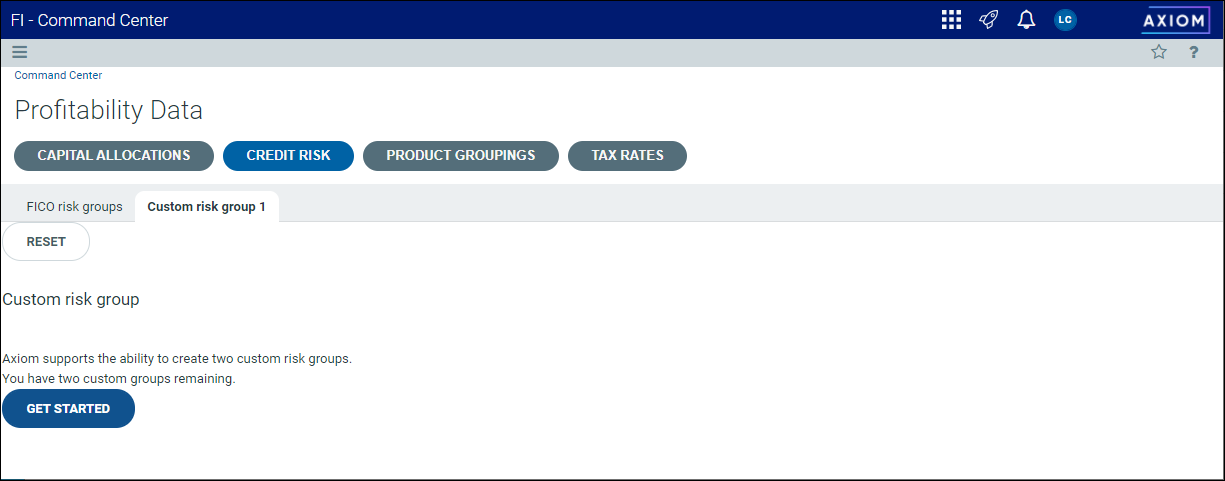
Axiom Financial Institutions Suite allows you to create two custom risk groups for calculating profitability.
NOTE: The steps and screen shots below are specific to setting up custom risk group 1; however, the steps for custom risk group 2 are identical.
Step 1: Define custom risk scale
To create a custom risk scale:
- From the Command Center, click Profitability Data.
-
Click Credit Risk, and then click the Custom risk group 1 sub-tab.
Click image to view full size
-
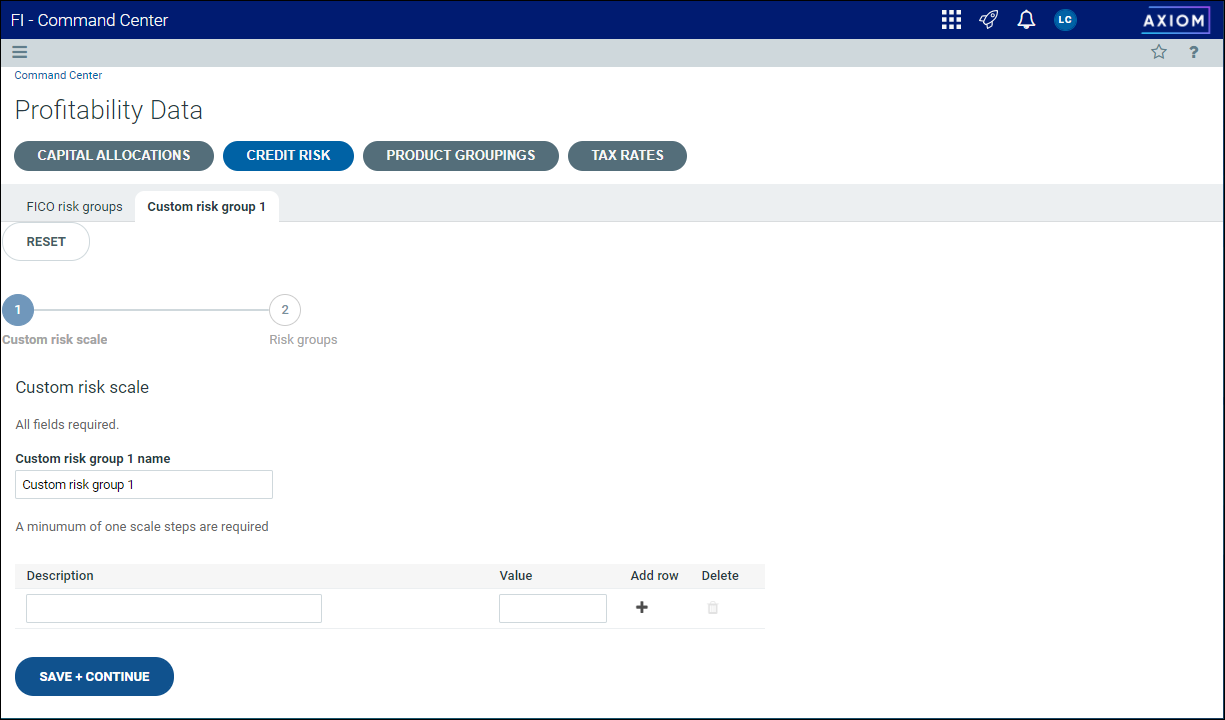
Click Get Started. The first page of the custom risk group setup wizard appears.

Click image to view full size
-
Enter a name in the Custom risk group 1 name field. This name must be unique.
- Enter a description for the risk scale in the Description field.
- Enter a corresponding value in the Value column.
- Click the + icon to add a new row.
-
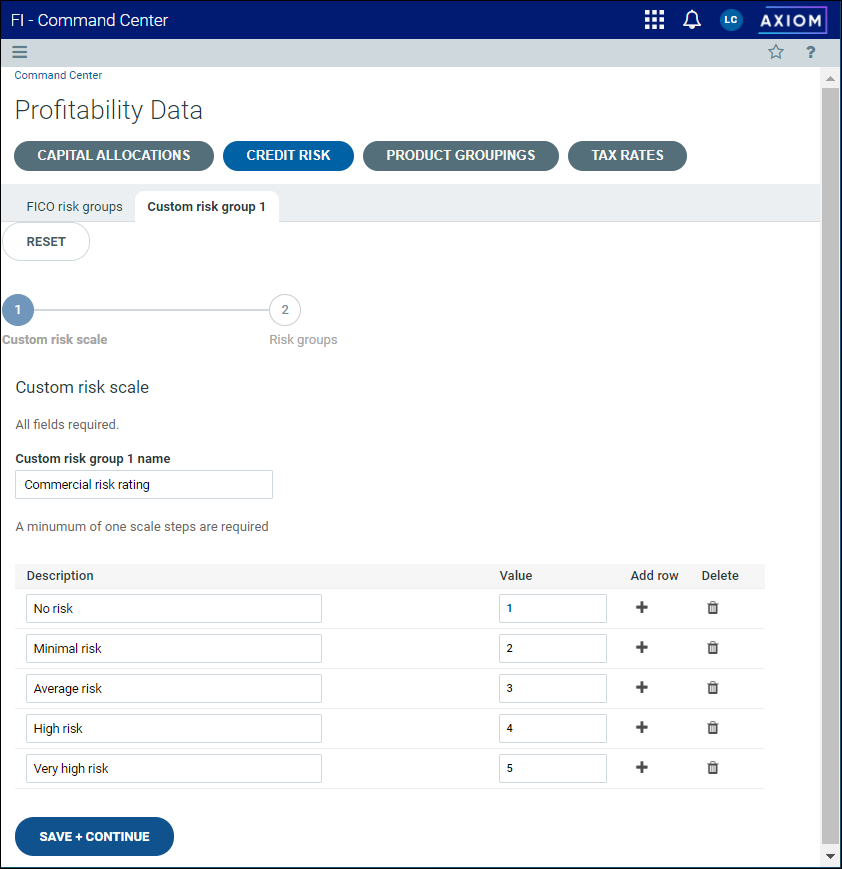
Enter a description and value for each row.

Click image to view full size
-
Click Save + Continue when complete.
NOTE: The name you entered will be displayed on the sub-tab.
-
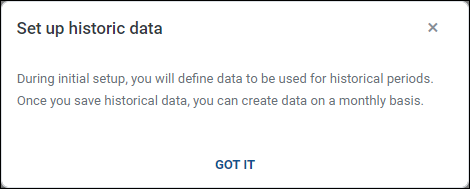
Click Got It in the Set up historical data dialog to establish an historical baseline for the group.
Step 2: Create custom risk groups
The next step is to create product groups for the risk scale.
-
On the second page of the setup wizard, enter at least one risk group.

Click image to view full size
-
Select the Use in RPPS check box for each group, if desired.
-
Click Save + Continue.
NOTE: After you set up a custom risk group, another sub-tab will appear allowing you to create a second custom group. The steps are the same as for the first group.
- Click Got It in the Set up historical data dialog to establish an historical baseline for the group.

Establishing an historical baseline
For the FICO group and any custom risk groups you create, you must define the data to be used for historical periods. After you have completed the setup for each group, you will see the following message:
NOTE: The following steps and screen shots reference the FICO risk groups tab, but the process is the same for your custom groups as well.
To establish an historical baseline:
-
Click Got It in the Set up historical data dialog. The FICO risk groups tab will be displayed.

Click image to view full size
-
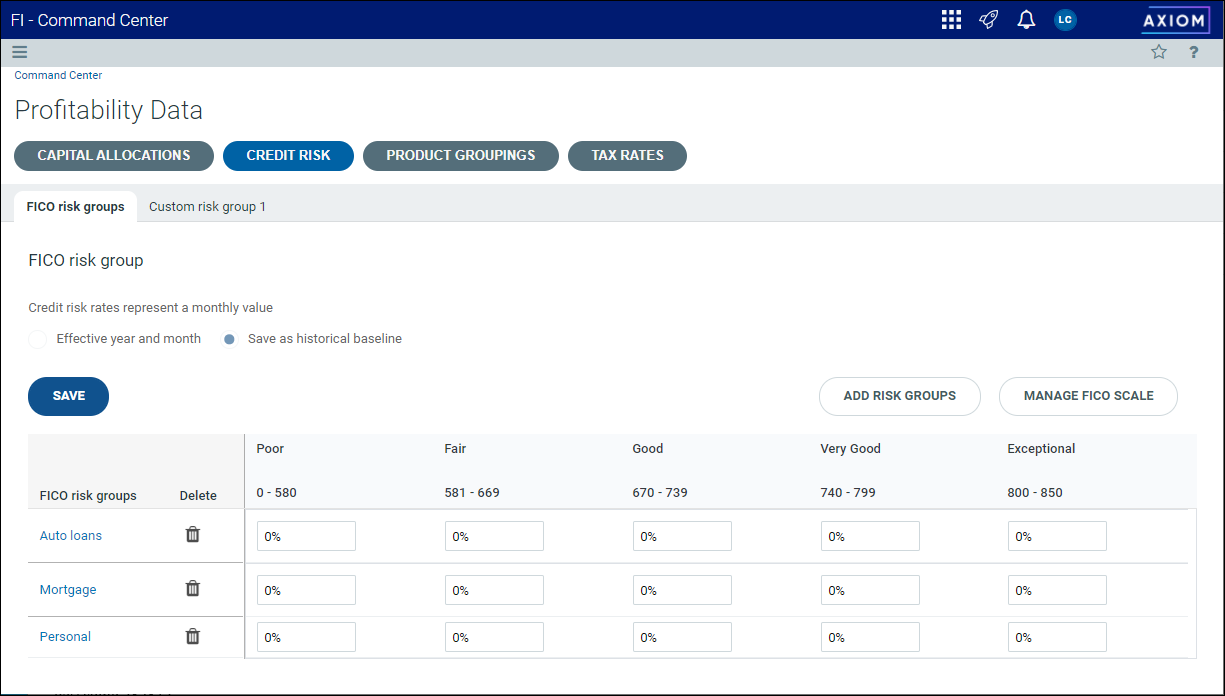
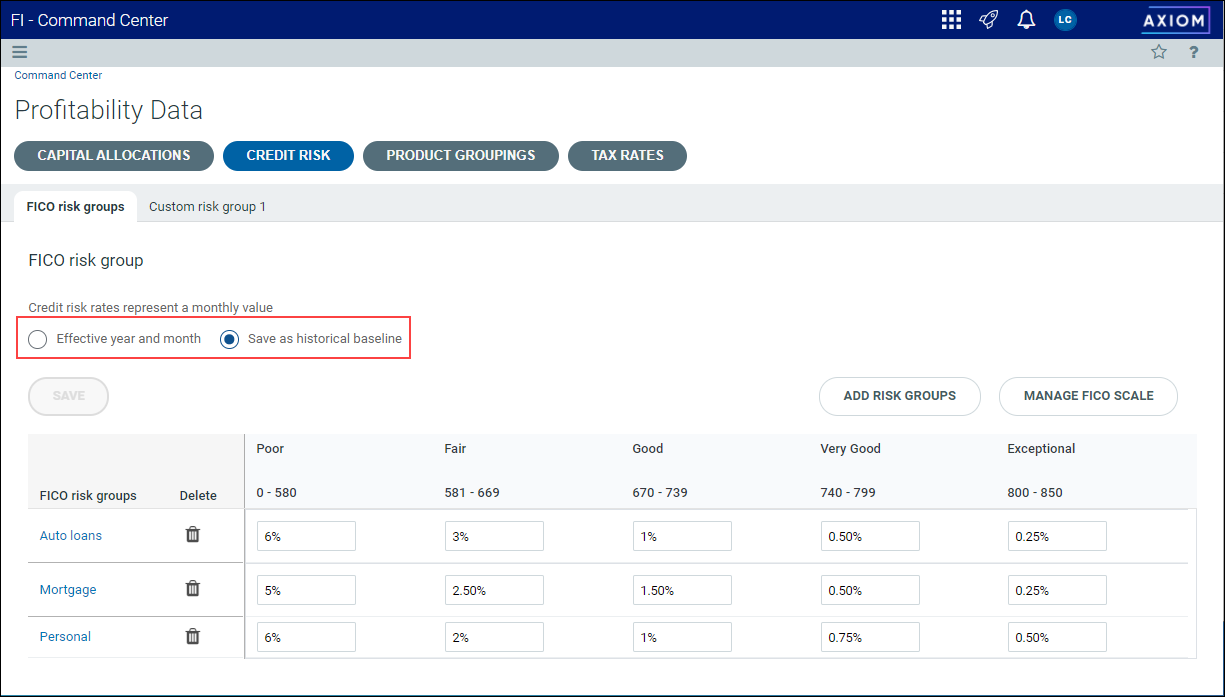
In the FICO risk groups tab, enter values for each product.

Click image to view full size
NOTE: These percentages represent the credit risk for all instruments grouped by product group and risk rating, and are a monthly value. The credit risk is calculated as an expense amount for each instrument and are expressed as a percentage of the average balance.
-
Click Save. The data you entered is saved as the historical baseline. Moving forward, you can now save new data as the effective year and month or as historical data.