Working with fixed assets
The Fixed Assets tab of the budget plan file allows you to request new fixed assets that are not associated with a project, and to fund large projects and their associated fixed assets and expenses.
From this tab you can:
To access the Fixed Assets tab :
-
From the FI Home page, click Financial Planning.

Click to enlarge image
-
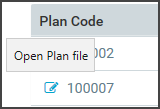
On the Financial Planning home page, click the notepad icon in the Plan Code column for the department.

Click to enlarge image
-
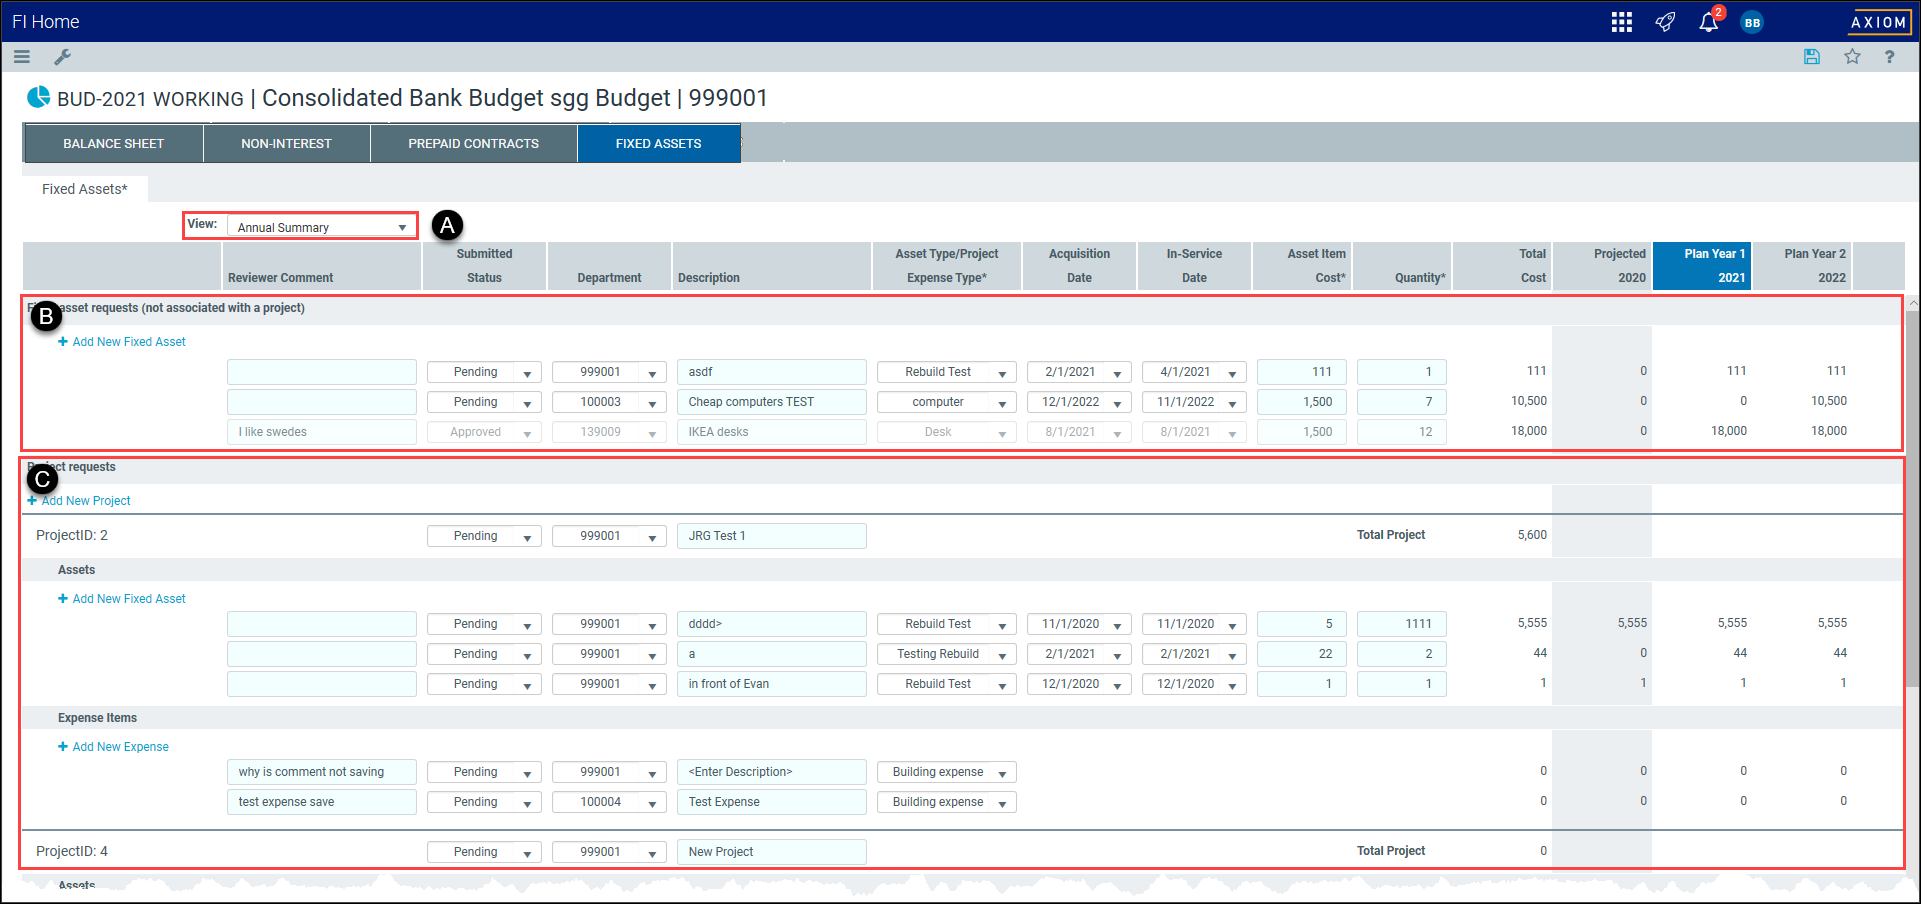
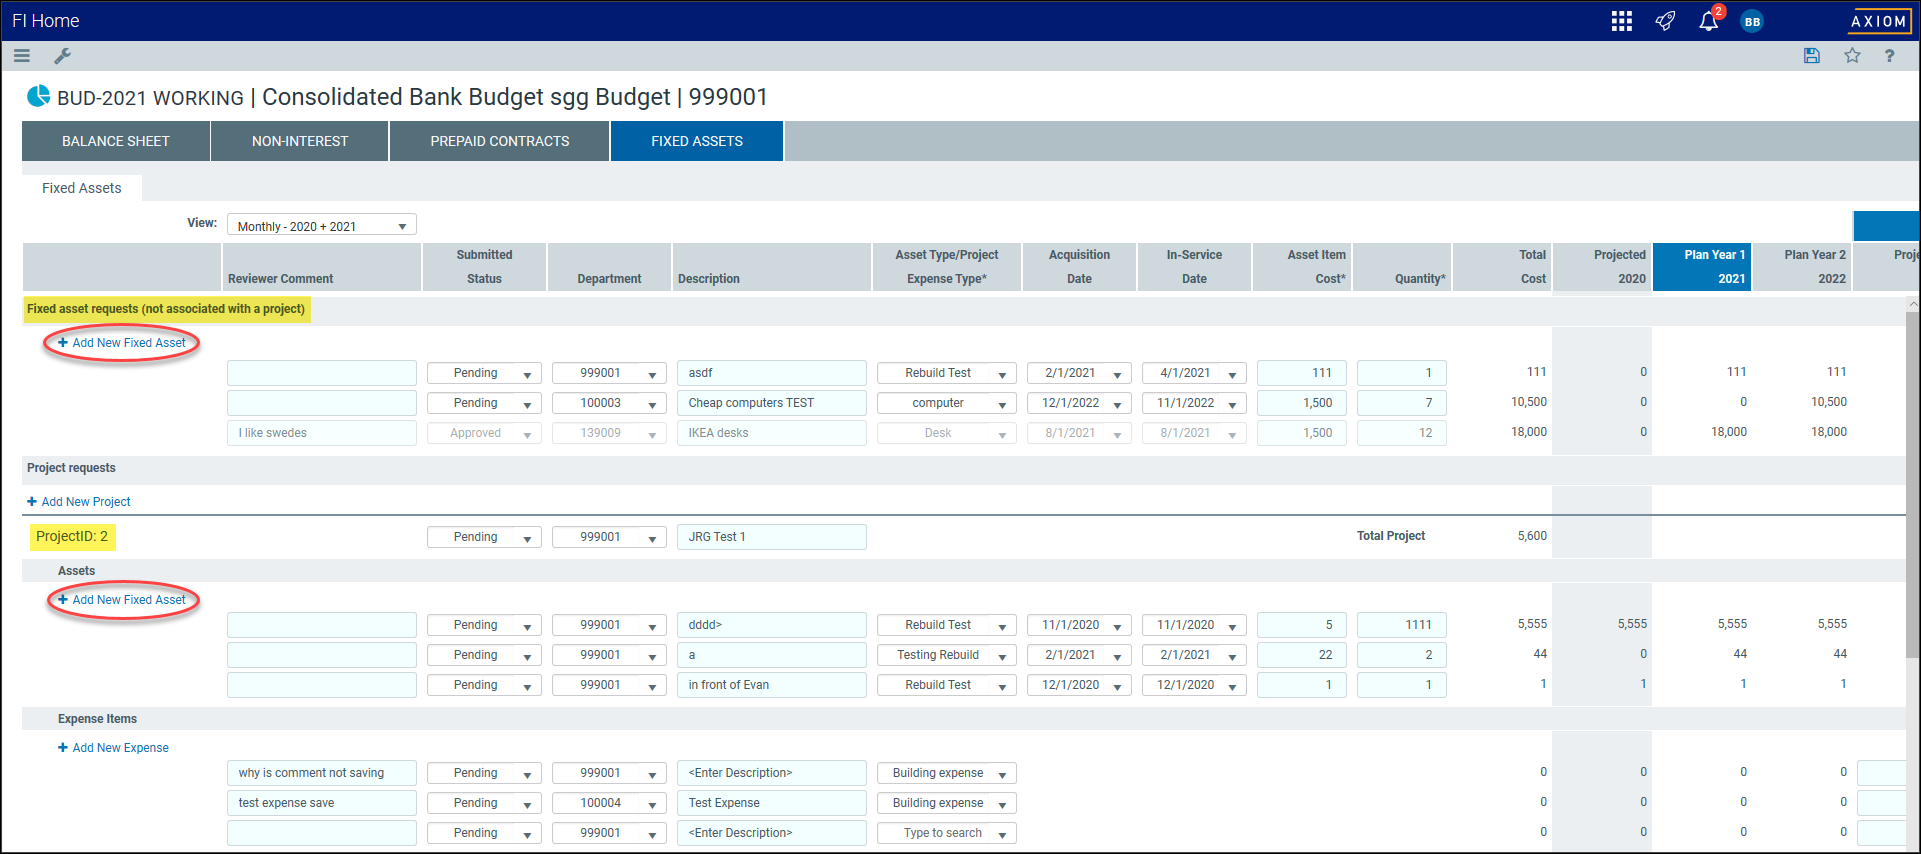
On the plan file page, click the Fixed Assets tab. The Fixed Assets sub-tab and related fixed asset request details appear below.

Click image to view full size


This tab contains the following elements:

|
You can modify the way that fixed asset request information are displayed using the View list. For details, see Controls available for displaying fixed assets. |

|
This section allows you to view and manage fixed asset requests that are not associated with a project. |

|
This section displays project-related requests, organized by project ID and grouped by assets or expense item requests. |
Fixed asset requests may or may not be associated with a specific project. The process for revising or deleting a fixed asset request is the same for both.
-
Existing fixed asset requests that have a submitted status of pending can be deleted or revised to reflect changes in the asset information.
-
Once the project is approved or rejected, all fields are write-protected.
To update an existing fixed asset request:
-
Select the field that you want to revise. Fields that contain a blue background are text fields, while fields that contain a white background contain lists from which you can choose.
TIP: See Fixed Assets data fields to determine the field entry requirements.
- Optionally, add a fixed asset request, add a fixed asset project, or add a project expense to the Fixed Assets page.
- When you are done revising the pending fixed asset request, click the Save icon
 to resubmit your fixed asset request for review.
To delete a pending fixed asset request:
- Click the arrow
 in the Submitted Status field associated with the fixed asset request of interest to display a status list.
 - Select Delete from the list.
- When you are done deleting pending fixed asset requests, click the Save icon .
Fixed asset requests may or may not be associated with a specific project. The process for adding a new fixed asset request is the same for both. However, fixed asset requests associated with a project are grouped for reporting and tracking.
To add a new fixed asset:
- Open the budget plan file.
-
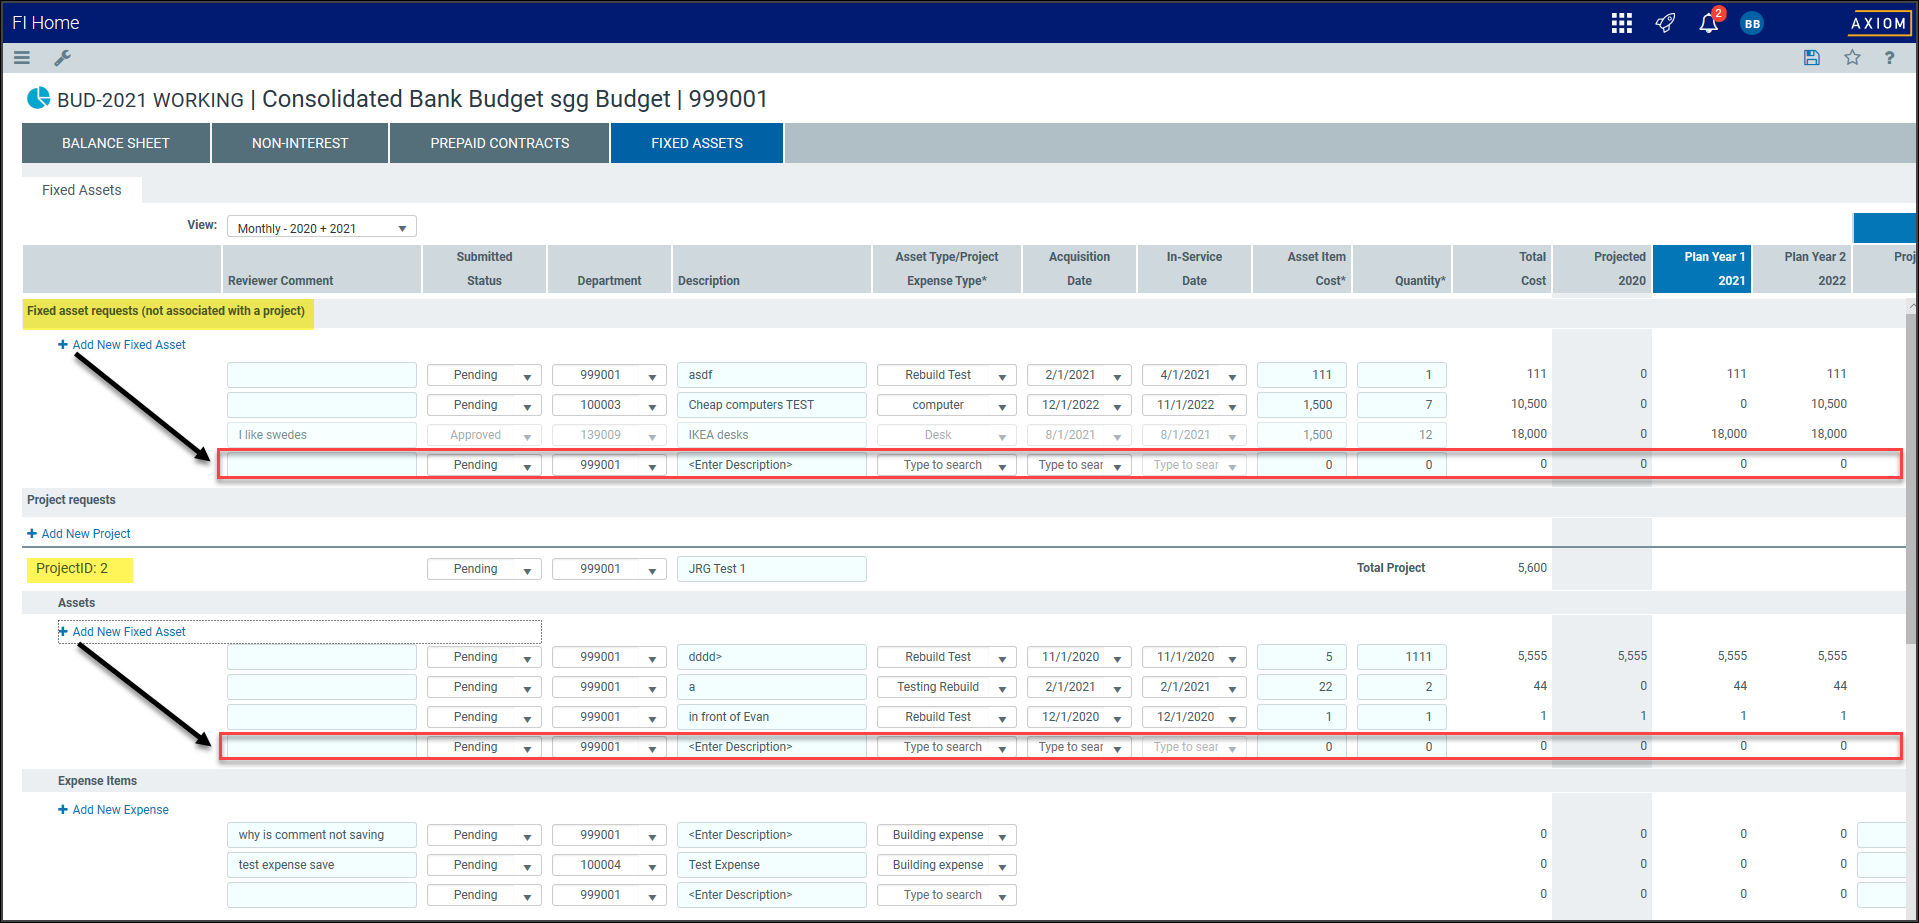
Click Add New Fixed Asset.

Click image to view full size
A new fixed asset row is added to the bottom of the Assets table.
Click image to view full size
-
Click the arrow icon
in the Department field to display a list of departments that you can assign to the fixed asset.NOTE: The list of departments is limited to the budget departments that roll up into the selected plan file.

Click image to view full size
-
Type a description of the new fixed asset in the Description field.

Click image to view full size
-
Type the first few letters of the asset type in the Asset Type field and then select from the list.
NOTE: The list of asset types are limited to a list that is defined by the administrator. You cannot add new asset types.

Click image to view full size
-
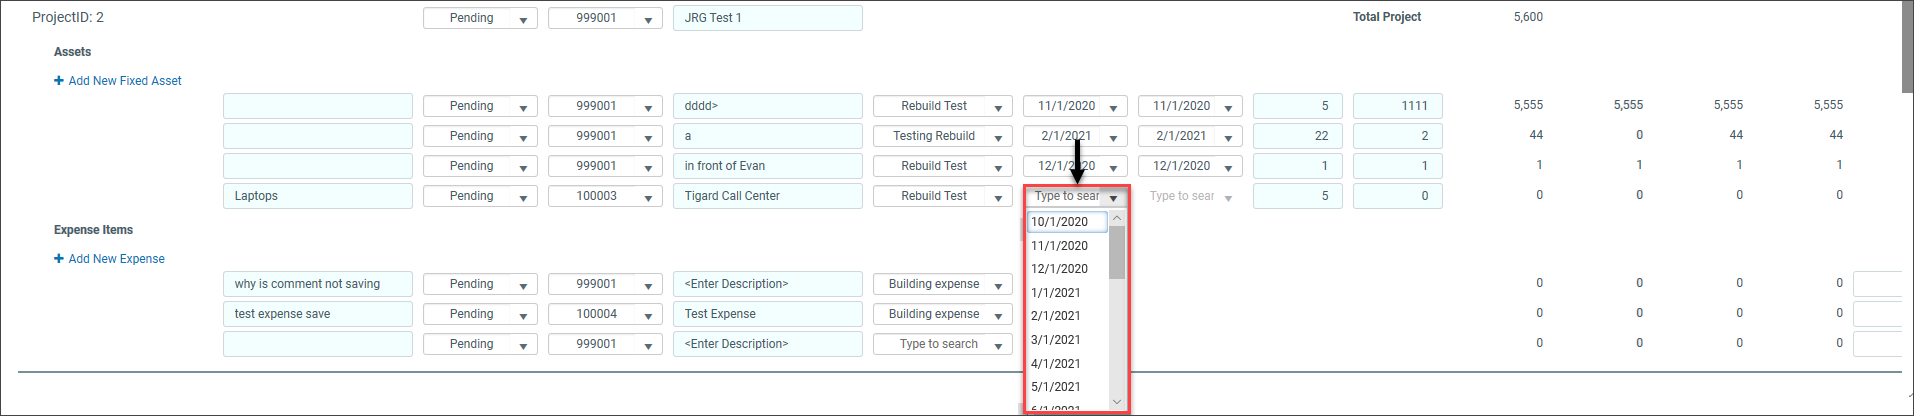
Click the arrow icon
in the Acquisition Date field to display a list of requested acquisition dates from which you can choose.
Click image to view full size
-
Click the arrow icon
in the In-Service Date field to display a list of requested in-service dates from which you can choose.
Click image to view full size
-
Type the asset cost in the Asset Item Cost field.

Click image to view full size
-
Type the number of requested assets in the Quantity field.

Click image to view full size
- Optionally, maintain a fixed asset request, add an expense, or add a fixed asset project to the Fixed Assets page.
- Click the Save icon to save your changes and submit your fixed asset request for review.


NOTE: When your plan file is reviewed, the status will change to either Approved or Denied and reviewer comments will optionally display. The plan file will update the next time it is opened.
Fixed asset requests that are associated with a project are created within the related project. If the project does not exist, you can add one.
To add a fixed asset project:
- Open the budget plan file.
-
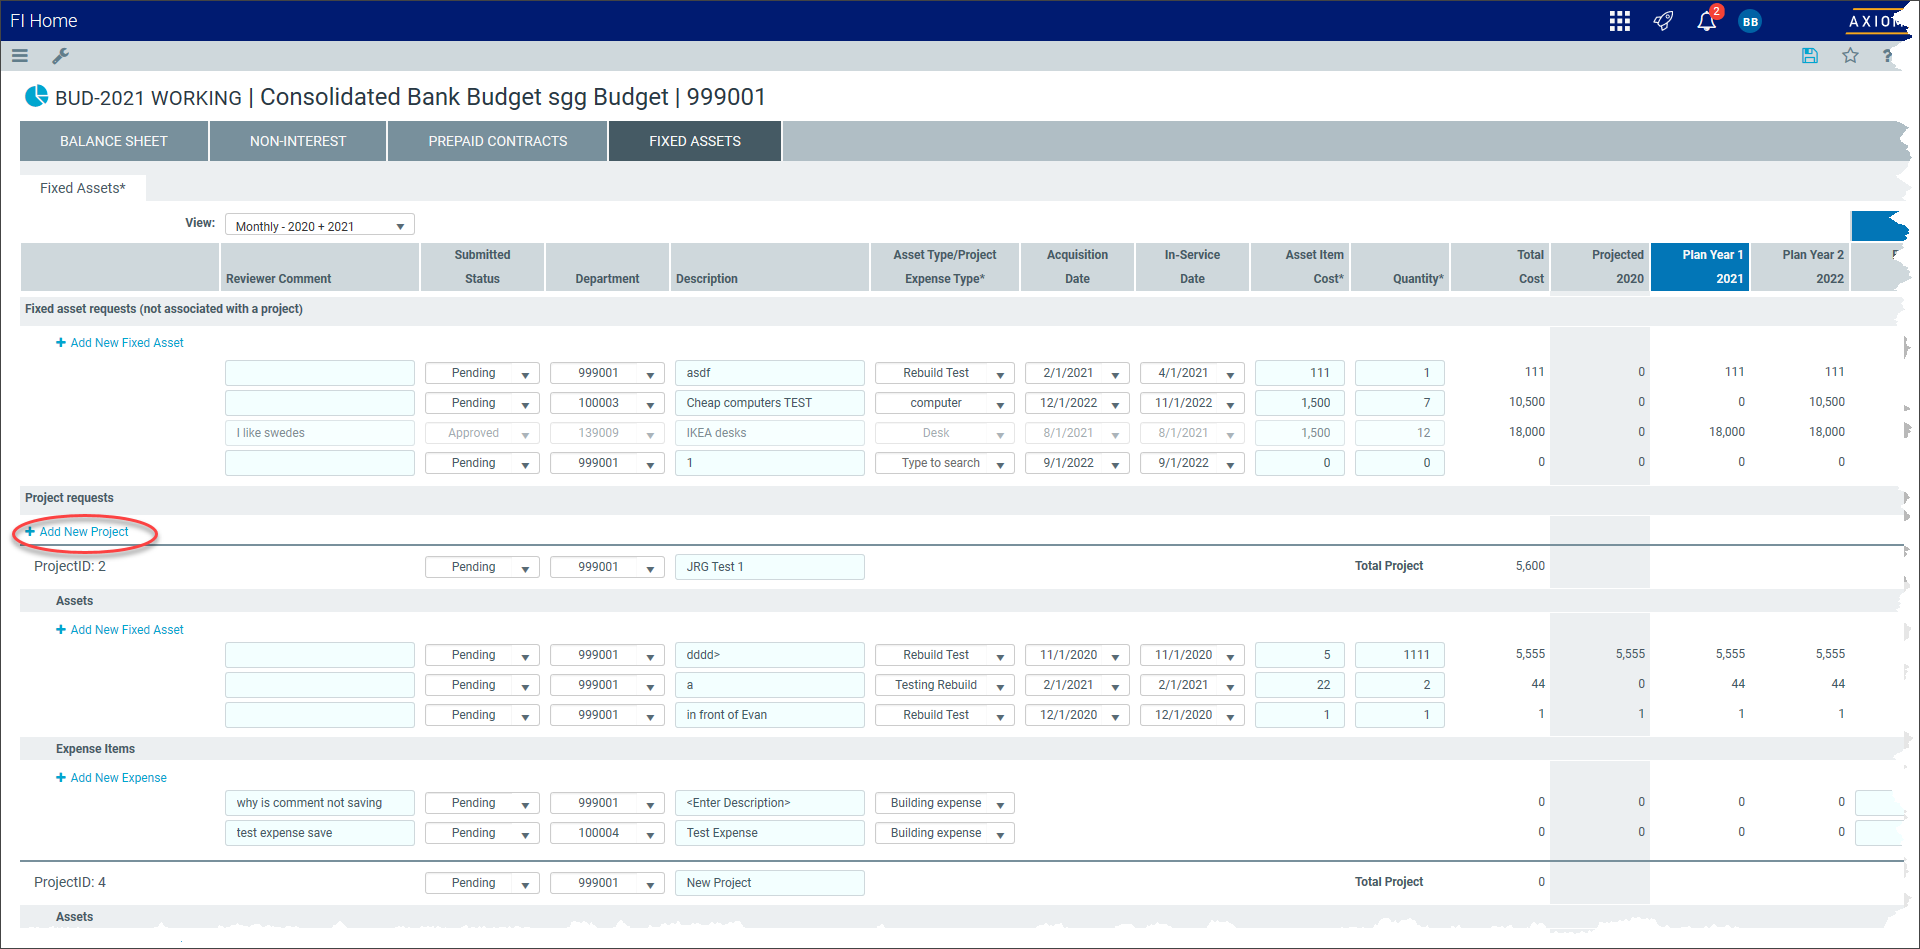
In the Fixed Assets tab, click Add a New Project.

Click image to view full size
-
In the dialog box, type a project description and click Apply.
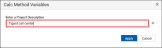
Click image to view full size
-
The system generates a new sequential ProjectID and populates the project Description field with the description that you entered.

Click image to view full size
-
Complete the fields in the following table:
Column Description Submitted Status This is the status of the fixed asset request. By default, the status is set to Pending. You can select Delete to delete the fixed asset request. When the request has been reviewed, it is set to either Approved or Denied and is no longer editable.
Department This is the budget plan department for which the fixed asset is intended.
- Optionally maintain a fixed asset request, add a fixed asset request, or add a fixed asset project to the Fixed Assets page.
- Click the Save icon to save your changes and submit your project request for review.


You can add project-related expenses that are not capitalized to your department budget. This allows you to enter current-year expenses for the project that are saved as expenses for the budget.
To add an expense to a project:
- Open the budget plan file.
- Click the Fixed Assets tab.
-
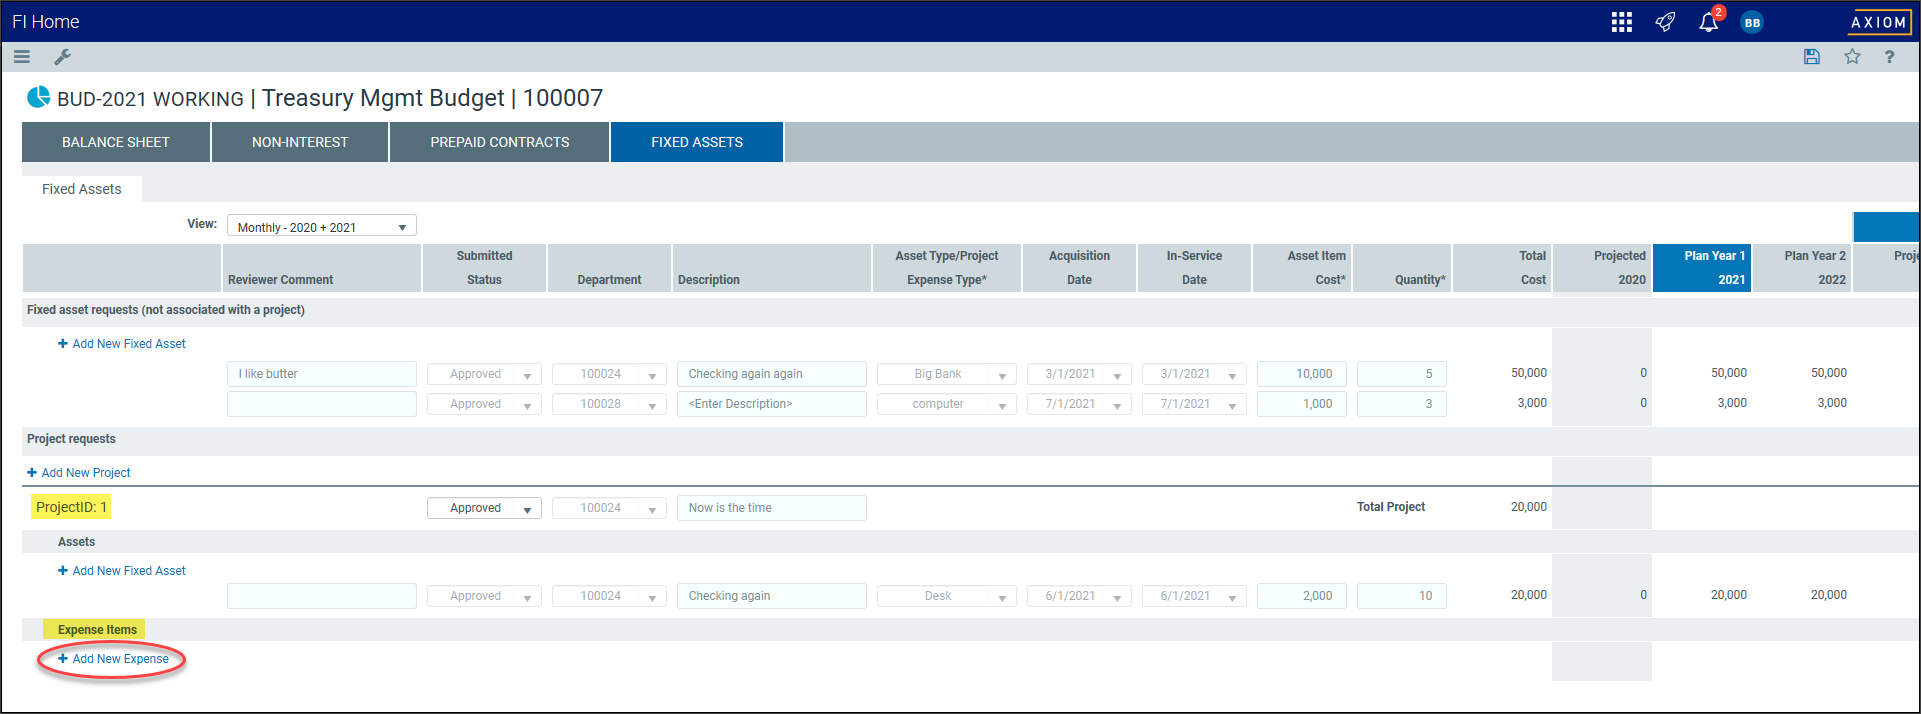
Click Add a New Expense, located in the Expense Items area of the desired project on the Fixed Assets page.

Click image to view full size
-
Click the arrow icon
in the Department field to display a list of departments that you can assign to the expense.
Click image to view full size
-
Type a description of the new expense in the Description field.

Click image to view full size
-
Type the first few letters of the expense type in the Expense Type field and then select from the list.

Click image to view full size
-
Enter the expense amount in the respective Actual, Projected, and Planned mo fields.

Click image to view full size
- Optionally maintain a fixed asset request, add a fixed asset request, or add a fixed asset project to the Fixed Assets page.
- Click the Save icon to save your changes and submit your project expense request for review.


Controls available for displaying fixed assets
From the View drop-down, select the time period for which to display fixed asset budget information.
| Option | Description |
|---|---|
| Projected Months - 20XX-20XX | Displays the last actual month plus projected months for the base year and plan year 1. |
| All Projected Months | Displays the projected months for the base year, plan year 1, and plan year 2. |
| All Actual and Projected Months | Displays the actual and projected months for the base year and projected months for plan year 1 and plan year 2. |
| Monthly - 20XX | Displays the annual budgets and monthly budgets for the base year. |
| Monthly - 20XX | Displays the annual budgets and monthly budgets for plan year 1. |
| Monthly - 20XX | Displays the annual budgets and monthly budgets for plan years 2 through 5. |
| Annual Summary | Displays the (previous year end, base, and projected) annual budgets. |
Enter or select the applicable information for non-interest income or expense, using the text entry fields and drop-down lists in the following table.
| Column | Description |
|---|---|
| Reviewer Comment | Displays optional reviewer comments associated with the reviewer's project, asset, or expense approval. |
| Submitted Status | Pending status displays by default when adding a new project, asset, or expense request. The status changes to Approved or Denied when your organization reviews the request after it has been submitted for review. Select Delete to delete your pending request. |
| Department | Department number of the active department displays by default. Optionally select another department from the list. |
| Description | Optional. This is a detailed, user-defined description of the asset type. The default character limit is 50 characters. |
| Asset Type/Project Expense Type | This is the asset type defined in the Fixed Assets driver. Asset types are selected by double-clicking the ellipses to the left of the Asset Type column. |
| Acquisition Date | This is the acquisition date of the asset. Acquisition dates are selected from the list of dates by double-clicking the ellipses to the left of the Acquisition Date column. |
| In-Service Date | By default, the in-service date is equal to the acquisition date. Users can select an in-service date by double-clicking the ellipses to the left of the In service date column. |
| Asset Item Cost | This is the cost per unit of the requested asset item. The asset item cost may be pre-populated with a standard cost defined in the Fixed Asset driver document, which can be overwritten by the user. |
| Quantity | This is the quantity of asset items requested. |
| Total Cost | Calculated as the Asset item cost ´ Quantity. |
| Projected (year) | Read-only, system-calculated. |
| Plan Year 1 (year) | Read-only, system-calculated. |
| Plan Year 2 (year) | Read-only, system-calculated. |
| Actual (mo) | Read-only, system-calculated. |
| Projected (mo) | Read-only, system-calculated. |
| Plan (mo) | Read-only, system-calculated. |
