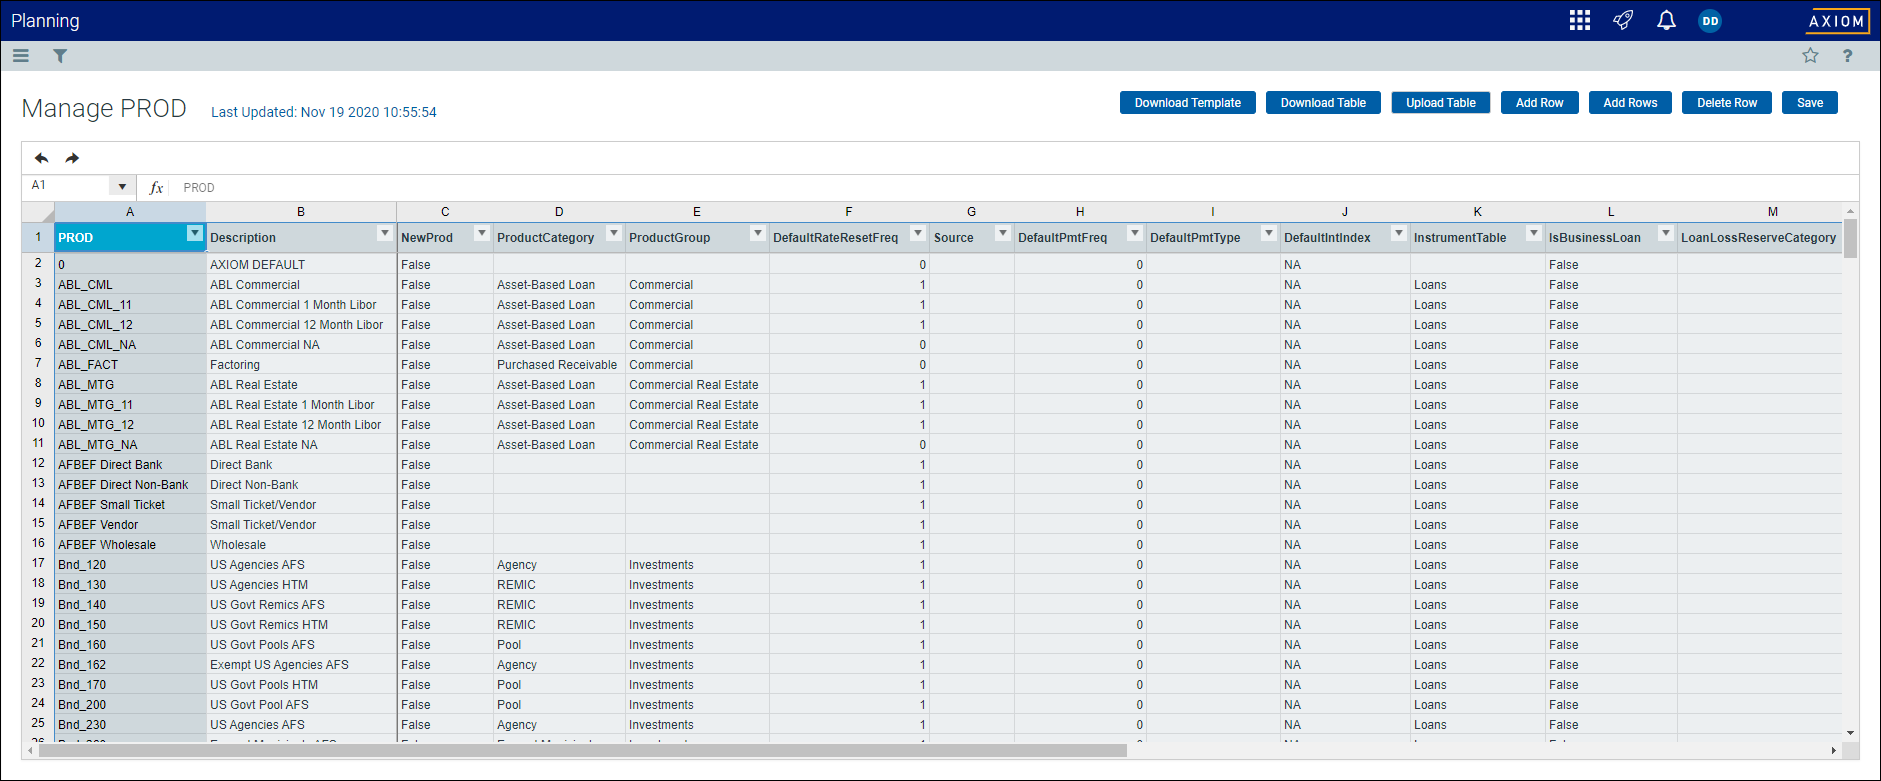
Product dimension
From the Manage PROD page, you can manage the Products dimension table, which contains records for each product within an organization.
TIP: You can manage your dimension tables by downloading them in spreadsheet form so that you can make larger changes more easily. You can then upload the spreadsheet with the changes back into the system database. For more information, see Editing a dimension using a spreadsheet.
To access the PROD dimension:
-
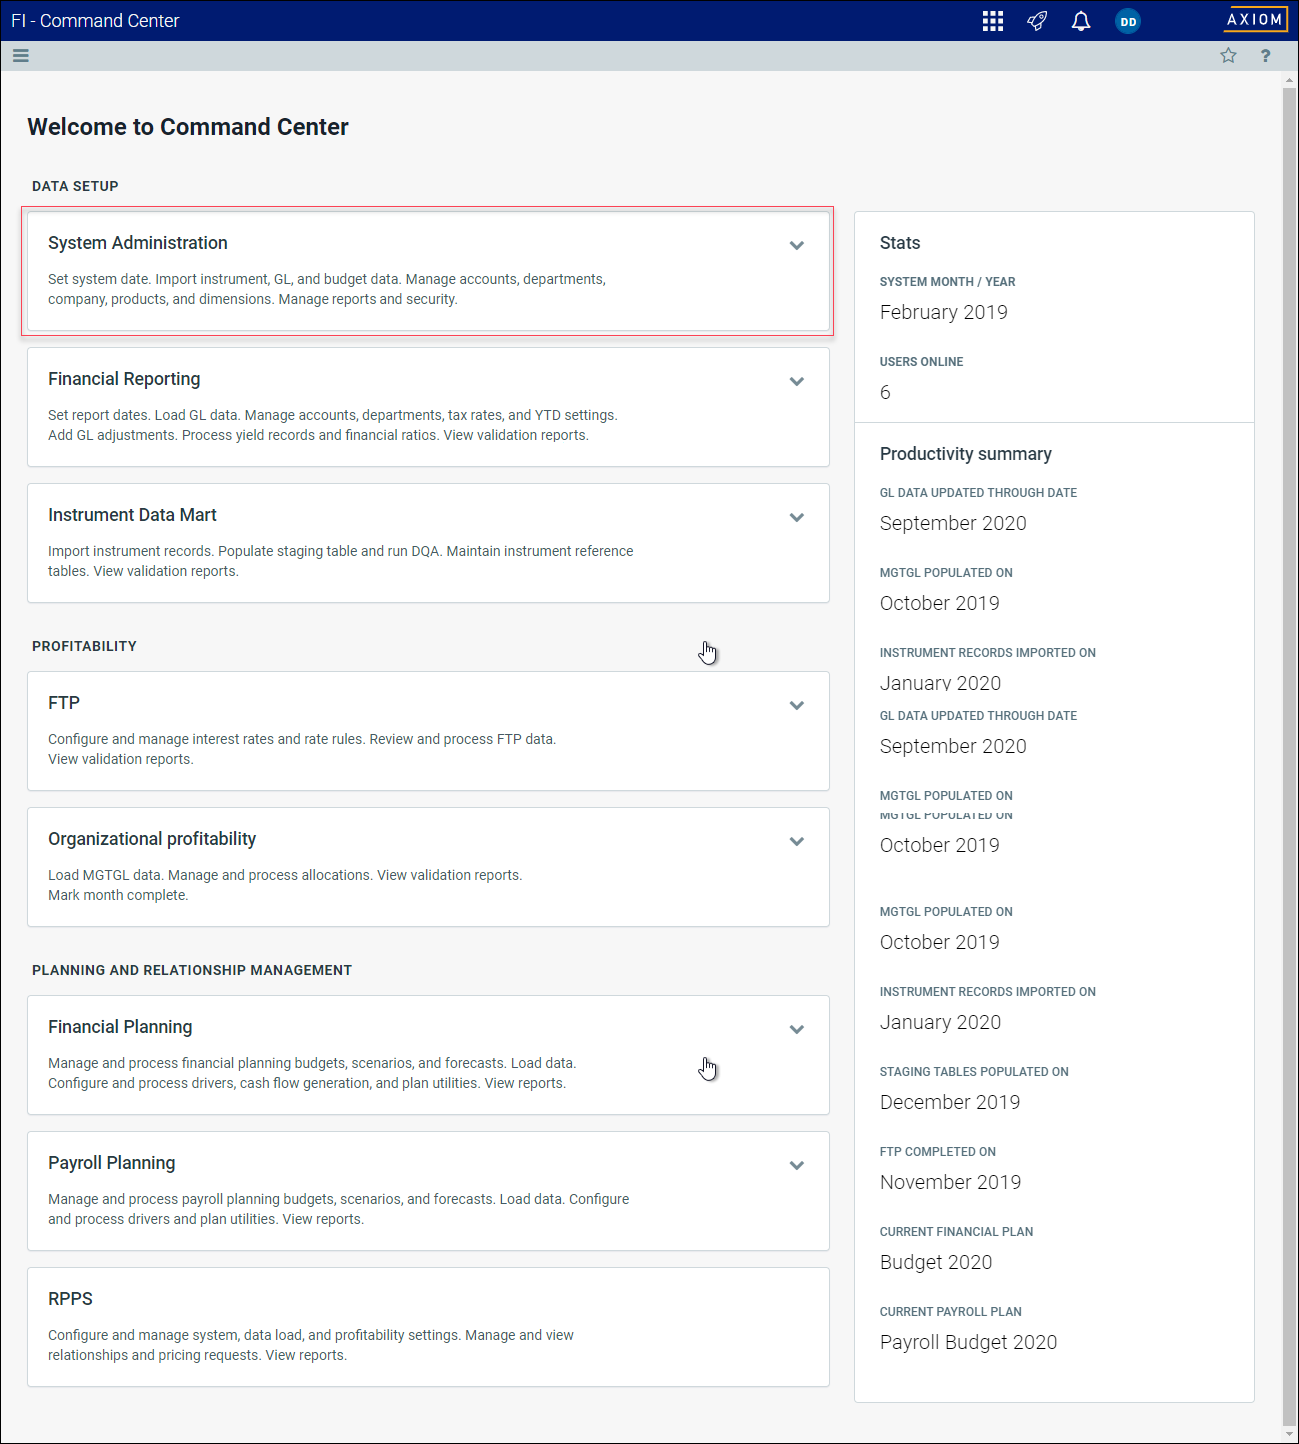
From the Command Center home page, select System Administration.

Click image to view full size
-
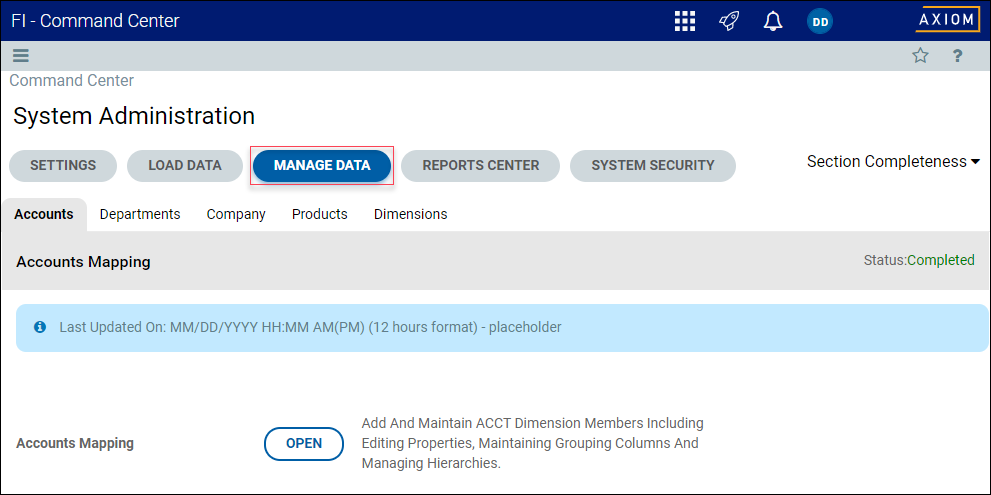
On the System Administration page, click Manage Data.

Click image to view full size
-
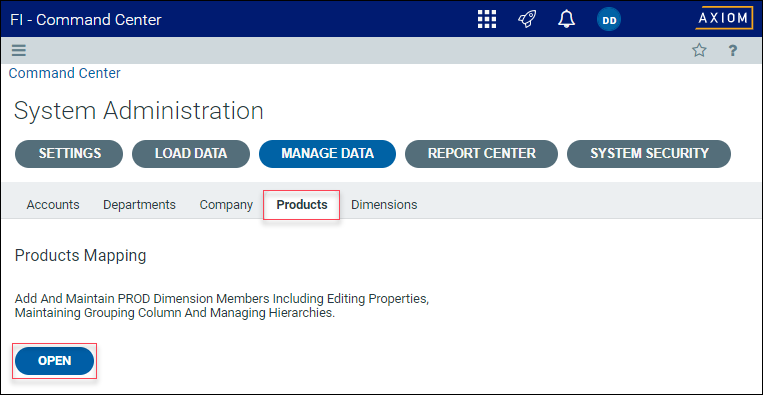
On the Products sub-tab, click Open.

Click image to view full size
NOTE: The page can only display up to a maximum of 10,000 records.
Filtering records
To filter records:
-
Click the funnel
 icon in the upper left corner of the page.
- In the Filter box, you can narrow down the records to display by selecting or creating a filter using the Filter Wizard. To access the Filter Wizard, click
 Edit. If you are familiar with writing filter statements, you can type the statement syntax directly in the Filter box.
 - Click Apply.
Adding or editing a product
Due to the large number of records that this table may contain, you need to use the Filter panel to identify the records to display.
To add or edit a product:
- In the table, do any of the following:
To add a product, click Add Row. The new row displays at the bottom of the table. Enter information in each column. After you save, the table will display the new row in order by the ACCT column.
NOTE: You can optionally add multiple rows to an account by clicking Add Rows. This displays the Add Rows dialog box, where you enter the number of rows that you want to add.
IMPORTANT: If you add a new record that already exists in the table, the system will overwrite the original column values with your new entries when you save your changes. We recommend that you review your entries before saving any changes.
To edit a product, click in the cell(s) to make your changes.
NOTE: Columns that are grayed out cannot be edited.
- To undo your changes, click the left arrow icon
 .
. - To redo your changes, click the right arrow icon
 .
.
- When you finish making changes, click Save.
Deleting a product
Due to the large number of records that this table may contain, you need to use the Filter panel to identify the records to display.
To delete a product:
-
In the table, select the row to highlight it, and then click Delete Row.
- At the Continue? prompt, click OK.
- When you finish making changes, click Save.
This section provides descriptions for each column in the Products dimension table:
| Column Name | Description |
|---|---|
| PROD | The code for the product. |
| Description | A description for the product. |
| NewProd |
Do the following:
|
| ProductCategory | A grouping column to group product codes into product categories. |
| ProductGroup | A grouping column to group product categories into product groups. |
| Source | Defines the source system from which the product code originates. |
NOTE: The table may display some columns that are related to other Kaufman Hall products or have been created specifically for your organization. Contact your Kaufman Hall Implementation Consultant or Kaufman Hall Support if you need help with these columns.
