Entering financial inputs for Threshold (Pro Forma) projects using Excel
Instead of using the Threshold (Pro Forma) project web form, you can enter financial input and balance sheet values using the Excel Pro Forma utility. This gives you all the functionality of Excel for greater control when auditing and viewing the formulas used to calculate project budget values.
NOTE: This feature will not display if a user is assigned a role profile that has read-only permission to plan files or if someone else has the plan file open and has Save Lock enabled.
TIP: The Excel Pro Forma Utility launches to display the sheet you were on. However, if the plan file has more than one sheet, you can open other sheets by refreshing the Excel utility (F9), and selecting another sheet from the Refresh Variables dialog.
To enter financial inputs for Threshold (Pro Forma) projects using Excel:
-
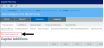
In the Financial Inputs tab (or a copy of the Financial Inputs tab), click Enter inputs using Excel.
Click image to view full size
-
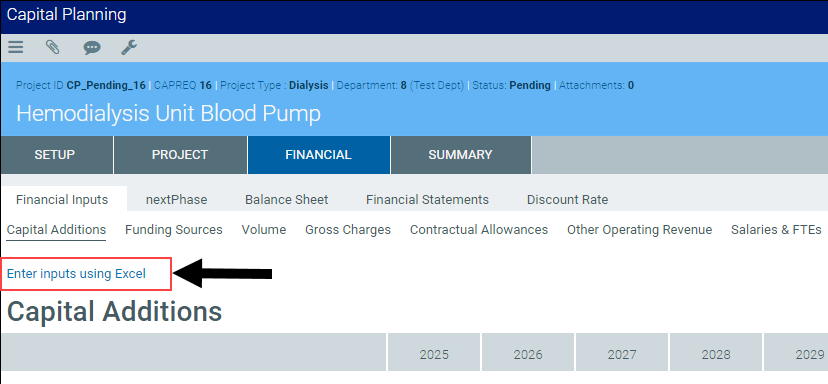
At the Click OK to save and continue to Excel Pro Forma Input prompt, click OK.
-
The content in the Financial Inputs tab is replaced with a description and instructions for the Excel Pro Forma utility and an Open Excel button. Click the button to launch the utility.

Click image to view full size
-
A prompt displays that you have unsaved changes that will be lost if you continue. Disregard this message and continue by clicking Leave this page to open the utility.
NOTE: The utility opens in the Desktop Client version of Axiom Capital Planning.
-
In the Financial tab, complete the following sections in the worksheet, as described in the sections listed in the following table:
TIP: To jump directly to a section in the worksheet, in the Main ribbon tab, click GoTo > Financials, and select the section.
Section Description Capital Additions Enter details regarding the capital spending items for your project Funding Sources Designate and manage the funding sources for the project Volume View and adjust patient volume by payor Enter growth-rate adjustments to inpatient and outpatient revenue at the global level as well as by day, procedure, and/or visit. Contractual Allowances Manage reimbursement adjustments from your default payors to model out your reimbursements from year to year Other Operating Revenue Manage additional operating revenue not related to a patient Salaries & FTEs Manage salary adjustments for variable and fixed FTEs Professional Fees Manage adjustments for variable and fixed professional fees Supplies Manage adjustments for variable and fixed supplies Purchased Services Manage adjustments for variable and fixed purchased services Other Expenses Manage adjustments for other variable and fixed expenses Statement of Revenue and Expense Review patient revenue, deductions from revenue, and operating expenses Capital Summary View a summary of your capital spending (from the Capital Additions section) by category -
In the Balance Sheet tab, enter debt, assets, and expenses related to the project for each upcoming fiscal year. Inputs include the following:
- Long term debt additions
- Current maturities of debt
- Interest expense
- Unrestricted net assets
- Unrestricted and board designated investments
-
After making your changes, in the Main ribbon tab, click Save. The changes are saved back to the Summary tab of the Threshold project web form.
-
At the Save to Database Status prompt, click OK.
-
Close the Desktop Client.
-
In the Threshold project web form, click the Summary tab to view your changes.
Use this section to enter details regarding the capital spending items for your project.
To add or edit capital spending items:
- From the Depreciation Methodology drop-down, select the depreciation type to use for your items: Full Year Depreciation, 1/2 Year Depreciation, or Monthly Input.
-
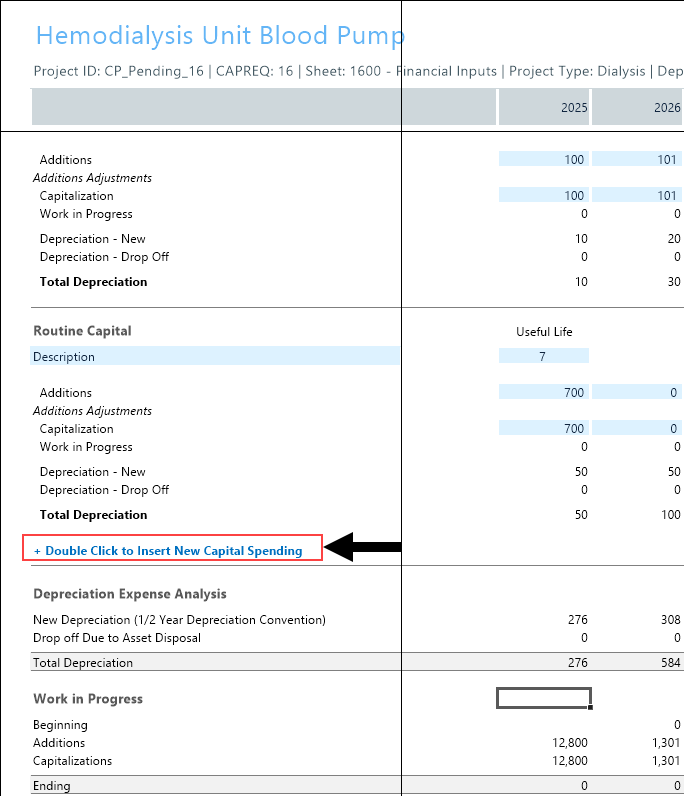
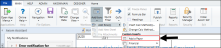
To add an item, click + Double Click to Insert New Capital Spending.
TIP: You may have to scroll down a bit to see this. It is located right above the Depreciation Expense Analysis section, as shown in the following screen shot.

Click image to view full size
- From the Calc Method Variables dialog, click Choose Value to select the project item type from the list, and then click OK.
- In the Description field under the item name, type a description of the item, if needed.
-
In the Useful Life field, type the number of years the item will remain in service.
NOTE: Depending on how your organization has configured your project template and your role profile, this field may not display.
- In each column, enter the capitalization amount for the applicable years.
- After making your changes, in the Main ribbon tab, click Save .
At the bottom of the Capital Additions section, the worksheet displays the following:
Depreciation Expense Analysis
This area shows the calculated depreciation amount based on the useful life, the methodology you selected, and when items are capitalized. This information will show up on your income statement.
Work in Progress
This area shows the dollars that you have spent but not yet capitalized.
Use this section to designate the funding sources for the project.
The section of the worksheet displays a default funding source. If you add more funding sources, any amounts you add will be removed from the default funding source.
To add or edit a funding source:
- To add a funding source, click + Double Click to Insert Funding Source.
- From the Calc Method Variables dialog, click Choose Value to select the funding source, and click OK.
- In each column year, type the funding source amount.
- In the Comments column, enter further details, if necessary.
- After making your changes, in the Main ribbon tab, click Save .
Use this section to view and adjust patient volume by payor.
To adjust volume:
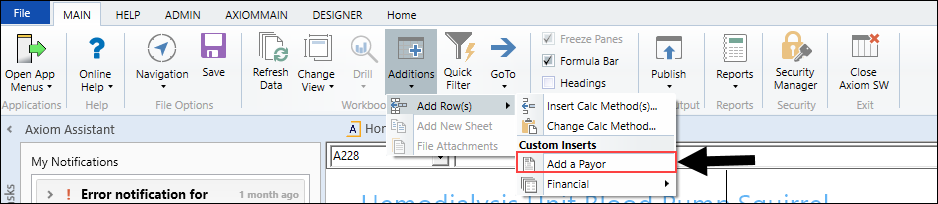
-
To insert a payor, in the Main ribbon tab, click Additions > Add Row(s) > Add a Payor.
Click image to view full size
- From the Choose Value dialog, select the payor from the list, and click OK.
-
In the Inpatient Ancillary Driver and Outpatient Driver fields, type the driver to use for each.
NOTE: By default, the system has been set up with drivers entered in these fields.
- For each payor default name, enter a name in the Customized Name field that best fits your organization, if needed.
-
For each section, enter rate and/or volume adjustments in the blue cells.
You can use the Volume Adjustment row to add or subtract values from the Total Inpatient Charges, Total Inpatient Procedures, Total Outpatient Visits, and Total % Discharges by Payor cells.
For example, the Total Inpatient Procedures for 2025 is expected to be 1,000. For 2026, the organization expects 1,500. Instead of entering 1,500, the user can just enter 500 in the Volume Adjustment row. This allows users to easily adjust volume amounts without having to enter totals for each year.
- In the Comments row, enter details, as needed.
- After making your changes, in the Main ribbon tab, click Save .
At the bottom of the section, an income statement displays, summarizing the impacts of the project.
Use this tab to enter growth-rate adjustments to inpatient and outpatient revenue at the global level as well as by day, procedure, and/or visit. This determines the rate to associate with the volume in the Volume tab to determine your organization's revenue.
To adjust gross charges:
- In each blue cell, enter the adjustment percentage or dollar amounts for each revenue type, as needed.
- In the Comments column, enter further details, if needed.
- After making your changes, in the Main ribbon tab, click Save .
At the bottom of the page, you can view Total Inpatient Revenue, Total Inpatient Procedure Revenue, and Total Outpatient Revenue.
Use this tab to manage reimbursement adjustments from your default payors to model out your reimbursements from year to year.
To adjustment payor reimbursements:
- From the drop-down next to the Inpatient, Inpatient Ancillary, and Outpatient sections for each payor, select how you want to model out the reimbursements by selecting one of the following:
- Payor Name Inpatient: Pct Charges, Per Case, Per Diem, Lump Sum
- Payor Name Inpatient Auxiliary: Pct Charges, Lump Sum, Per Procedure
- Payor Name Outpatient: Pct Changes, Lump Sum, Per Visit
- In each blue cell, enter a percentage or amount adjustment, as needed.
-
At the bottom of the page, in the Bad Debt and Charity section, enter adjustments for bad debt and charity, which are calculated as a percentage of gross charges.
TIP: You may have to scroll down a bit to see these sections. It is located right above the Other Operating Revenue section, as shown in the following screen shot.
Click image to view full size
- In the Comments column, enter further details, if necessary.
- After making your changes, in the Main ribbon tab, click Save .

Use this section to manage additional operating revenue not related to a patient (i.e. gift shop) by entering a first year amount and then applying a growth rate to it.
To add or edit operating revenue:
- To add another revenue type, click + Double Click to Insert Other Revenue.
- From the Calc Methods Variables dialog, select an operating revenue type from the list, and click OK.
- In the Total Other Operating Revenue row, in the first column, enter an amount.
- In the remaining year columns, enter a percent and/or dollar adjustment, as needed.
- In the Comments column, enter further details, if needed.
- After making your changes, in the Main ribbon tab, click Save .
Use this tab manage the salary adjustments for variable and fixed FTEs.
To forecast salaries:
- To add a salary, click + Double Click to Insert Salaries.
- From the Calc Method Variables dialog, click Choose Value to select a salary type from the list, and click OK.
- In the Productivity Adjustment row, from the Var Driver drop-down, select the driver to use to drive your variable FTEs.
- In the first column of the Variable FTEs, enter the number of variable FTEs.
- In the Fixed FTEs row, enter the number of fixed FTEs.
- In the Annual Salary/FTE row, enter the salary associated with the FTE.
- In each blue cell for each year, enter the variable and fixed adjustments for each column, as needed.
- In the Comments column, enter further details, if necessary.
- After making your changes, in the Main ribbon tab, click Save .
Use this section to manage the adjustments for variable and fixed professional fees.
To forecast professional fees:
- To add a professional fee, click + Double Click to Insert Professional Fees.
- From the Calc Method Variables dialog, click Choose Value to select a fee type from the list, and click OK.
- In the Global Inflation Assumption field, from the Var Driver drop-down, select the driver to use to calculate the variable or fixed fee expense.
- In the Variable Rate per Unit row, in the first column, enter a rate.
- In the Fixed Expense row, in the first column, enter a fixed dollar amount.
- In the Global Inflation Assumption row, from the Var Driver drop-down, select the driver to use to calculate the variable or fixed fee expense.
- In each blue cell for each year, enter the variable and fixed adjustments for each column, as needed.
- In the Comments column, enter further details, if necessary.
- After making your changes, in the Main ribbon tab, click Save .
Use this section to manage the adjustments for variable and fixed supplies.
To forecast supplies:
- To add a supply, click + Double Click to Insert Supply.
- From the Calc Method Variables dialog, click Choose Value to select a supply type from the list, and click OK.
- In the Global Inflation Assumption row, from the Var Driver drop-down, select the driver to use to calculate the variable or fixed supply expense.
- In the Variable Rate per Unit row, in the first column, enter a rate.
- In the Fixed Expense row, in the first column, enter a fixed dollar amount.
- In each blue cell for each year, enter the variable and fixed adjustments for each column, as needed.
- In the Comments column, enter further details, if necessary.
- After making your changes, in the Main ribbon tab, click Save .
Use this section to manage the adjustments for variable and fixed purchased services.
To forecast purchased services:
- To add a supply, click + Double Click to Insert Purchased Services.
- From the Calc Method Variables, click Choose Value to select a purchased supply type from the list, and click OK.
- In the Global Inflation Assumption row, from the Var Driver drop-down, select the driver to use to calculate the variable or fixed purchased services expense.
- In the Variable Rate per Unit row, in the first column, enter a rate.
- In the Fixed Expense row, in the first column, enter a fixed dollar amount.
- In each blue cell for each year, enter the variable and fixed adjustments for each column, as needed.
- In the Comments column, enter further details, if necessary.
- After making your changes, in the Main ribbon tab, click Save .
Use this section to manage the adjustments for other variable and fixed expenses.
To forecast purchased services:
- To add a supply, click + Double Click to Insert Other Expense.
- From the Calc Method Variables dialog, click Choose Value to select an expense type from the list, and click OK.
- In the Global Inflation Assumption row, from the Var Driver drop-down, select the driver to use to calculate the variable or fixed expense.
- In the Variable Rate per Unit row, in the first column, enter a rate.
- In the Fixed Expense row, in the first column, enter a fixed dollar amount.
- In each blue cell for each year, enter the variable and fixed adjustments for each column, as needed.
- In the Comments column, enter further details, if necessary.
- After making your changes, in the Main ribbon tab, click Save .
Statement of Revenue and Expense
Use this section to review patient revenue, deductions from revenue, and operating expenses for project financial inputs.
Use this section to view a summary of your capital spending (from the Capital Additions section) by category in the following areas:
- Total requested
- Total capitalization
- Total depreciation
