AX2783
Adding rows to a plan file
You can insert new rows into your plan file using calc methods. A calc method is a predefined row (or rows) that defines the formatting and formulas to be applied to a row. For example, you may need to:
- Add an account that is not currently in the plan file
- Add a new employee
- Add additional detail lines, if you are planning for certain accounts at the detail level
After a calc method is inserted, you need to complete the new row(s) with the appropriate information. For example, you may need to enter an account number, or input plan values. The calc method may use a form to help you complete some of these inputs.
You can only insert calc methods if you have the appropriate security permissions. The ability to insert calc methods is controlled on a per file group basis, using the Allow Calc Method Insert permission. Additionally, administrators and users with the Manage Calc Methods permission can always insert calc methods.
Additionally, most plan files are set up to use calc method controls. If you have the necessary security permissions to insert calc methods, then these controls further specify where calc methods can be inserted, and which calc methods can be used at each location.
There are several different ways to add a new row to a plan file. The methods available to you depend on how your plan files have been set up by your administrator:
- You can use custom insertion points to automatically add new rows to the appropriate locations throughout the plan file.
- You can double-click on designated rows within a sheet to add new rows at that location.
- If the plan file does not use either of the above methods, or if you are a calc method administrator who can add rows anywhere in the file, then you can add new rows manually.
Adding a row using a custom insertion point
Plan files may be set up with custom insertion points. These points are intended to guide you to the appropriate places to add new rows to a plan file. Custom insertion points are available on the Add Row(s) > Custom Inserts menu.
There are two different types of custom insertion points: dynamic and static. Plan files may use only dynamic insertion points, only static insertion points, or a combination of both.
-
When using a dynamic insertion point, you select the item that you want to add to the plan file (such as an account), and then the insertion controls dynamically determine where the account should be added. If the account already exists in the file, you are taken to the relevant row.
-
When using a static insertion point, you select from one or more specific areas in the plan file that are enabled for insertion, and then add the new row in that selected location.
The Custom Inserts menu shows all insertion points defined within the file (not just for the active sheet). When you select an insertion point, you may be taken to another sheet in the file.
The Custom Inserts menu is only available if you have the appropriate security permissions to insert calc methods.
To insert new rows using a custom insertion point:
-
On the Axiom tab, in the File Options group, click Add Row(s). Then, select the desired insertion point from the Custom Inserts menu.
TIP: You can also access this menu by right-clicking anywhere in a plan file (Calc Methods > Custom Insert).
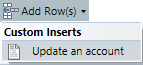
Dynamic insertion points are single items on the menu. For example, there might be a dynamic insertion point named Update an account:
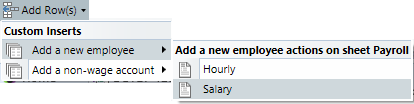
Static insertion points are organized into sub-menus. For example, there might be sub-menu named Add a new employee, which contains two insertion points: Hourly and Salary.
-
The next step depends on whether you have selected a dynamic insertion point or a static insertion point:
-
If you have selected a dynamic insertion point, the Choose Value dialog opens. Select the desired item that you want to add to the plan file, and then click OK. For example, the dialog may display a list of accounts, in which case you would select the account that you want to add.
If the selected item already exists in the relevant sheet and no further calc methods can be inserted for it, then you are simply taken to the location of the existing item. The dynamic insertion process is now complete. Otherwise, the dynamic insertion process determines where the selected item can be added, and moves your cursor to that location.
- If you have selected a static insertion point, your cursor is moved to the location that corresponds with the selected insertion point.
-
-
One of the following occurs, depending on whether multiple calc methods are eligible to be inserted at this location:
-
Multiple calc methods: If more than one calc method can be inserted at this location, then the Insert Calc Method dialog opens. Select the calc method that you want to insert, and then click OK.
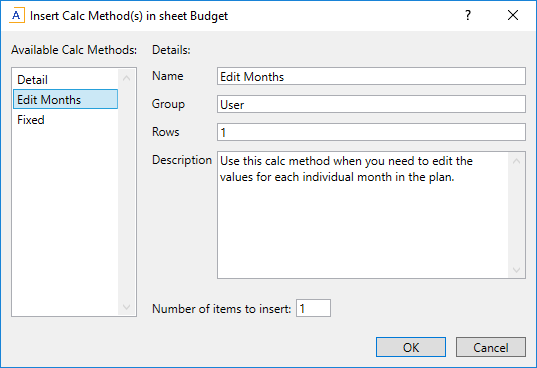
Example Insert Calc Method dialog
The available calc methods are listed in the left-hand side of the dialog. When you select a calc method name, the properties of that calc method display in the right-hand side of the dialog, including a description. If you are not sure which calc method to use, the descriptions may provide guidance.
If you want to insert multiple instances of the calc method, edit the Number of items to insert. By default, this is set to 1. For example, you may need to add two new employees to a payroll budget, and both employees use the same calc method. In this case you can set Number of items to insert to 2. The number of items that you can insert at any one time may be limited to a certain maximum amount.
NOTE: The calc methods in this list are always limited to the calc methods allowed at this location. If you are an administrator or a user with the Manage Calc Methods permission, and you want to insert a different calc method at this location, you must insert it manually.
-
Single calc method: If only one calc method can be inserted at this location, then that calc method is selected automatically, and the Insert Calc Method dialog does not display.
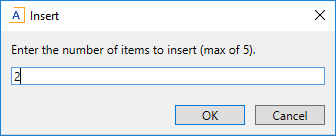
If this location is configured to allow you to insert multiple instances of the calc method, then you are prompted to specify the number of items to insert. Enter the number of items (up to the specified maximum) and then click OK.
-
-
If the selected calc method has defined variables, then the Calc Method Variables dialog displays. Enter values for the variables, and then click OK.
The values that you enter for the variables will be placed in the appropriate cells when the calc method is inserted into the sheet.
This dialog only applies if the calc method has defined variables. Otherwise, this dialog does not display and the calc method is simply inserted into the sheet.
NOTES:
- If your plan files have been configured to support double-click for calc method variables, you can open this dialog again later by double-clicking the calc method in the sheet. You can then change any entries as needed. Keep in mind that some variables may be set up so that they only display when inserting, such as the variable for selecting an account.
- If you are inserting multiple instances of the calc method, the selected values will be repeated in each inserted calc method. Most likely you will need to edit the calc methods after they are inserted to select unique values for each item.
After the calc method is inserted into the sheet, you may have inputs to complete. For example, you may need to input an annual total to be spread equally across months or according to a statistic.
Adding a row by double-clicking
Plan files can be set up to allow adding new rows by double-clicking in designated locations. These locations will be designated in the sheet using text such as: "Add new row here" or "Double-click to add a new account." The specific text used and how it appears depends on your particular implementation.
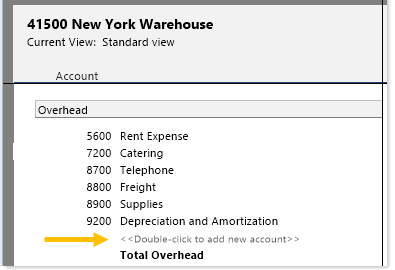
Example plan file with a double-click "hotspot" for adding rows
To add a new row by double-clicking:
-
Double-click on the cell which contains the insertion text.
- One of the following occurs, depending on whether more than one calc method can be inserted at this location:
Multiple calc methods: If more than one calc method can be inserted at this location, then the Insert Calc Method dialog opens. Select the calc method that you want to insert, and then click OK.
Example Insert Calc Method dialog
The available calc methods are listed in the left-hand side of the dialog. When you select a calc method name, the properties of that calc method display in the right-hand side of the dialog, including a description. If you are not sure which calc method to use, the descriptions may provide guidance.
If you want to insert multiple instances of the calc method, edit the Number of items to insert. By default, this is set to 1. For example, you may need to add two new employees to a payroll budget, and both employees use the same calc method. In this case you can set Number of items to insert to 2. The number of items that you can insert at any one time may be limited to a certain maximum amount.
NOTE: The calc methods in this list are always limited to the calc methods allowed at this location. If you are an administrator or a user with the Manage Calc Methods permission, and you want to insert a different calc method at this location, you must insert it manually using the Add Row(s) menu.
Single calc method: If only one calc method can be inserted at this location, then that calc method is selected automatically, and the Insert Calc Method dialog does not display.
If this location is configured to allow you to insert multiple instances of the calc method, then you are prompted to specify the number of items to insert. Enter the number of items (up to the specified maximum) and then click OK.
-
If the selected calc method has defined variables, then the Calc Method Variables dialog displays. Enter values for the variables, and then click OK.
The values that you enter for the variables will be placed in the appropriate cells when the calc method is inserted into the sheet.
For example, the calc method may have a variable for Account. The account that you select in this dialog will be placed in the account column when the calc method is inserted into the sheet.
This dialog only applies if the calc method has defined variables. Otherwise, this dialog does not display and the calc method is simply inserted into the sheet.
NOTES:
- If your plan files have been configured to support double-click for calc method variables, you can open this dialog again later by double-clicking the calc method in the sheet. You can then change any entries as needed. Keep in mind that some variables may be set up so that they only display when inserting, such as the variable for selecting an account.
- If you are inserting multiple instances of the calc method, the selected values will be repeated in each inserted calc method. Most likely you will need to edit the calc methods after they are inserted to select unique values for each item.
After the calc method is inserted into the sheet, you may have inputs to complete. For example, you may need to input an annual total to be spread equally across months or according to a statistic.
Adding a row manually
You can add new rows to a plan file manually by placing your cursor in the desired area of the sheet and then using Add Row(s) > Insert Calc Method(s).
This command is only available if you have the appropriate security permissions to insert calc methods. If you have the appropriate permissions, then the availability of the command further depends on the usage of calc method controls in the sheet:
-
If calc method controls are used in a sheet, then this option is only available for rows that are enabled to allow calc method insertion. In almost all cases, these are the same rows that are set up with custom insertion points, so it is easiest to use the custom inserts menu to be taken directly to these enabled areas.
-
If calc method controls are not used in a sheet, then you can insert calc methods anywhere in the sheet.
Also, if no calc methods have been defined for a sheet, then this command is not available because there are no calc methods that can be inserted.
Administrators and users with the Manage Calc Methods permission can insert calc methods manually anywhere in the sheet, regardless of whether calc method controls are being used.
To insert a row manually:
-
Place your cursor in the row directly below where you want the new calc method to be inserted.
NOTE: If you are inserting a calc method on a row that is set up with calc method controls, the location of the insert may be determined by the controls. By default, calc methods are inserted above the current row, but the calc method controls may be configured to insert below the current row.
-
On the Axiom tab, in the File Options group, click Add Row(s) > Insert Calc Method(s).
If this menu item is not available, then one of the following circumstances applies:
- No calc methods have been defined for the current sheet.
- Calc method controls are being used, and the current row is not enabled for insertion.
- You do not have security permissions to insert calc methods.
-
In the Insert Calc Method dialog, select the calc method that you want to insert, and then click OK.
The available calc methods are listed in the left-hand side of the dialog. When you select a calc method name, the properties of that calc method display in the right-hand side of the dialog, including a description. If you are not sure which calc method to use, the descriptions may provide guidance.
If you want to insert multiple instances of the calc method, edit the Number of items to insert. By default, this is set to 1. For example, you may need to add two new employees to a payroll budget, and both employees use the same calc method. In this case you can set Number of items to insert to 2.
NOTES:
- If calc method controls are being used, then the list of calc methods is limited to those allowed by the insertion point. Calc method administrators always see all calc methods when manually inserting a calc method.
- If the selected calc method uses variables, and you do not want to be prompted to enter variable values, you can clear the Prompt for calc method variables check box. This option only displays on the dialog if the selected calc method uses variables, and if the user is an administrator or has the Manage Calc Method permission.
- Administrators and users with the Manage Calc Method permission can select multiple calc methods for insertion, for the purposes of editing calc methods in bulk. For more information, see Replacing multiple calc methods.
-
If applicable, in the Calc Method Variables dialog, enter values for the calc method variables, and then click OK.
If the calc method has variables, then the values you enter for the variables will be placed in the appropriate cells when the calc method is inserted into the sheet.
For example, the calc method may have a variable for Account. The account that you select in this dialog will be placed in the account column when the calc method is inserted into the sheet.
This dialog only applies if the calc method has defined variables. Otherwise, this dialog does not display and the calc method is simply inserted into the sheet.
NOTE: If your plan files have been configured to support double-click for calc method variables, you can open this dialog again later by double-clicking the calc method in the sheet. You can then change any entries as needed. Keep in mind that some variables may be set up so that they only display when inserting, such as the variable for selecting an account.
After the calc method is inserted into the sheet, you may have inputs to complete. For example, you may need to input an annual total to be spread equally across months or according to a statistic.
