Review and submit the data transfer
The Final Check & Submit page of the Transfer to Financial Planning utility provides a review of your selections and the choice to create plan files after the transfer or to not create plan files so that you can build them at a later time.
To finalize and submit the transfer:
-
On the Final Check & Submit page, in the Data Build Option section, do one of the following:
- To automatically create the nodes (plan files) after submission, leave the toggle set to Yes (the default).
- To transfer the data but put off creating nodes until a later time, click the toggle to No.
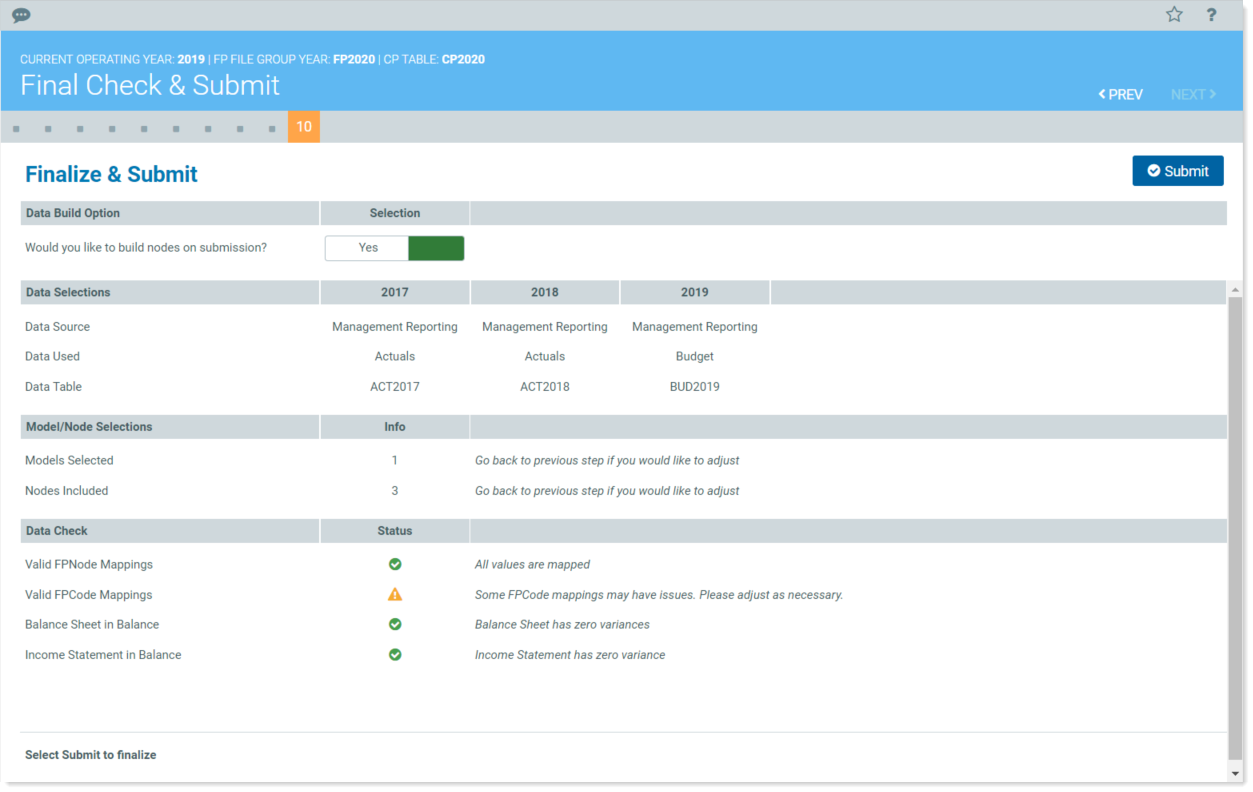
- In the Data Selections and Model/Node Selections sections, review the information to be sure it is what you expect.
- In the Data Check section:
- If there are any mapping issues, either correct them by going back to the corresponding mapping check page or, if you decide not to correct them, be sure you understand them and how they will affect transferred data.
- If there are balance sheet variances, go back to the Financial Planning aggregate data check - code reconciliation & validation page of the Code Mapping & Validation part of the utility. Click View Annual Data and then, in the Balance Sheet section, expand the rows to view the line items. If you decided to correct mismapped items, return to the node and code check pages and use a utility to fix errors.
- When ready to transfer the data, click Submit.
- In the confirmation message, read the information and then, to continue with the transfer, click OK.
After you OK the submission, the utility runs an import job that transfers the data. You will receive an email notification when the integration is complete. You should receive a notification about any errors that occur. Any errors that occur are recorded in the Scheduler.
