Creating or modifying custom columns in dimensions
Some dimension tables allow you to add additional custom columns. These "grouping" columns allow you to customize the data you want to query into reports. You can add up to five grouping columns to the following dimensions/reference tables:
- Accounts
- Age
- APR DRG
- Cost Categories
- CPT Codes
- Departments
- Financial Class
- ICD Diagnosis
- ICD Procedure
- Insurance Plan
- MS DRG
- Patient Zip code
- Revenue Codes
NOTE: Only users with Admin role profiles can make changes to this page.
To create or modify custom columns in dimensions:
-
In the
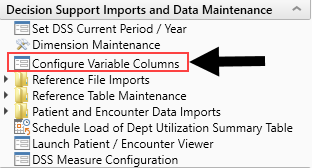
-
In the Configure Variable Columns page, in the Enabled column, click the check box next to the column to use.

Click image to view full size
-
In the Preferred Name field, type a name for the column that makes sense for reporting purposes.
NOTE: The column name must start with a letter and contain no spaces. The name can only include letters A-Z, 0-9, and/or an underscore (_), and can only include up to 200 characters. The system displays a check mark next to the name if it is allowed by the system; otherwise, it displays an x. The system will not allow you to save your changes until the check mark displays.
- When you are done making changes, in the Main ribbon tab, click Save.
- In the Admin ribbon tab, click Scheduler.
- In the Service tab, run the System.SyncBIModel job.
- To add or edit patient Zip codes, see Patient ZIP Code reference table.

After you save the changes, the system updates the appropriate dimension tables with the new columns. You then update the columns with the appropriate records.