Simulate adjustments to claim charges
Use the Charge Adjustments feature to preview adjustments to claims charges in simulations to understand the impact they will have on your net reimbursement and future contract performance.
NOTE: This feature is available to administrative users only.
To preview claim price/charge adjustments:
- If one does not already exist, create a simulation and add contracts for which you want to preview price changes.
- From the Claims menu, select Charge Adjustments.
-
From the Simulation drop-down, select the simulation that has the contracts against which you are running claim adjustments.
NOTE: This feature cannot be used in the Live environment.
- In the Adjust By section, select the desired type of adjustment:
- No Adjustment – Select and then click Clear to clear the current selected adjustment type and its calculations.
- Overall Percentage – Adjust the price/charge by a specified percentage.
- Revenue Code – Adjust the proce/charge by programming different revenue codes if they are different rates, for example.
- Line Item Code – Adjust the price/charge by specific line items on claims.
- Do one of the following depending on your selection in the previous step:
- If you selected Overall Percentage, then, in the Adjustment field, enter a percentage written as a decimal value (e.g., 0.07), and then click Save. Skip to step 7.
- If you selected Revenue Code or Line Item Code, proceed to step 5.
- To adjust by Revenue Code or Line Item Code, you can input the codes manually or you can upload a file with the code adjustments. Do one of the following:
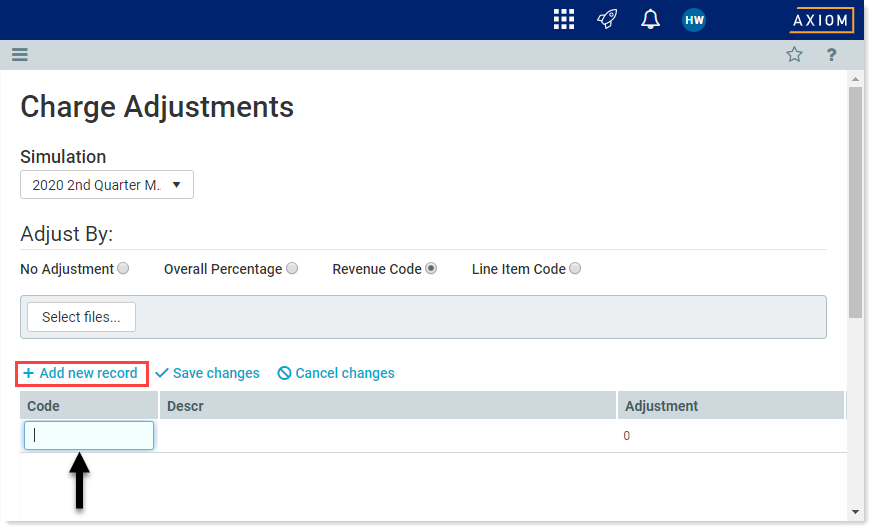
To enter the code adjustments manually:
- Click +Add new record.
- In the Code column, type the code, then press the Tab key.
- In the Description column, type a description and then press Tab.
- In the Adjustment column, click the up or down arrow to reach the desired adjustment number.
- Click Save changes.
- To upload a file of code adjustments:
- Click Select Files.
Navigate to and select the file containing the codes and their adjustments.
IMPORTANT: The file should be an Excel file and must have three columns in the following order: the first column must contain the codes, the second for the descriptions but can be left blank, and the third should contain the adjustments. If the Description column is left blank, the system will populate it from the appropriate library.
The file’s contents display on the page:
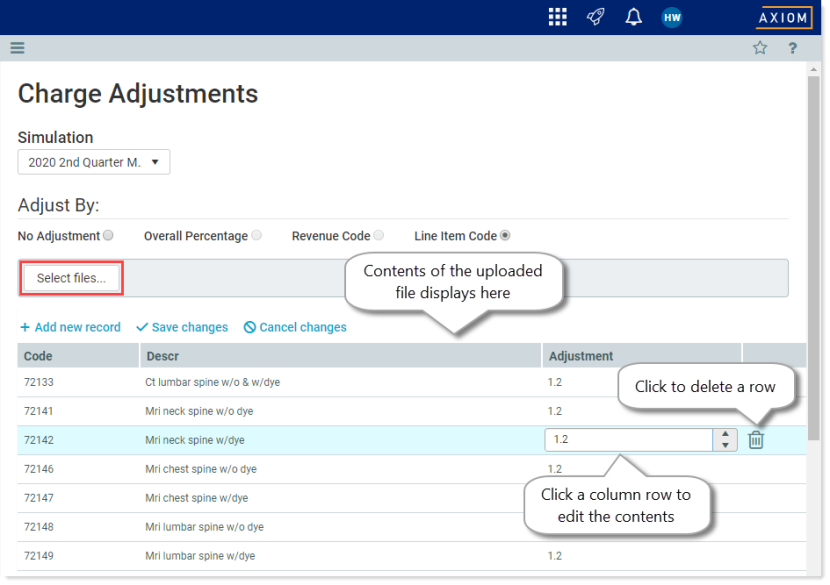
- (Optional) If desired, you can edit the file contents from this page:
- Edit any entry by clicking it and making changes.
- Delete an entry by clicking the delete icon (
 ) at the right end of the row and then confirming the deletion.
 - To add a new code line item, click Add new record and input values.
- To cancel an edit, click Cancel changes (you cannot cancel changes after saving them).
- Click Save changes to save your edits.
- Do one of the following:
- To view how the adjustments affect your reimbursements, calculate the claims and then view the Voucher details; or from the Reports menu, run any of the standard reports for the adjusted claims.
To preview a new adjustment, select the No Adjustment option, click Clear, and then repeat the steps starting with step 4.
NOTE: You cannot select a different adjustment option without first clearing the existing one. Clearing removes adjustments from all claims in the selected simulation.
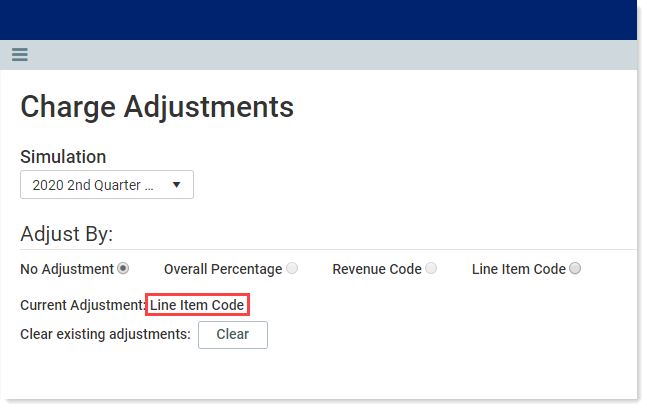
The adjustment about to be cleared is listed before clearing. After clearing, Clear Adjustments reads “None.”
