Adding a new department
The New Department Utility allows you to easily set up new departments using a copy of accounts from an existing department as well as add additional accounts to your new department. As a result, you can configure all necessary accounts for Statistics, Revenues, Deductions, Expenses, and Hours in a single step. In addition, you can also set up the job codes necessary to populate your labor method.
Configure the PAYTYPE dimension
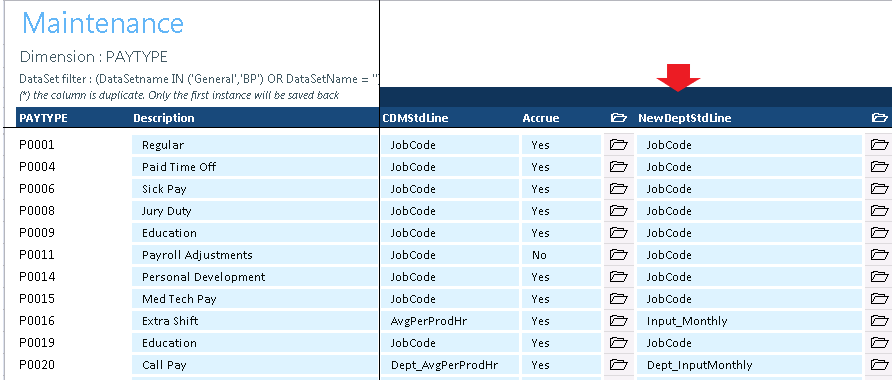
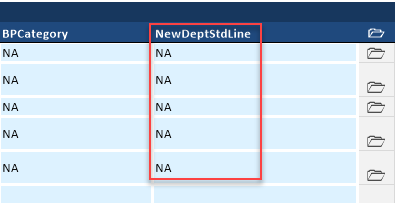
In the PAYTYPE dimension, you need to set up the NewDeptStdLine column. By default, this column populates with NA until you configure it, but will have similar entries as Paytype.KHAStdLine. This column is used to select the appropriate calculation method to use for the labor method selected for use in the new department.
Manage labor rates when using the New Department utility
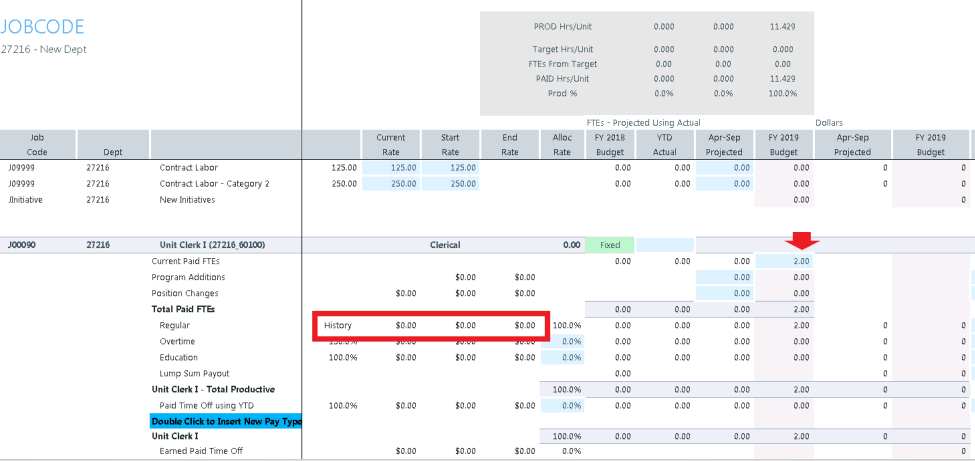
When the plan file is built for the new department, it is ready for user input. One of the inputs you need to configure is the FTE value for each job code. In the following example, two FTEs have been added to job code J00090 in the FY 2019 Budget column, but notice that the Current, Start, and End Rate columns are zero.
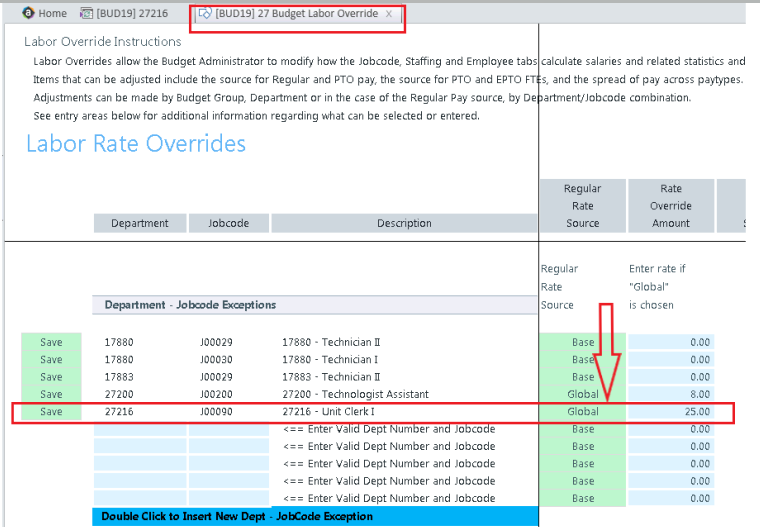
In the Department - Jobcode Exceptions section, add each department and job code combination. In the Regular Rate Source column, select Global, and enter the wage rate desired. Save the driver file and then refresh (F9) the plan file.
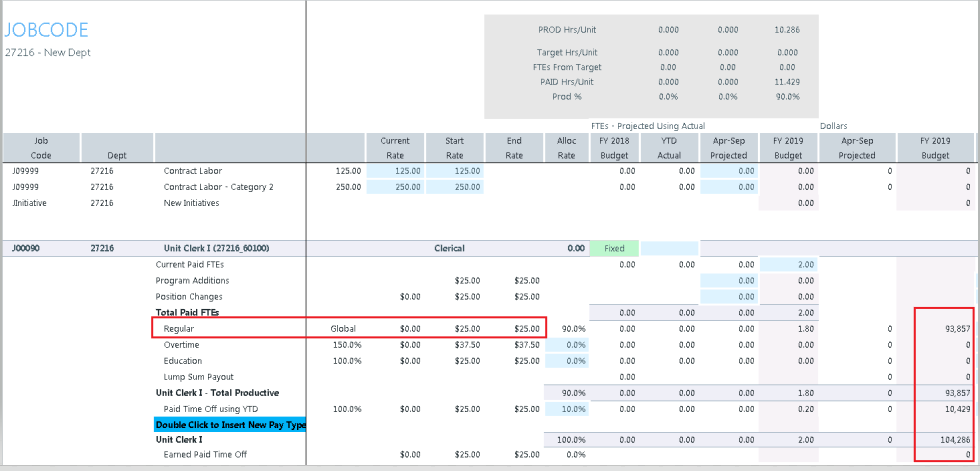
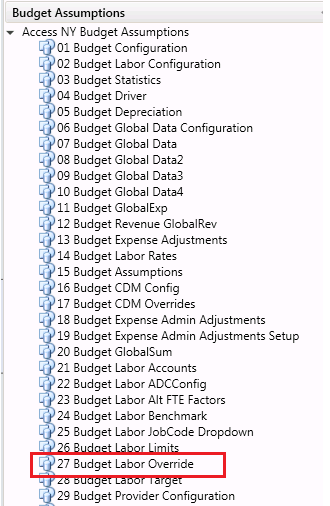
Note that the system now displays the wage rate and calculates the dollars. The word “Global” also displays next to the Regular row, indicating that this wage rate is controlled from the 27 Budget Labor Override driver.
Alternate configuration
The instructions above present a configuration that enables administrators to allow for FTE input only by their end users, while administrators control the wage rate. However, if administrators prefer to use the Add New Jobcode calculation method, then simply exclude the job code(s) when processing the New Department Utility. Administrators can then add the job codes by using the existing Add New Jobcode calculation method individually, which then allows for end user input of both wage rate and FTE.
To add a new department:
-
Using the Dimension Maintenance utility, add the new department in the DEPT dimension.
NOTE: Before you can use the New Department utility, the new department must exist as a valid department with all required columns completed.
The calculation method available is “Jobcode” and that method assumes historical activity to populate a rate. To configure for a rate, we will use one of the driver files known as 27 Budget Labor Override to allow for rates to be applied.
-
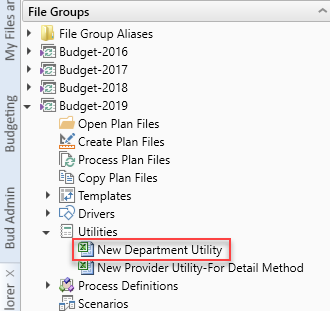
In the Explorer task pane, navigate to File Groups > budget file group > Utilities, and double-click New Department Utility.
-
In the Refresh Variables dialog, complete the following:
Option Description Select Existing Department Select an existing department to copy from. The existing department will be used as the profile of accounts and job codes for the new department.
Select New Department Select the new department to copy to. -
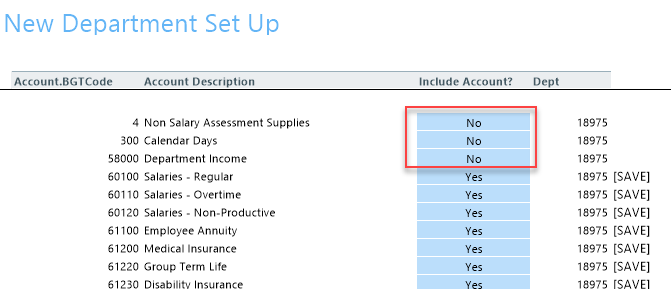
Review the rows assigned to the new department, and exclude any that you do not want as part of the new department profile.
In the following example, the first three rows are part of the actual data of the donor department, but we may not want these for budgeting purposes so we will set these rows to No in the Include column.
-
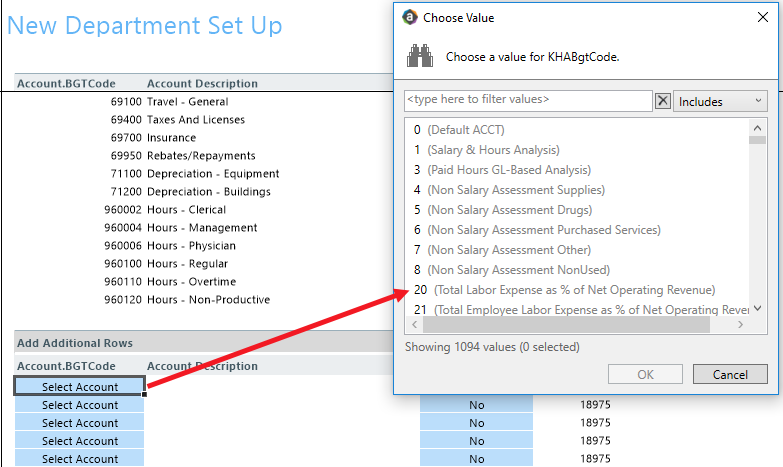
To add additional rows, use the Add Additional Rows section. In the Account column, double-click the blue input cell to select from a validated list of accounts. Click the blue cell in the Include Account column and click Yes from the drop-down to confirm the addition of the account.
-
Refresh the utility again to see the final results of the new department’s profile that will be used in the plan file.
-
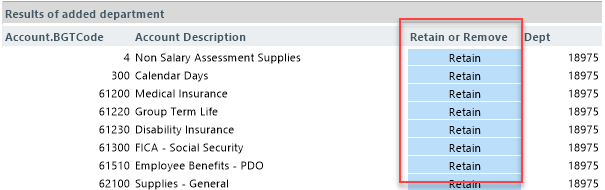
The New Department Utility displays the results in the Results of added department section. Use the drop-down in the Retain or Remove column to remove any accounts within the results that you want to remove. Retain is selected by default.
-
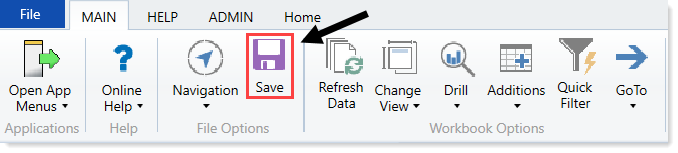
After updating the new department’s profile, in the Main ribbon tab, click Save.
NOTE: The system posts the values to the Act[YEAR] table, and uses the database field NYBKHA as the value to post to so no changes to actual imported data are affected.
-
Using the Dimension Maintenance Utility, update the calc methods for each account in the NewDeptStdLine column in the ACCT dimension, and click Save.
As of the 2018.4 release, we added a new column to the ACCT dimension for the calculation methods that would work best in a department that contains no history. For example, when using patient revenue accounts, typically a per-unit type calculation method would be used. However, in a new department with no history, Fixed Even or Input Monthly would likely be a better option. The Acct.NewDeptStdLine column is used to assign the calcutation methods so plan files build with the relevant methods.
-
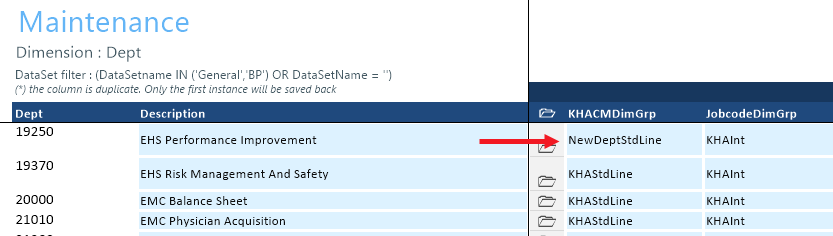
In the DEPT dimension, update the KHACMDimGrp colum as you would any department, but use NewDeptStdLine and click Save.

-
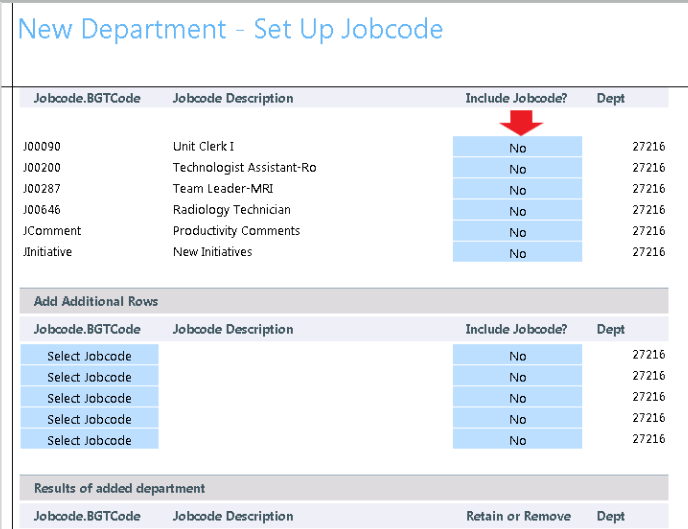
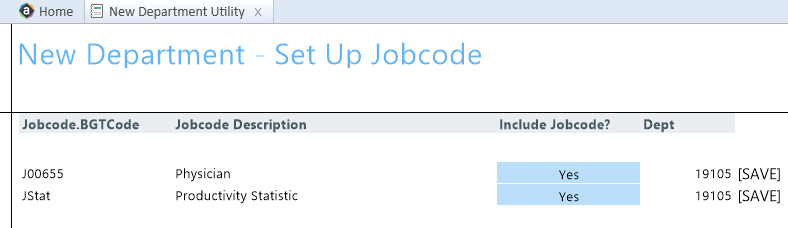
Click the Jobcode tab at the lower-left of the New Department Utility.

In the following example, there are only two job codes in the department:
-
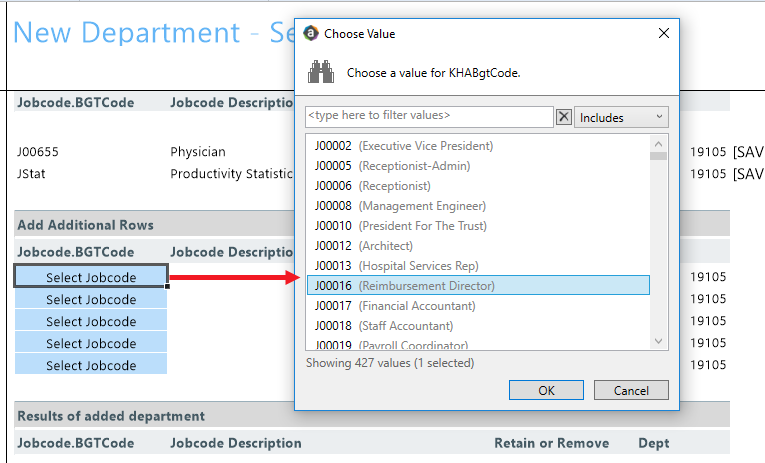
To add additional rows, use the Add Additional Rows section. In the Jobcode.BGTCodecolumn, double-click the blue input cell to select from a validated job code list. Click the blue cell in the Include Jobcode column, and click Yes from the drop-down to confirm the addition of the account.
- In the Main ribbon tab, click Refresh Data.
-
The New Department Utility displays the results in the Results of added department section. Use the drop-down in the Retain or Remove column to remove any job codes you do not want to retain. Retain is selected by default.

- After updating the new department’s job codes, in the Main ribbon tab, click Save.
