Add calculated fields to a report
If you need a measure that does not exist, you can build a calculated field. You create calculated fields by choosing current measures and creating expressions with mathematical functions to calculate the desired results.
To create a calculated field:
- Open the drill-down report to which you want to add a calculated field. If you are creating a new report, select the tab for the type of report (e.g., Claims or Line items).
-
In the menu bar at the top of the page, click Reports > Create Calculated Field.
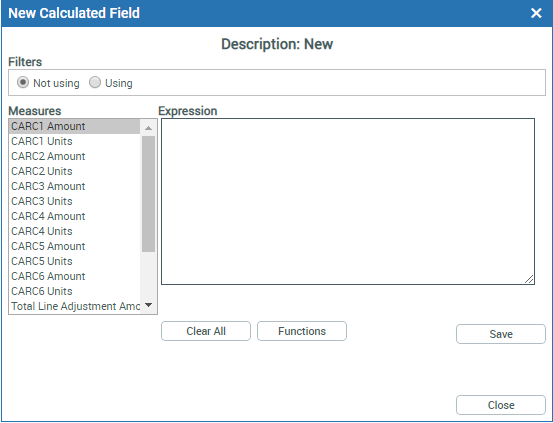
The New Calculated Field window opens.
NOTE: You cannot use a calculated field in an equation for another calculated field.
- Do one of the following:
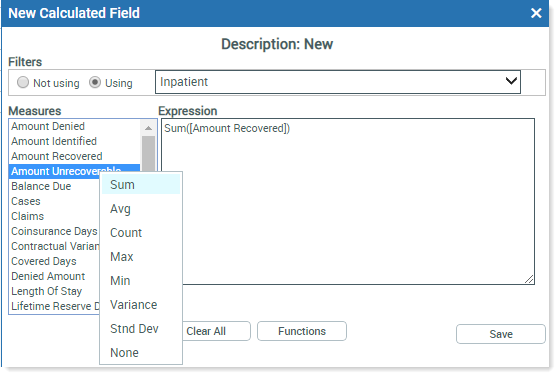
To use filters from a saved report, click the Using option and then select a report from the drop-down list. Reports available in this list are based on the tab that you are on when building the calculated field. A calculated field on the Claims tab can only use the filters from other Claim reports.
NOTE: Using the filters option limits the calculated field to only the claims found in the selected saved report. For example, to compare pediatric claims to all claims, you need to create a calculated field for SUM(claims) with a filter from a report limited to pediatric claims. You can select only one report to apply as a filter to a calculated field. However, the report used for the calculated field can contain as many filters as you need.
- If you do not want to use a filter, leave the default Not using selected.
- Build the expression by selecting measures from the Measures list on the left:
Click the desired measure, and select the desired function from the list of available functions. The measure is added to the Expression box. Now you need to add an operator or mathematical symbol.
Click the Functions button to select the desired operator, or, for a mathematical equation, use the mathematical symbols on your keyboard (+ - / *) for add, subtract, divide, and multiply, between your measures to string them together.
NOTE: Do not use special characters, such as dashes and slashes, in a calculated field name.
TIP: If you make a mistake with the expression, click Clear All and start over.
Add the next measure and symbol, as needed, until your expression is complete.
TIP: If you know the complete expression, you can type it into the Expression box manually instead of selecting Measures and Functions from the menus.
- Click Save.
- In the Save As dialog, select a location to store the measure on the Measures tab, and then in the Name field, type a name for it.
Click Save and Return.
The new measure name displays in blue text on the Measure tab in the folder you selected. The name becomes a column header when added to a report.
