Assign claims from claim tracking
Assign claims from the Claim Tracking page by performing a mass modification.
To assign claims from Claim Tracking:
- In the main menu header, click Claims > Track/Assign Claims. The Claim Tracking page opens.
- Click the Modify Tracking tab. This tab provides three methods for selecting claims: Current View, Quick Filters, or Existing Filters.
-
Select one of the following options and follow the provided instructions.
Current ViewUse this method to modify the tracking details of claims currently in the tracking page:
- Click Use Current View.
- In the Select modifications column, edit the tracking detail options.
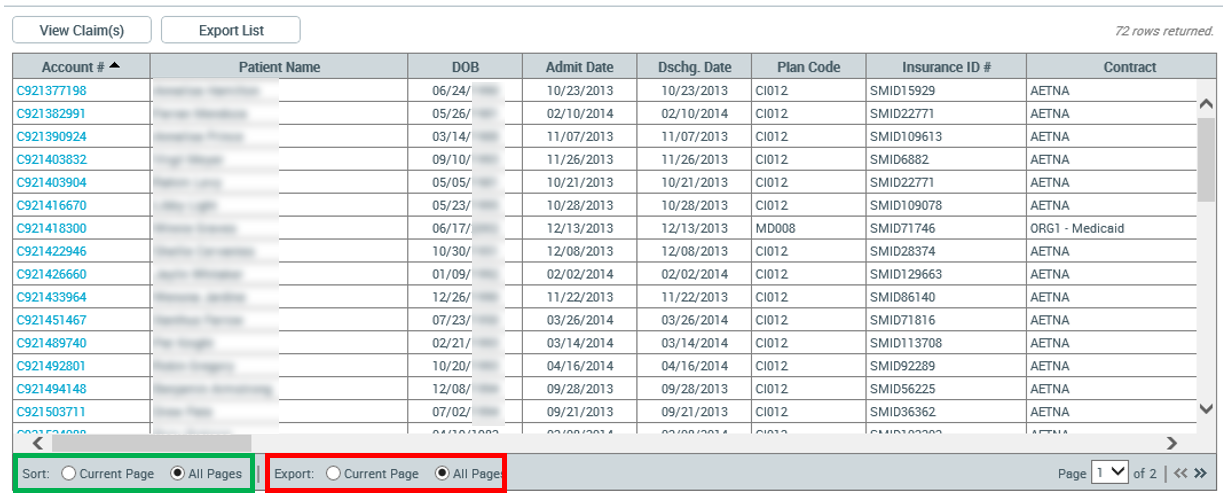
- Click Modify Claims. Also, if claims are in the Current View, you can sort the claims and export them to MS Excel. You can sort on the current page, or, if there are numerous pages of claims, you can sort the entire set. This option is boxed in green in the following example. To the right of the Sort feature is another set of options. Here you select whether to export the current pages or all pages in the set. Then, to export to Excel, click the Export List button next to the View Claim(s) button, as shown outlined in red in the following Quick Filters example.
 Quick Filters
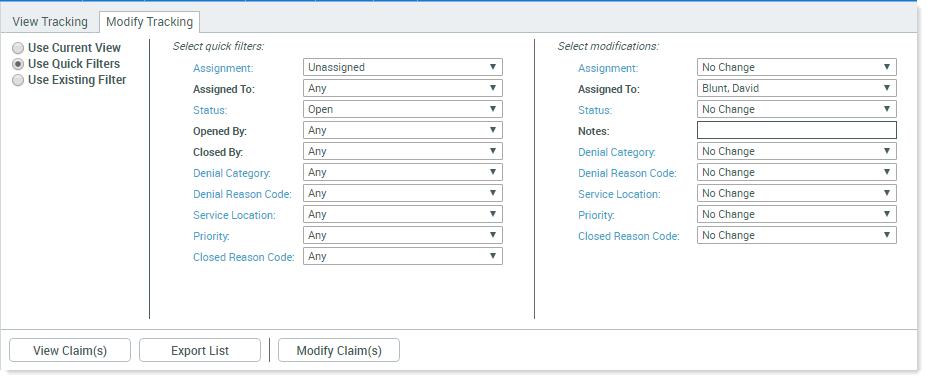
To use this method to mass modify claims:
- Click Use Quick Filters.
- In the Select quick filters column, specify the tracking details of the claims to modify.
- In the Select modifications column, specify the new tracking details to apply.
- Do one of the following:
- To modify the claims immediately, click Modify Claim(s).
- To review the claims found, click View Claims; then, if the returned dataset is correct, click Modify Claims.
 Existing Filters
The Existing Filters list contains filters built in Claim Tracking, and advanced filters built in Reports.
IMPORTANT: Use caution when using Advanced Filters from Reports to select accounts in Claim Tracking. Basic report parameters require you to specify a contract to run your report on as well as a discharge date range. The advanced filter does not necessarily specify a payer or date range; therefore, your returned results may be for all payers for the entire database. Modify by filters carefully and be sure to view your results before applying changes.
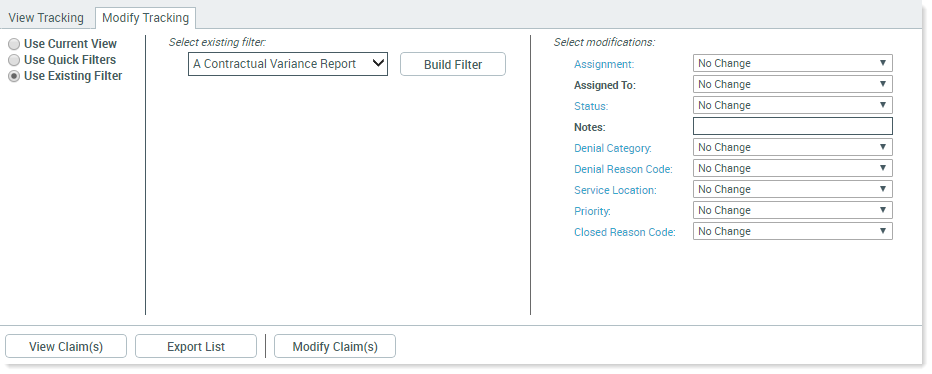
To use this method to assign claims based on existing filters:
- In the Select existing filter drop-down, select a filter. Alternatively, you can click the Build Filter button and build a filter from scratch, as explained in Build an advanced filter.
- In the Select modifications column, specify tracking details to apply by editing the modifications.
-
Click Modify Claim(s). This can also be done in two steps by first clicking View Claim(s).
Customizing filters
As mentioned in Assign a claim, Axiom Contract Management includes ten User Defined fields, five of which are formatted numerically and five of which are formatted as characters. You can also hide columns to prevent them from entering claim tracking reports. For example, if you want to eliminate the name field from claim tracking to comply with HIPAA regulations, contact a Kaufman Hall representative.
