Assign a claim
Assigning a claim is the first step in using the Claim Tracking feature.
To assign a claim:
- In the main menu header, click Claims > View a Claim.
- In the View Claim By section on the left, select the criteria for the claims to view, then click View Claims.
- In the Acct # column, click the number of the claim to assign.
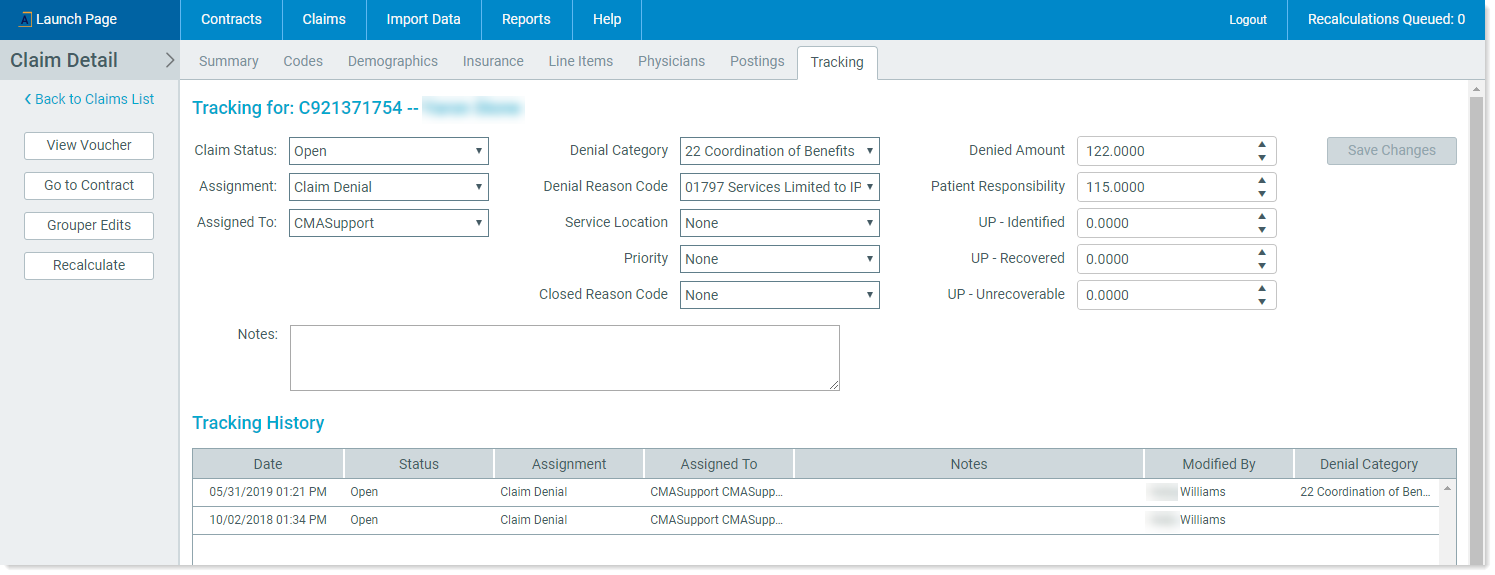
- On the claim detail page, click the Tracking tab.
- Select the following claim details:
- Claim Status – Select Open, Closed, or other user-defined status (Needs Review, Insurance Pending, etc.).
Assignment – Select the general reason for assignment. This is also a user-defined field.
Assigned To – Select the user assigned to this claim. This is a list of all system users, and is generated by Kaufman Hall, and cannot be changed.
User Defined (1 – 10) – Select up to five user-defined fields with numeric formats, and five with character formats. Administrators can edit them as needed.
Notes – (Optional) Add any additional information in this text box. For example, provide details about the generalized assignment reason to offer more specifics to this particular claim.
-
Click Save. The claim displays in the Tracking History section.
Claim details example
NOTE: System administrators can build new Claim Status options, Assignment options, and User Defined options into the system from Claim Tracking, as described in Edit user-defined claim tracking quick filters.
As you follow the claim through the recovery process, you can make additional notes to any of the critical information on the page. The most recently saved information displays at the top of the Tracking History section.
