Import translation tables
Translation tables are crosswalk code tables that map equivalent, identical, or similar information across two or more distinct data sets. Most crosswalking is done between a newer version and an older, out-of-date version of the same code set. Certain Contract Management Calc Bases, such as the following, all require translation tables:
- Line Item Code Incidental
- RevCode Incidental
- Line Item Code MPR
- Line Item Code ASC
- Multi-Channel Discount
Importing translation tables follows the same basic process as importing rate files.
To import a Translation Table:
- Navigate to the clause or term.
- In the Rates column, click Set (or View if you are replacing an existing translation table).
- In the Rates window, click the [Calc Basis] Import Files tab.
- On the right side of the window, click Upload/Specify Files.
- In the Upload/Specify Files dialog, on the right, click Choose File, then browse for and select the desired Translation Table file, and then click Open.
- When the name of the file displays in the Choose File field, click Upload.
-
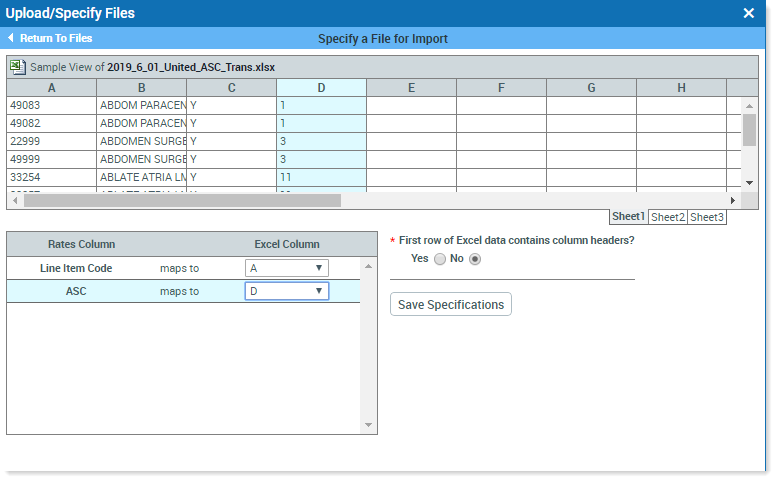
On the folder view side of the dialog, click the uploaded translation table file to select it, and then on the right, click Specify.
-
In the Upload/Specify Files form, on the lower left, in the Excel Column, for each row in the Rates Column, select the letter that should correspond to the column in the image of the Excel file above it.
-
Select whether or not the file uses headers, and then click Save Specifications. Close the form.
- In the Specified Translation Files box, click Attach.
- If desired, click the Translation Data View tab to view the uploaded information.
- Close the Rates window.
