Adjust rates for a CMS Outpatient calculation
Use these instructions to modify rates for a CMS Outpatient calc basis on a clause or term, as part of modeling post grouper custom pricing.
To set up post-grouper custom pricing on a contract:
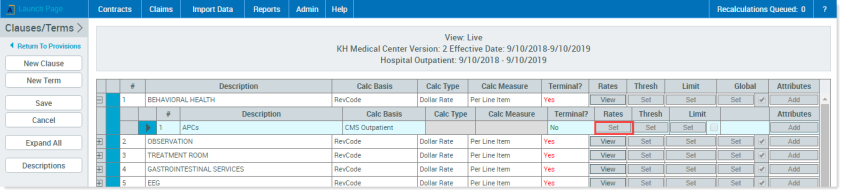
- Navigate to the desired clause or term for a provision with a clause or term with a CMS Outpatient calc basis.
-
In the Rates column, click Set.
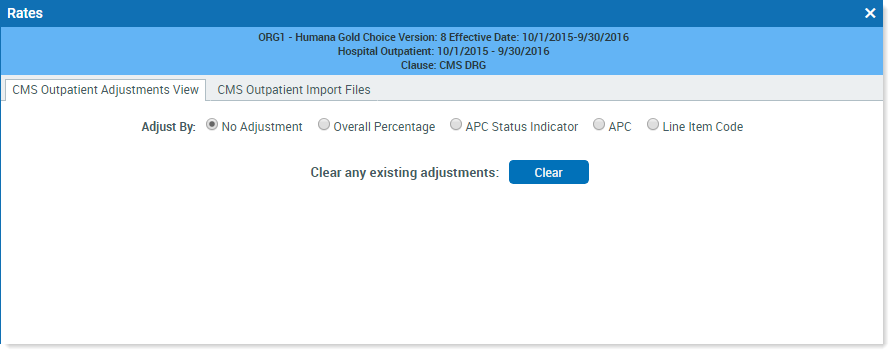
- In the Rates window, in the CMS Outpatient Adjustments View tab, select the type of adjustment:
- No Adjustment – No adjustment is made to the rates coming from the grouping and pricing process. This is the default selection.
- Overall Percentage – Adjust the post-grouping and pricing rate by a specified percentage.
- APC Status indicator – Adjust the calc basis percentage based on the Status Indicator.
- APC – Adjust the calc basis percentage based on the APC groupings.
Line Item Code – Adjust the calc basis percentage by specific line items on a claim.
- Do one of the following, depending on your selection in the previous step:
- If you selected Overall Percentage, then in the Adjustment field, enter a percentage written as a decimal value (e.g., 0.07), and then click Save. Skip to step 13.
- If you selected APC Status Indicator, APC, or Line Item Code, proceed to step 5.
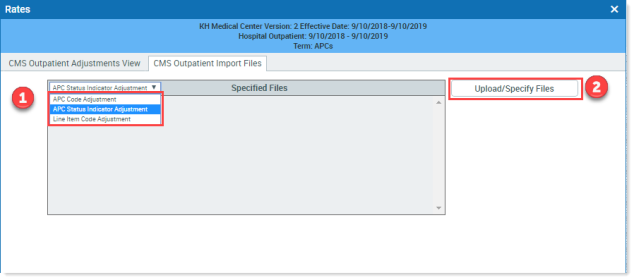
- Click the CMS Outpatient Import Files tab.
-
In the Specified Files box, on the left of the header, from the drop-down, select the type of adjustment you selected in step 3, and then click Upload/Specify Files:
-
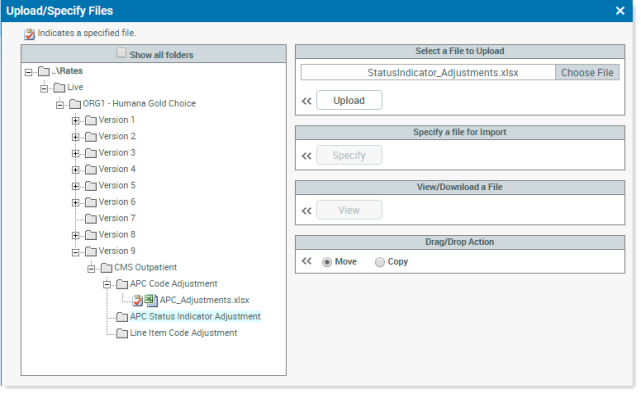
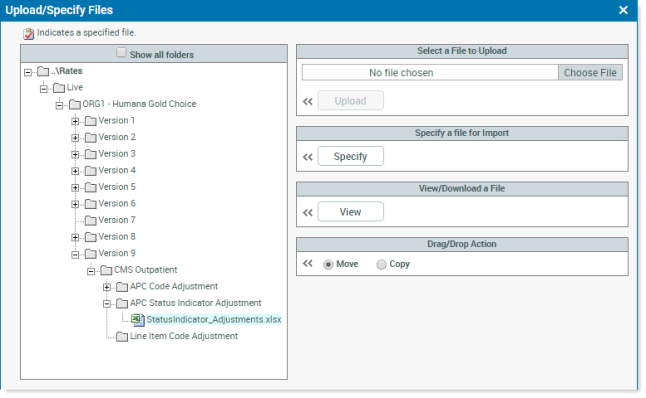
In the Upload/Specify Files dialog, click Choose File, and then select the file that fits the adjustment type you selected. In the following example, a file with SI adjustments is selected.
-
In the pane on the left, click the destination folder for the file, then in the Select a File to Upload pane, click Upload.
After the file uploads, you should be able to see your file located in the destination folder:
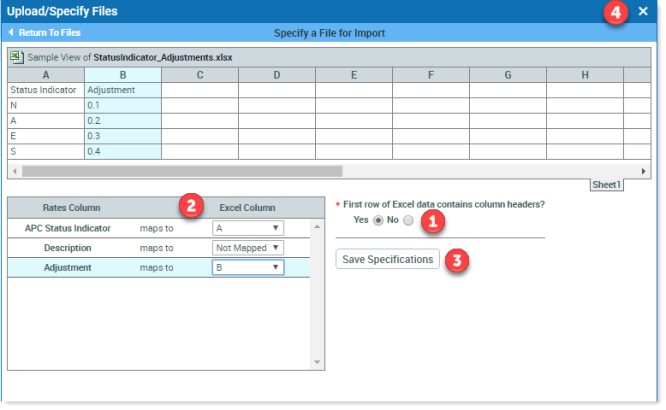
- Select the file on the left, and then on the right, in the Specify a file for Import section, click Specify.
-
If the file needs to be formatted before importing, you are prompted to make the selections in the dialog. Use the following example as a guide. When finished, click Save Specifications, and then close the dialog.
-
In the Specified Files section, click Attach.

-
Click the CMS Outpatient Adjustments View tab. The rates from the uploaded file display:
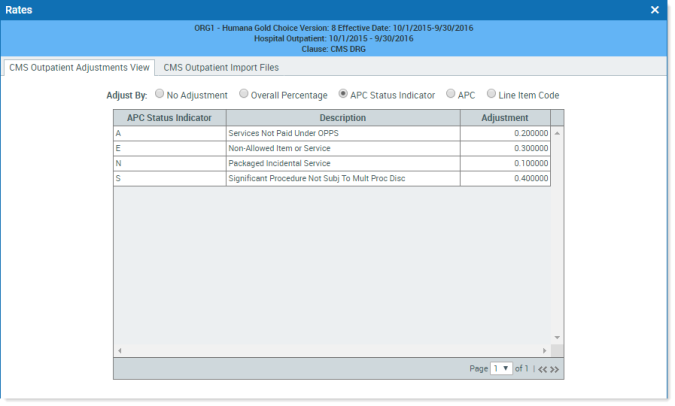
- Close the Rates window. The Rates column on the clause/term now reads “View.”
