Using the RF Balance Sheet and Cash Flow calculator
The Axiom Rolling Forecast RF Balance Sheet and Cash Flow calculator does the following:
- Summarizes historical financial statement data for the two previous completed fiscal years plus YTD for the current year
- Creates a forecast for both the Balance Sheet and Cash Flow using the save-to-database functionality
The Balance Sheet and Cash Flow calculator includes the following sections:
- Balance Sheet Assumptions – Key metrics used to drive various balance sheet calculations. Valid entries are listed in the Balance Sheet Assumptions Inputs section.
- Assets
- Liabilities and Net Assets
- Detailed Schedules – Contains rows to input detailed schedules for each category.
- Statement of Cash Flows
- Summary Income Statement
RFCodes are summarized by balance sheet categories, and the resulting summary data can be posted back to the database for both the Current Year Projection and New Forecast as well as inclusion in all related Forecast Analysis reports. If necessary, you can adjust values for balance sheet categories or enter them directly.
As forecasts and assumptions change, simply refresh the data in the RF Balance Sheet and Cash Flow calculator to update and post newly computed balance sheet information for calculating metrics driven by income statement parameters (assuming the balance sheet assumptions remain unchanged).
The Axiom Rolling Forecast Balance Sheet report assigns RFCodes to balance sheet categories per the FSSummary, FSDetail, and FPCode grouping columns on the RFCode dimension table.
You can filter the report by entity or group, as defined in dimensions by using the Quick Filter feature from the Main ribbon tab.
To use the RF Balance Sheet and Cash Flow calculator:
-
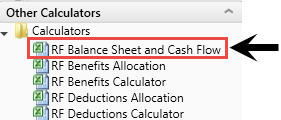
In the RF Admin task pane, in the Other Calculators section, click Calculators, and double-click RF Balance Sheet and Cash Flow.
- Refresh the data by doing one of the following:
In the Main ribbon tab, in the Workbook Options group, click Refresh Data.
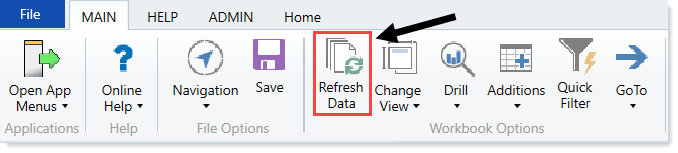
- Press F9.
-
In the Refresh Variables dialog, do any of the following:
Option Description Select 'Yes' to add Net Income to Fund Balance - To add Net Income, select Yes.
- To not add Net Income, select No.
Choose Inputs view to update save RFCode - To display all of the data in the calculator, including all of the non-input cells, select All.
- To display only the input cells, select Inputs.
Choose Default Asset Dept - Click Choose Value.
- In the Choose Value dialog, select the default Asset Dept to post results to.
- Click OK.
Choose Default Liability Dept - Click Choose Value.
- In the Choose Value dialog, select the default Liability Dept to post results to.
- Click OK.
Choose Default Equity Dept - Click Choose Value.
- In the Choose Value dialog, select the default Equity Dept to post results to.
- Click OK.
- In the Refresh Variables dialog, click OK.
- After the calculator populates, verify the following:
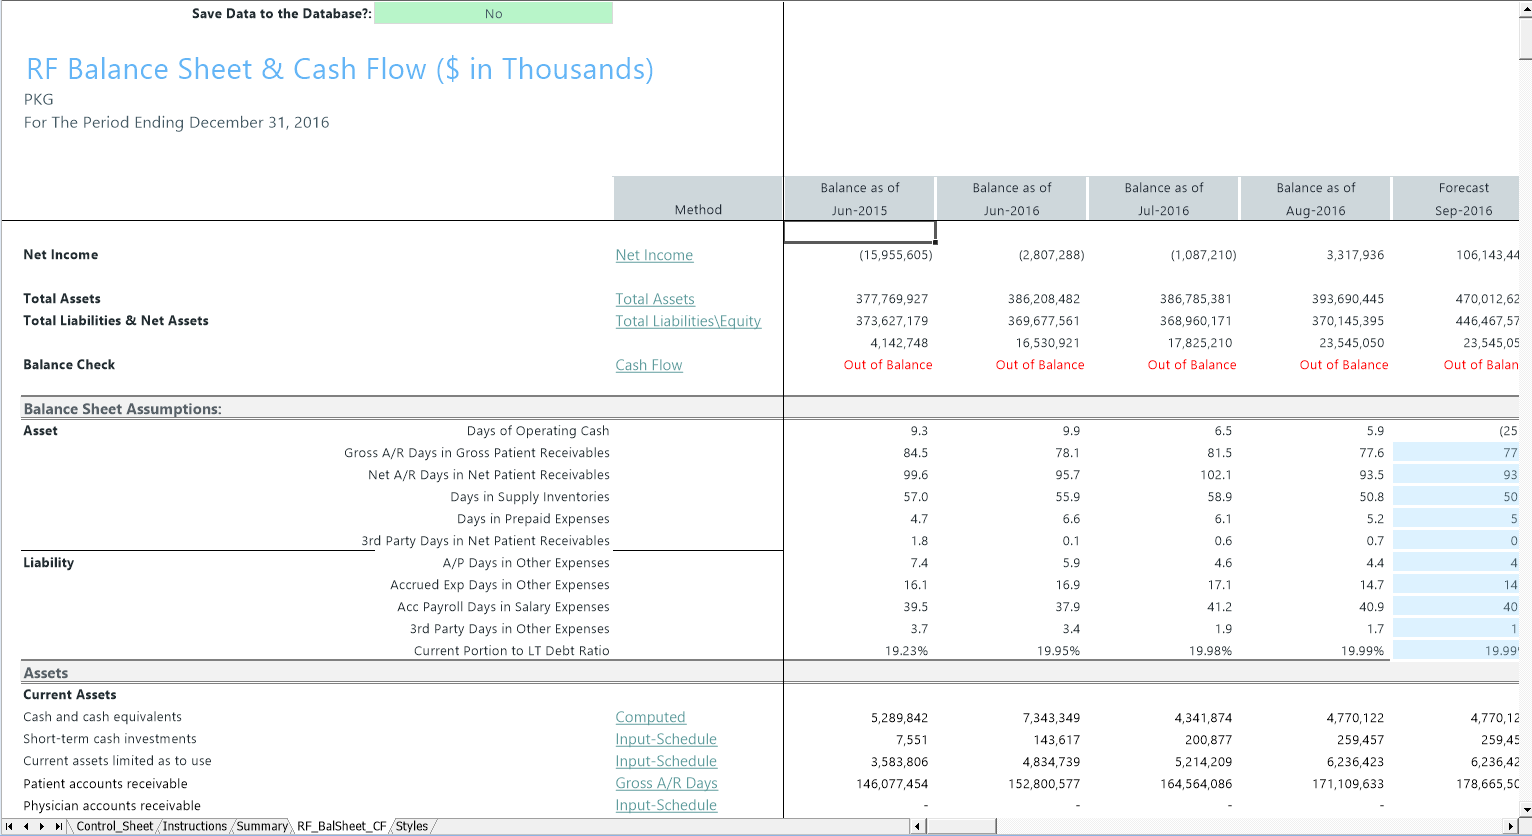
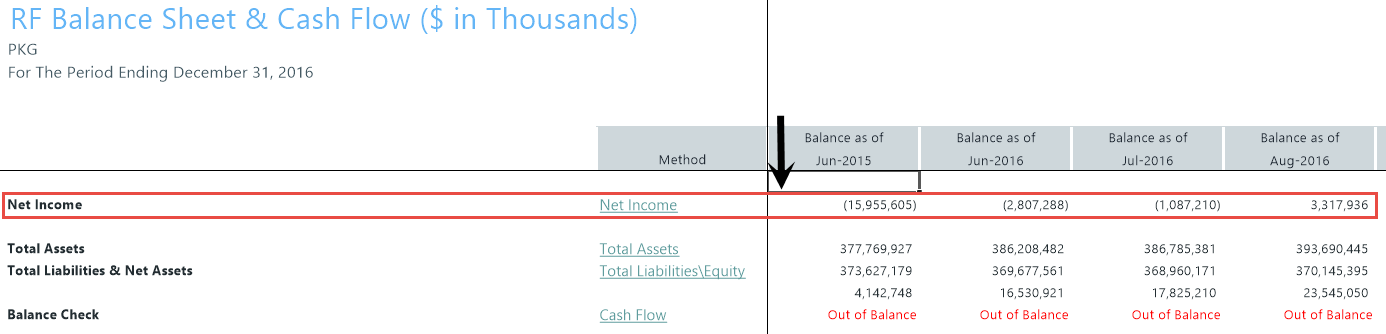
Data in the Net Income row at the top of the spreadsheet matches the balance sheet to be prepared.
Historical information for the last six quarters.
Review to the Balance Check row in the header section to confirm that the model is in balance.
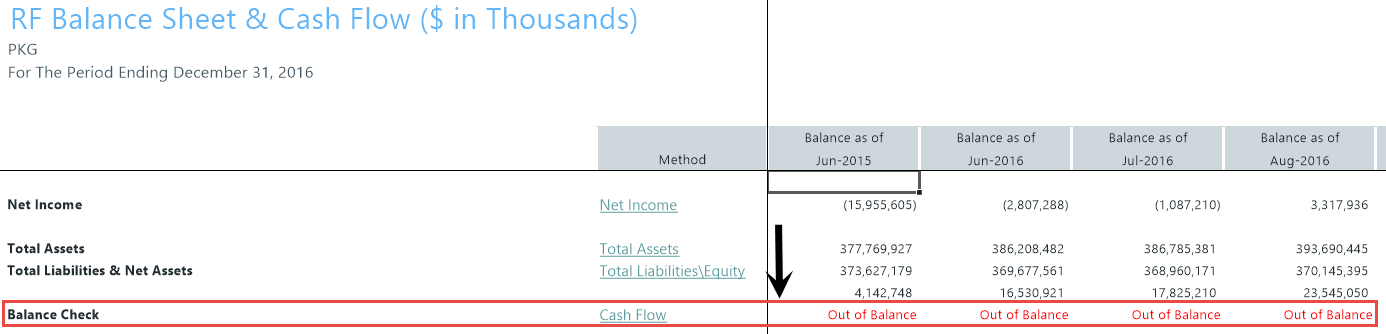
NOTE: If the model appears to be out of balance, consider refreshing the report and verify that the Add Net Income to Fund Balance setting was configured properly per your organization’s accounting practice.
-
In the RF_BalSheet_CF tab, make adjustments to the values in any blue cells. After making your changes, do the following:
- Review the cash flow statement to make sure it balances to total cash.
- Make sure the summaries match your expectations on the Summary tab.
For more information on the asset and equity inputs, see Balance Sheet assumption inputs.
-
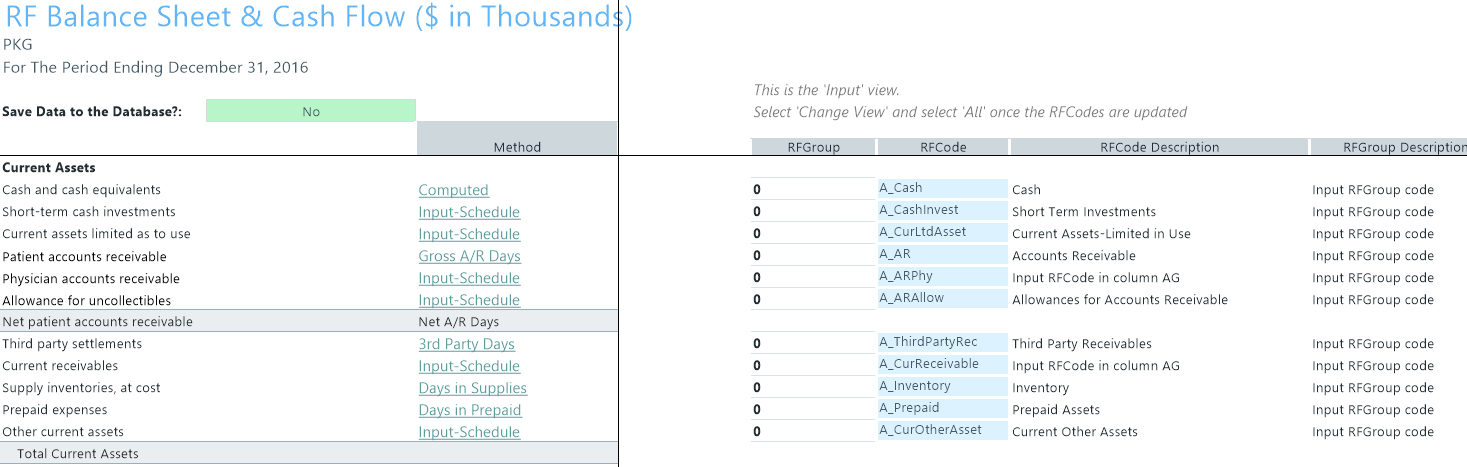
To display the inputs view for RFGroup and RFCode, in the Main ribbon tab, in the Workbook Options group, click Change View > Inputs.

RFGroup will already be assigned per the settings in the refresh variable dialog. You can enter RFCodes in the blue cells for each category.
- To save the changes back to the database, in the Save to Database drop-down at the top of the RF_BalSheet_CF tab, do one of the following:
- To save changes, select Yes.
To not save changes, select No (if it is not already).

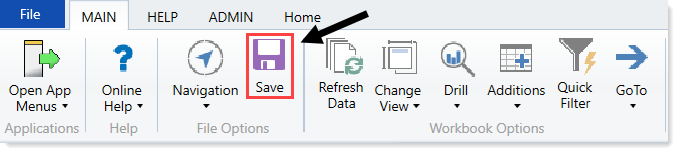
-
In the Main ribbon tab, click Save.
NOTE: To maintain separate models for different entities or groups, from the Main ribbon tab, click Save As, and save the model as RF Balance Sheet and Cash Flow_[EntityName] or Balance Sheet and Cash Flow_[GroupName]. If you have eliminating entries, you will need a separate model for these transactions.
