AX3006
Printing multiple plan files
You can print multiple plan files in batch by using the Print Plan Files feature. You can select multiple plan files within a file group, and then select one or more print views for each plan file. The available print views for each plan file are based on the template that was used to create the plan file.
To print multiple plan files from a file group:
-
On the Axiom tab, in the File Output group, click the down arrow to the right of the Print button, and then click Print Plan Files.
NOTE: In systems with installed products, this feature may be located on the Main tab—either directly on the ribbon or under Publish.
TIP: If you have access to the file group menu for a file group, then you can access Print Plan Files from the file group menu. In this case, the current file group is pre-selected in the dialog.
-
In the Print Plan Files dialog, use the File Group list to select the file group that contains the plan files that you want to print.
Only one file group can be printed at a time. Once a file group is selected, the dialog displays a list of the available plan files.
-
In the Select plan files to print section, select the plan files that you want to print.
-
You can sort and filter the list using standard Axiom grid functionality to find the plan files that you want to print.
-
To select multiple plan files at once, highlight the plan files, and then right-click and select Select. If you want to print all plan files that currently display in the dialog, select the check box in the header row.
Once at least one plan file has been selected, you can select which print views to print.
-
-
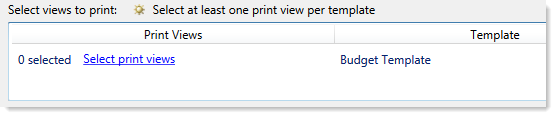
In the Select views to print section (at the bottom of the dialog), select the views that you want to print. You must do this for each source template used for the selected plan files.
-
Click the Select print views link.
-
In the Select Print Views dialog, select the sheet / print view combinations that you would like to print, and then click OK.
If you want to see the settings that will be applied to the print job, click the View link. Print settings are read-only in this context.
NOTE: All template sheets are listed in this context (except for Control Sheets), including sheets that you may not normally see in plan files because they are hidden. If you select a sheet that is hidden in one of the selected plan files, it will not be printed. A message will inform you of the unprinted sheet when the printing process is complete.
-
Repeat this process for each source template.
If all of the selected plan files were built using the same template, then there will be only one template listed. If the selected plan files were built using multiple templates, then multiple templates will be listed. The print selections for each template will only apply to the plan files that were built using that template.
-
-
If you want to print to a different printer than your default printer, click Choose Printer at the bottom of the dialog. In the Printer Setup dialog, select the printer that you want to use, and then click OK.
NOTE: In the Windows Client, the printer is always your default printer unless you change it for a particular print job. In the Excel Client, the printer starts as your default printer, but if you change the printer for a print job, the changed selection will be remembered for any future print jobs in the current session.
- Click Print.
The selected plan files are printed, using the print view selections.
If a selected print view is not found in a target plan file, a message displays at the end of the process, listing the affected plan file and the relevant sheet / print view. This may occur if the print views in either the template or the plan file have been modified after plan file creation.
