Select years, sources, and data
Use these instructions to configure the Transfer to Financial Planning utility for transferring data to Axiom Financial Planning. In the following steps, you select the time periods, data sources, and data to be transferred.
NOTE: At any time while in the utility, you can click the PREV link to go back to previous pages or click a page number button in the button row under the page title.
-
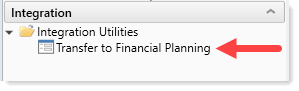
In the Fin Plan Admin task pane, in the Integration section, expand Integration Utilities.
-
Double-click Transfer to Financial Planning.
NOTE: Many of the options available depend on selections made on the first Configuration for Data Transfer page. For example, if you select Rolling Forecast as the transfer source for any of the years, the utility skips the step where you select Management Reporting data options. For this reason, users who choose Rolling Forecast as a data source have only nine steps in the transfer utility instead of 10.
- On the first page of the utility, review the instructions, and then in the upper right of the page, click NEXT.
-
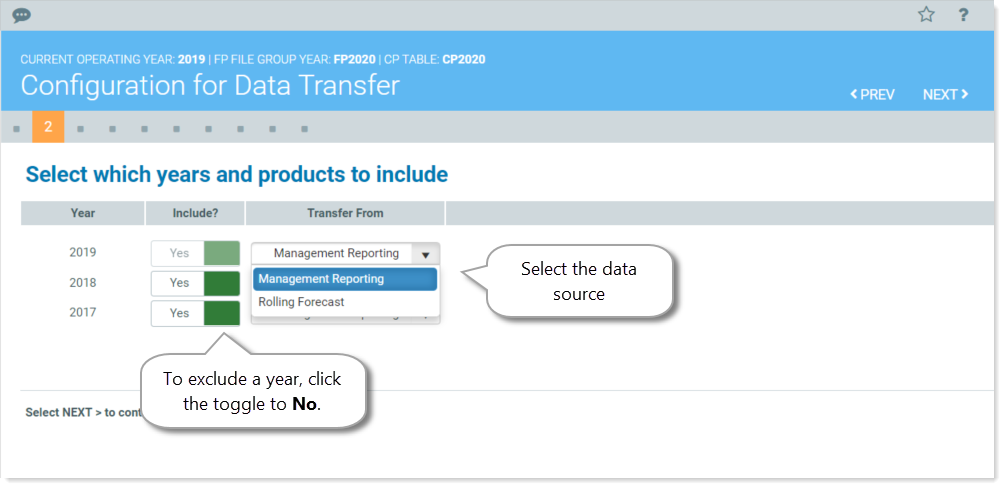
On the first Configuration for Data Transfer page (page 2 of the utility), In the Include? column, select whether to include each year listed.
NOTE: The years available for selection depend on your Axiom Financial Planning settings. For example, if you are currently working on your 2020 File Group, the years available are based on that. You can exclude any year shown except Year 3 (the first year listed).
-
In the Transfer From column, select the data source for each included year.
NOTE: When you select Rolling Forecast as a source, the data imported is based on the Axiom Rolling Forecast system setup. You can change the values using the Axiom Rolling Forecast drivers.
- Click NEXT.
Options on the second Configuration for Data Transfer page depend on the data sources (products) selected on the previous page.
- If you selected Management Reporting for all years, you must select the Management Reporting tables from which to transfer data for each year.
-
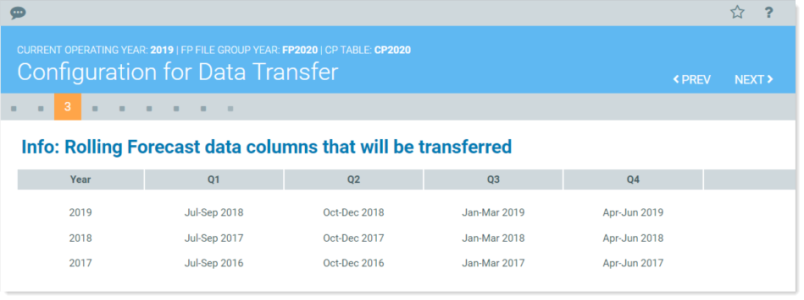
If you selected Rolling Forecast for all years, a non-editable table displays the year(s) and quarters that the data will be transferred from. Data is based on the Rolling Forecast system setup. You can change the values using the Rolling Forecast drivers.
- If you selected a combination of both Management Reporting and Rolling Forecast as data sources, the utility displays both sections on the page.
To configure Management Reporting tables:
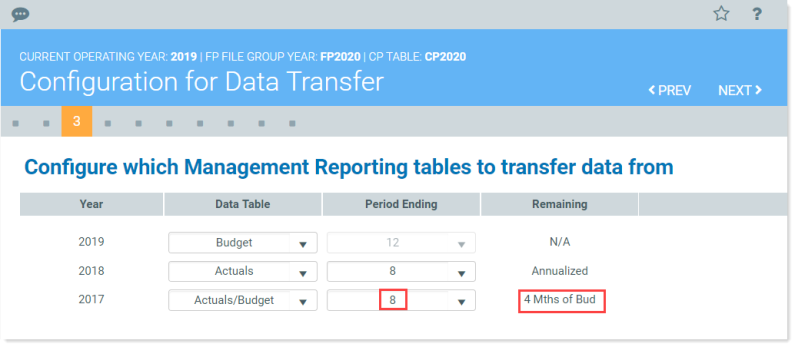
- In the Data Table column for each year, select the table from which to transfer data:
- Actuals – Select to use data from the Actuals table (e.g., ACT2020) for the entire year. If you select this option, select a period in the following step.
- Budget – Select to use data from the Budget table (e.g., BUD2020) for the entire year.
- Current Yr Forecast – Select to use data from the Current Year Forecast table (e.g., CYF2020) for the entire year.
- Actuals/Budget – Select to use a combination of months from the Actuals and Budget tables. If you select this option, select a period in the following step.
-
If you selected Actuals or Actuals/Budget in the previous step, then in the Period Ending column, from the drop-down, select the number of months to use:
- For Actuals, select the number of months to use. The remaining months will be annualized.
-
For Actuals/Budget, select the number of months to pull from Actuals. The remaining number of months will come from Budget, as shown in the following example. For year 2017, eight months are selected from Actuals, leaving the remaining four months to come from Budget:
To configure Year 3 balance sheet and table options:
NOTE: You can base your balance sheet on a data source different from what you selected for the Management Reporting tables, if you like; however, the default is to use what you selected for Year 3 in the Configure which Management Reporting tables to transfer data from section.
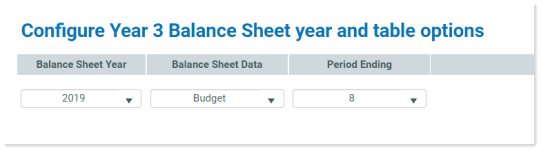
- In the Configure Year 3 Balance Sheet year and table options section, in the Balance Sheet Year column, select the desired year.
-
In the Balance Sheet Data column, select Actuals or Budget.
NOTE: If you selected Rolling Forecast as the data source for the first year (2019 in the example) in Step 2: Select years and data sources, then Rolling Forecast will be the only option available in the Balance Sheet Data column drop-down.
-
In the Period Ending column, select the month to apply from the selected source table.
- Click NEXT.
NOTE: The utility skips this step if you selected Rolling Forecast as the product source for any year in Step 2: Select years and data sources. The Select data options page does not display unless the transfer source selected for all included years is Management Reporting.
To select Management Reporting data options:
NOTE: If you use alternate mapping, the items selected for the balance sheet node are mapped to the FPNodeBS column instead of the FPNode column in the DEPT table.
- (Optional) To move and consolidate data associated with certain codes to the balance sheet node, do the following:
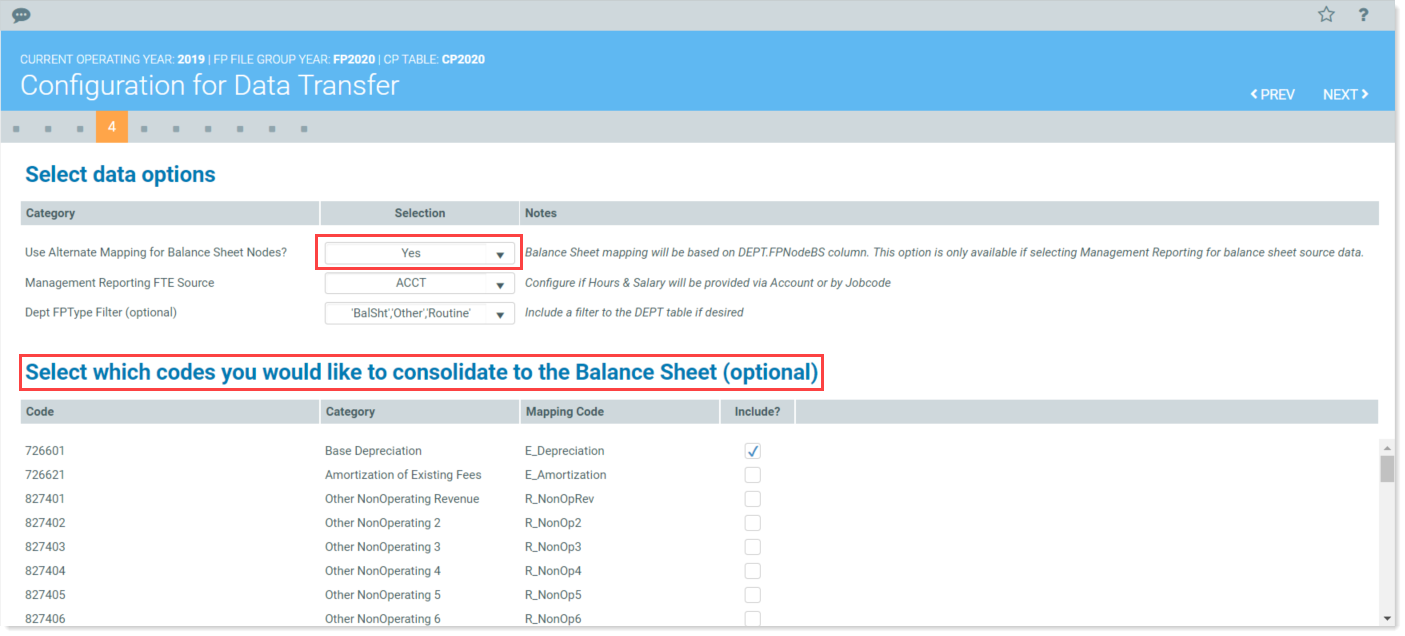
- In the Use Alternate Mapping for Balance Sheet Nodes? row, in the Selection column, select Yes from the drop-down. A section displays for selecting codes to consolidate.
In the Include column, select the check boxes for the codes to consolidate to the balance sheet node. Selecting a code groups the code using the DEPT.FPNodeBS mapping column rather than the DEPT.FPNode mapping column.
-
For Management Reporting FTE Source, in the Selection column, select the source table for your FTE and Salaries: ACCT or Job Code.
NOTE: The Job Code option does not display if you selected CYF or Actuals/Budget data for the first year listed in Step 2: Select years and data sources.
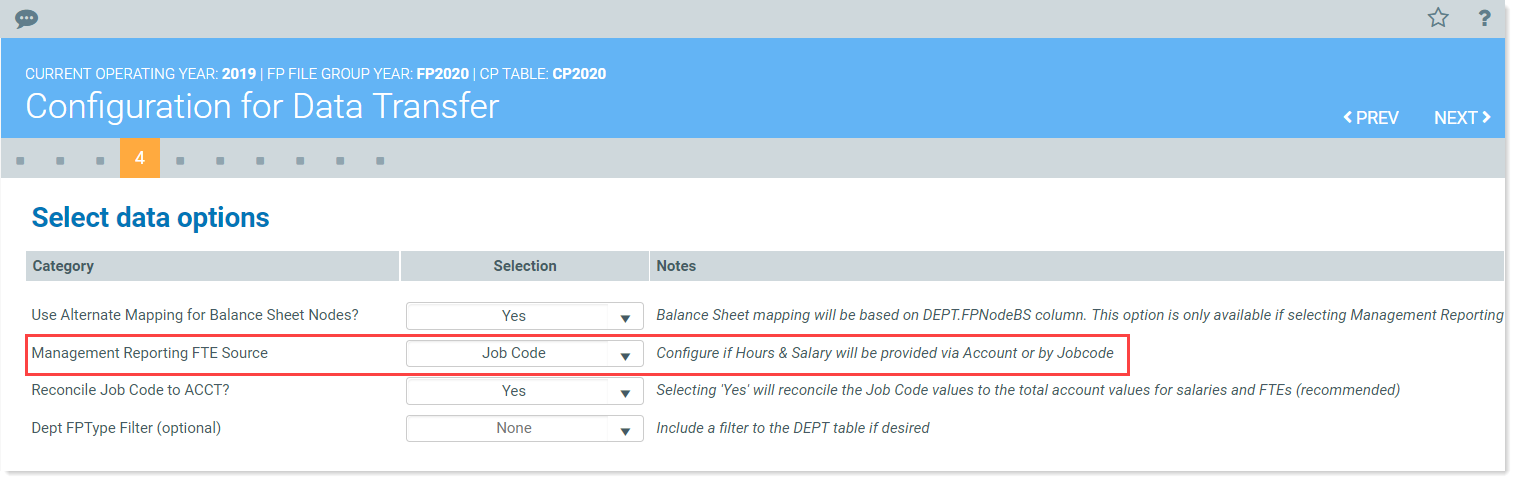
- If you selected Job Code as your Management Reporting FET Source in Step 2, the Reconcile Job Code to ACCT? option displays on the following line. The default is set to Yes, which means the utility will automatically reconcile the Job Code values to the total account values for salaries and FTEs. If you want to reconcile these manually (not recommended), select No.
-
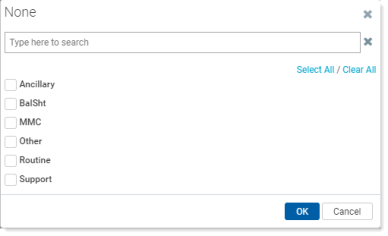
(Optional) For Dept FPType Filter (optional), if you do not want to load all items from the DEPT table, you can select just the items to include. In the Selection column of the Dept FPType Filter row, click the down arrow, select the desired filters, and then click OK. Your selected item types display in the Selection column.
- Click NEXT.
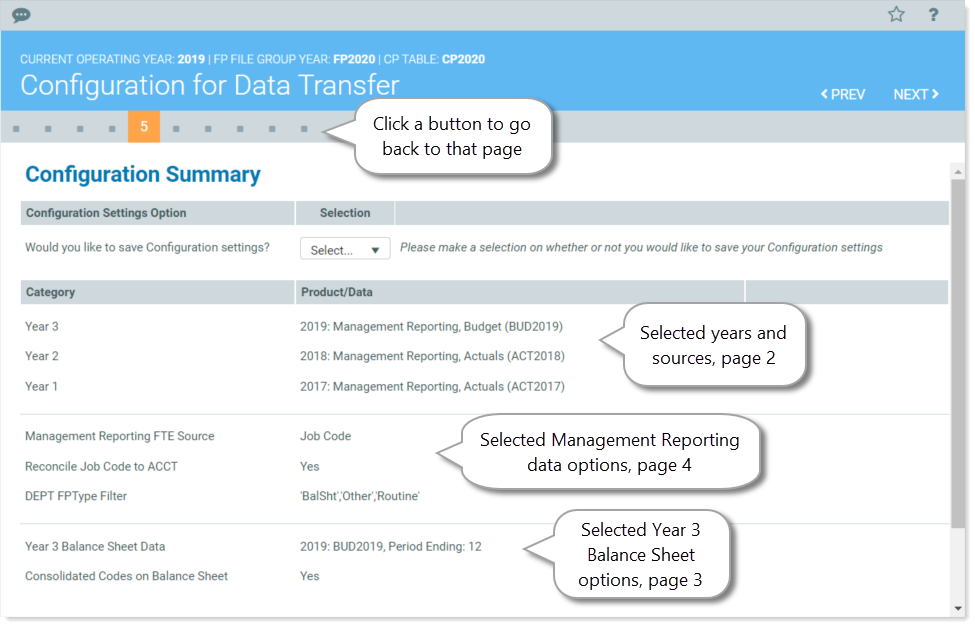
The Configuration Summary page presents a summary of the data that you selected to transfer, and the option to save your selections thus far. You can go back to any page and make changes. Be aware that some changes may affect related selections on other pages, so it is a good idea to review pages that follow.
-
In the Configuration Settings Option section, from the Would you like to save Configuration settings? drop-down, select Yes to save your selected settings to this point, or No to not save settings and have all settings revert to the defaults the next time the utility is opened.
-
Review the rest of your selections and make any changes needed.
- After reviewing and/or making changes, click NEXT.
Continue to Verify mapping and validate data.
