Select models and nodes
The next steps in the Annual Rollforward Utility involve selecting models and nodes, and designating the models to save the nodes to.
The Model Selections page displays the list of models available for including in the roll forward. In addition to selecting models, you can configure model options such as renaming a model, changing the default number of Projected Years, and changing the associated driver (if applicable).
-
At the Model Selections page, all models are selected by default. To exclude a model, in the Include? column on the left, click the checked box to clear it. If the list is long, you can click the Filters icon (
 ) in the gray header bar and filter the list to display only the models you want to view.
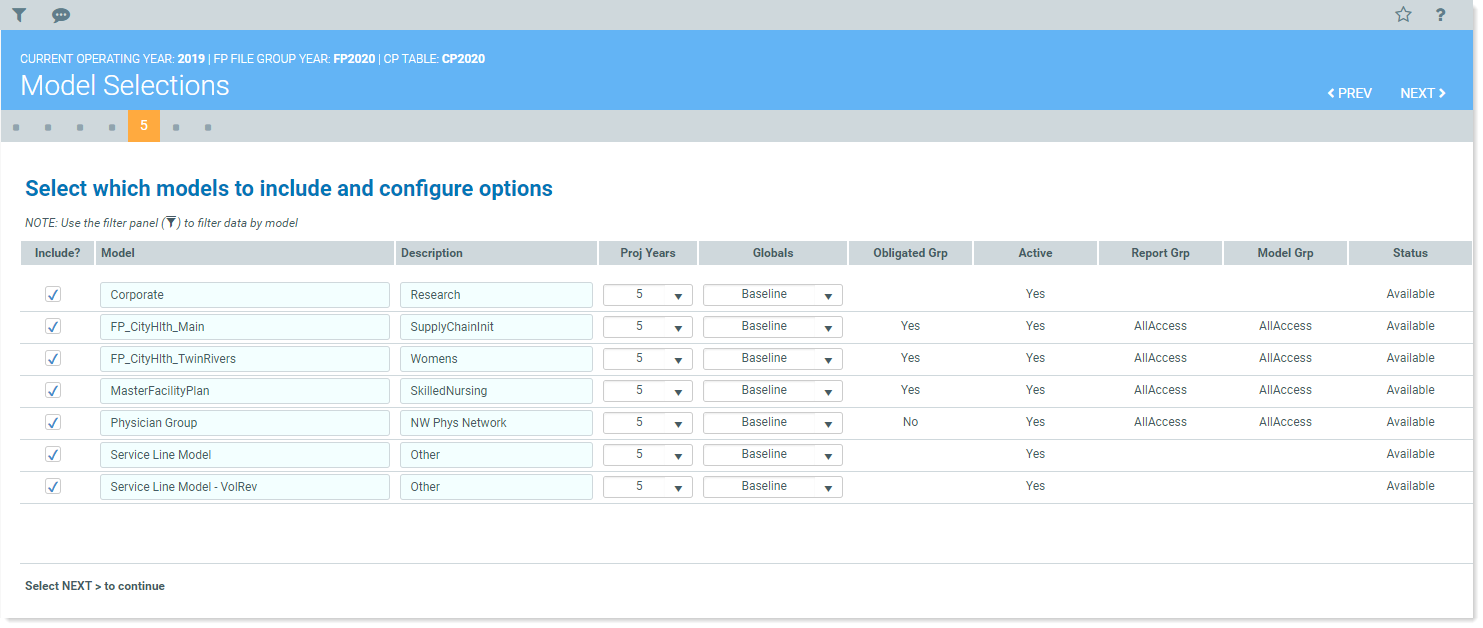
- If desired, make any of the following changes:
- To change a model’s name, type the new name in the Model column field.
- To change a model’s description, in the Description column field, edit the description.
To change the number of projected years, in the Proj Years column, select the desired number of years from the drop-down.
To change the driver used for a model, in the Globals column, select the desired driver from the drop-down.
- Click NEXT.
The Node Selections page displays a list of nodes available for including in the roll forward, based on the models you selected on the previous page.
-
At the Node Selections page, all nodes are selected by default. To exclude a node, in the Include? column, click the corresponding checked box to clear it. If the list is long, you can click the Filter icon (
) in the gray header bar and filter the list to display only the desired nodes.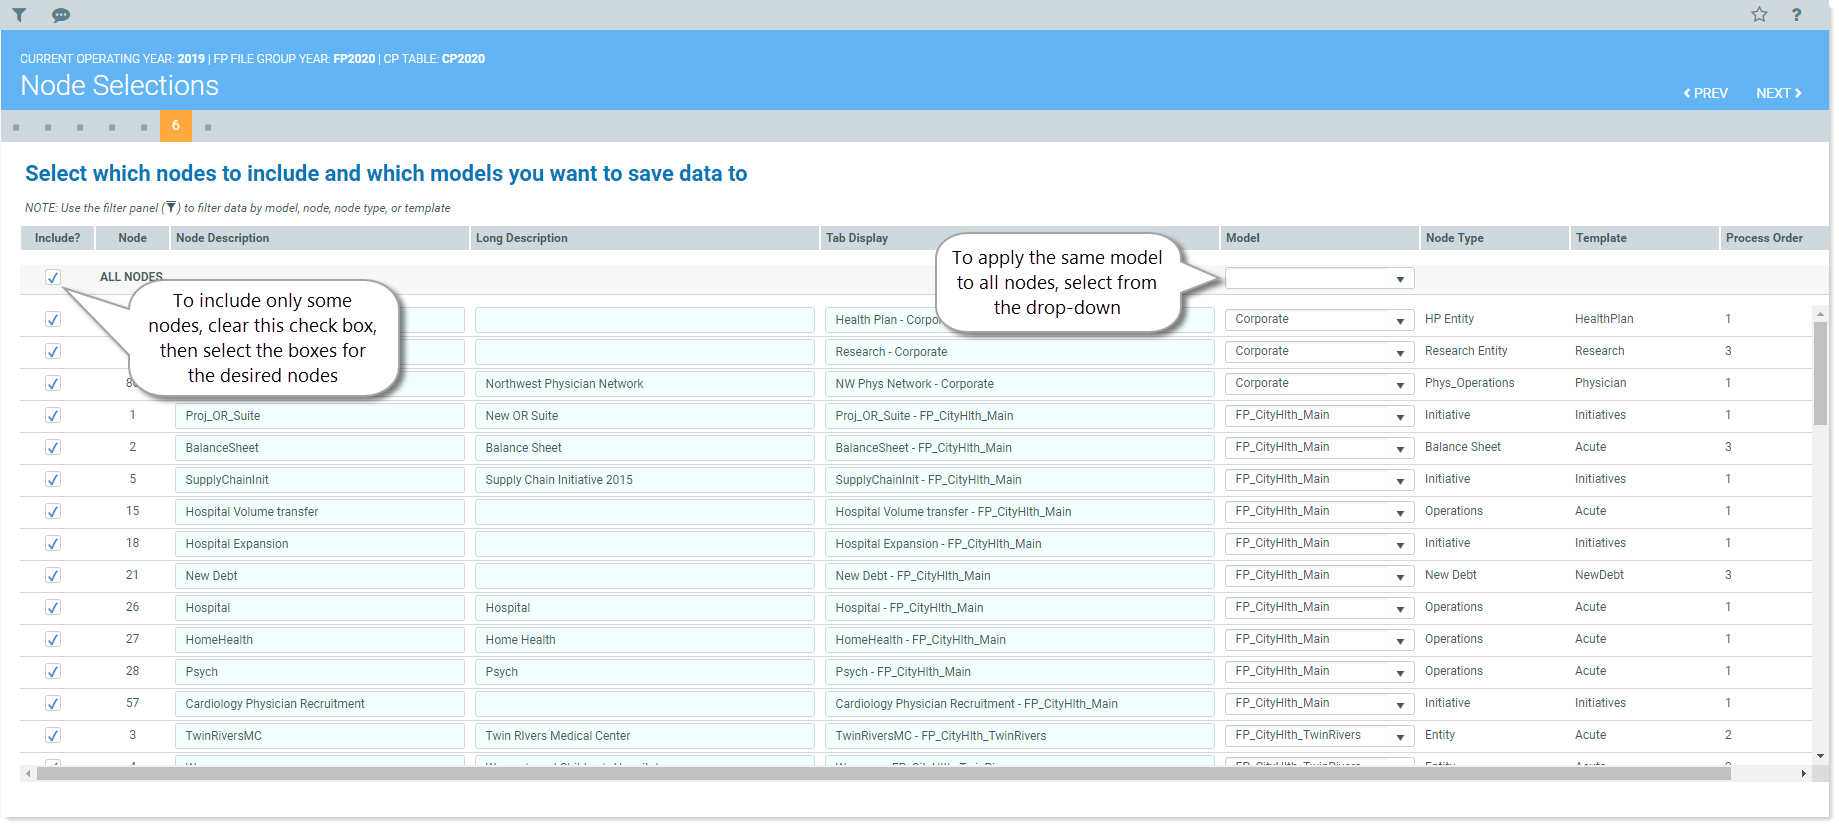
- If desired, make any of the following changes:
To change a node's description, in the Node Description column, edit the text.
To change a node's long description, in the Long Description column, edit the text.
To change the text displayed on the tab when the plan file is opened, in the Tab Display column, edit the text.
NOTE: This is the value that displays when a node is opened and can be modified.
To apply the same model to all nodes, in Model column, in the top drop-down, select the desired model. The selected model name is copied to the Model field for all nodes.
To apply different models to different nodes, In the Model column, select from the corresponding drop-down for each desired node.
- Click NEXT.
Continue to Step 7: Finalize and submit.
