Building Up RVUs
Building Relative Value Units (RVUs) is often a tedious and time consuming task. Additionally, there are numerous ways and methodologies used for creating RVUs across health service organizations. The RVU Developer tool is designed to make both the development and the maintenance of RVUs easier and more efficient. Additionally, it has been designed to support varying levels of detail and to work with any number of methodologies.
The basic concept of building an RVU is to break down the Cost Item into detailed resources with defined values that, when aggregated, form the relative value at the cost pool level, which are then saved to the CostRVU table. For example, CPT procedures performed in a clinic can be studied to determine what resources are used during the procedure. These resources are mapped to the CPT code, forming an RVU or Cost Component. Each of the resources has a quantity, cost, and frequency of use, which ultimately drives the basis of the RVU in dollar terms. The resources are grouped by cost pool and then summed to create the RVUs for the various cost pools, e.g., Labor, Supplies, Equipment, and so on.
You can break down the development of RVUs into discrete activities with corresponding tasks. An example of this process is outlined, as follows:
NOTE: Generally, labor is the minimal Resource Class used in RVU development while the others are optional and/or selected for specific departments.
- Activity 1: Determine the departments and the cost Items that need RVUs to be developed.
- Activity 2: Identify and prepare source data for the RVU development process for the Labor Resource Class and load into the Resource table.
- Activity 3: Identify and prepare source data for the RVU development process for the Supply Resource Class and Medication Resource and load into the Resource table.
- Activity 4: Identify and prepare source data for the RVU development process for the Equipment Class and load into the Resource table.
- Activity 5: Identify and prepare source data for the RVU development process for the Other Resource Class and load into the Resource table. Other resources are often Professional Fees, Purchased Services, etc.
- Activity 6: Determine the activity level at which the RVUs will be developed, and create activities.
- Activity 7: Determine the frequency of use and the relative value of each resource for each cost item.
- Activity 8: Review the resulting RVU and save the cost components, along with the RVU.
The following diagram illustrates the main activities and steps in both data preparation and the RVU development process:
Process Diagram – RVU Development Data Preparation
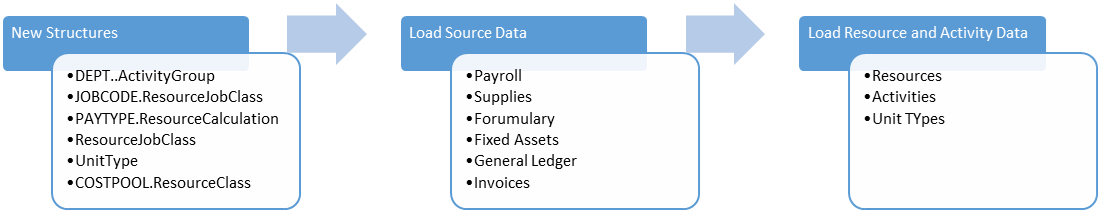
Process Diagram – RVU Development Process

To build up an RVU:
-
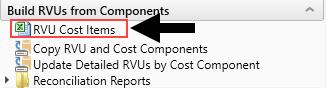
In the Cost Accounting Admin task pane, in the Build RVUs from Components section, double-click RVU Cost Items.
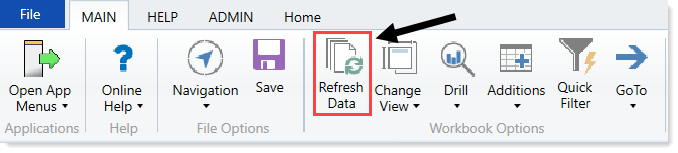
- To refresh the data, do one of the following:
In the Main tab, in the Workbook Options group, click Refresh Data.
- Click F9.
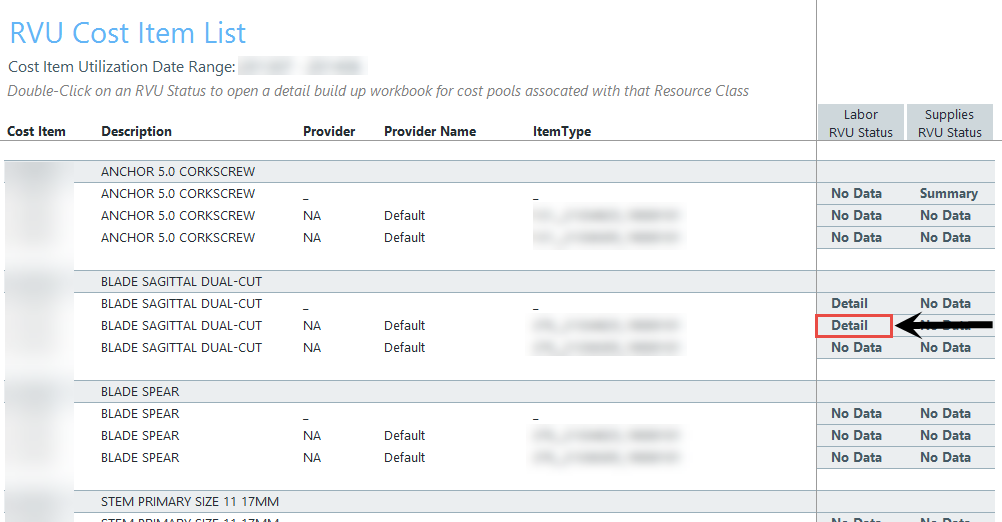
- In the Refresh Variables dialog, select the variables to include, and click OK. The RVU Cost Item workbook displays a list of all your cost items according to the parameters you specified in step 3. The Equipment RVU Status, Labor RVU Status, and Other RVU Status columns display one of the following status types:
- Summary - RVUs that already exist in the CostRVU table (for example, not studied at the cost component level).
- Detail - Cost components that exist for RVUs.
No Data - No RVUs created.
NOTE: You must select a value for each variable to populate the workbook.
-
To view the detail build up worksheet for a ResourceClass row, double-click Detail in any of the three status columns, as shown in the following example:

Click image to view full size
-
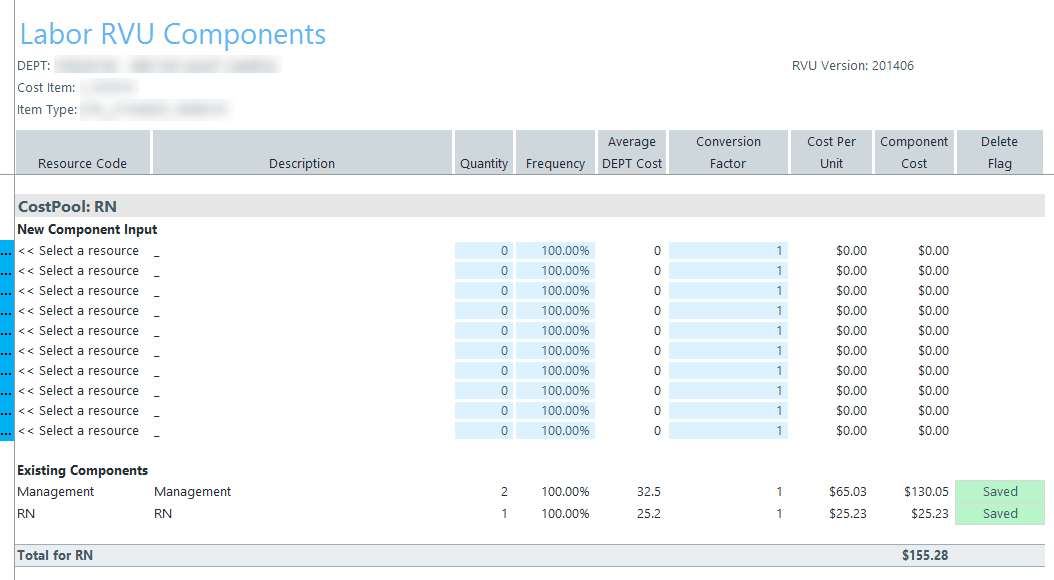
In the workbook for the status column you selected, to add a resource, click the ellipse next to the Select a resource row.

Click image to view full size
NOTE: You can only add ten resources at a time. To add more than ten, add all ten resources, and then click Save. The resources are added to the database and move to the Existing Components section at the bottom of the screen. The New Component Input section is cleared so that you can add more resources.
-
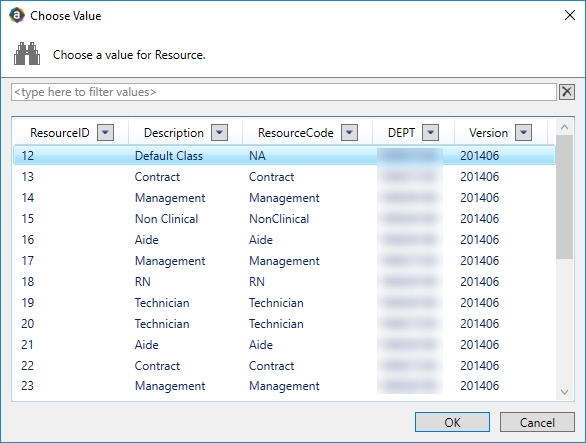
In the Choose Value dialog, select a resource from the list, and click OK.

Click image to view full size
-
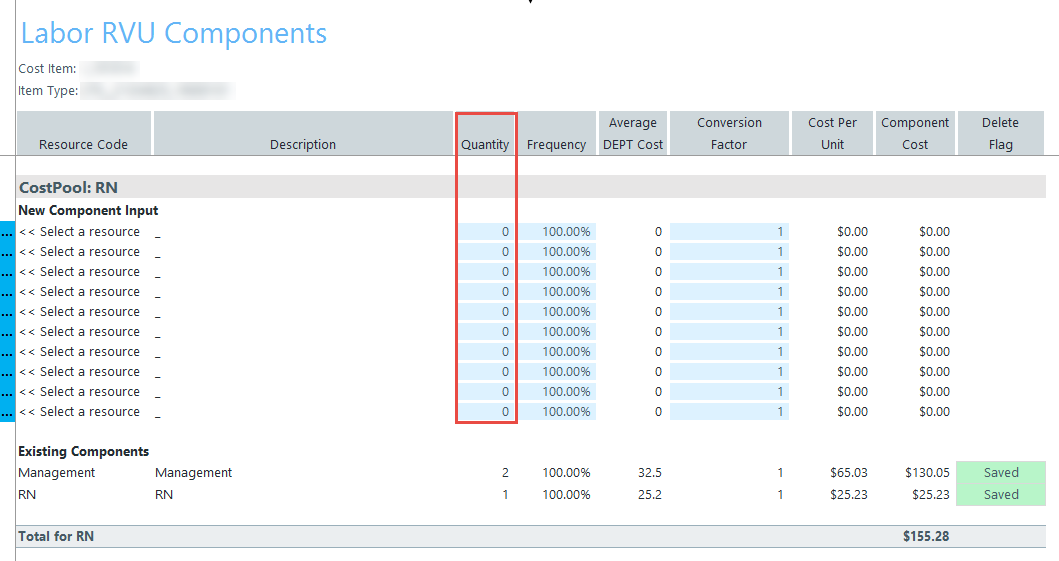
In the Quantity column, type the number or quantity of the resource used for the cost item.

Click image to view full size
-
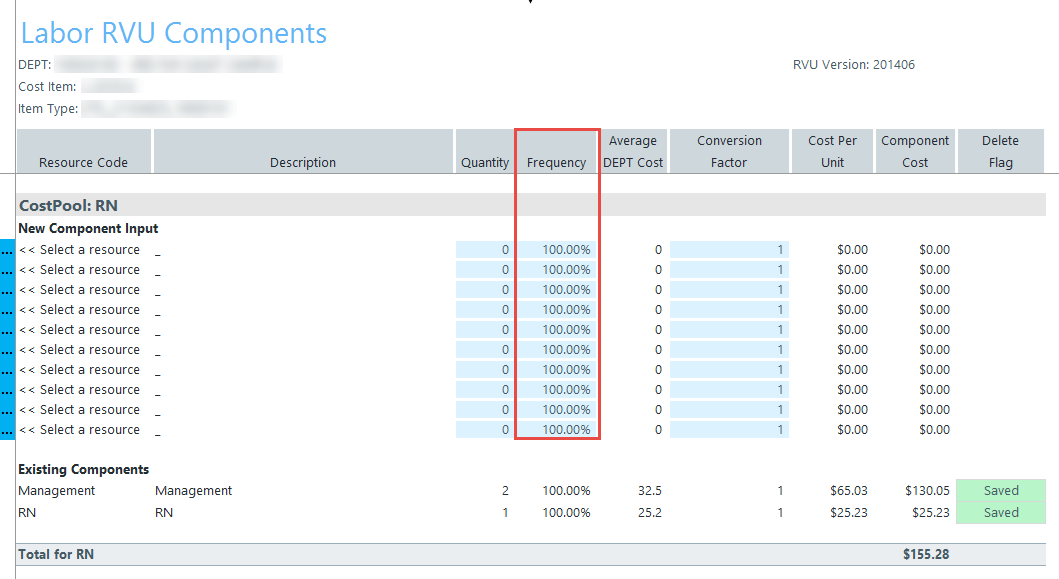
In the Frequency column, type a percentage for how often the resource is used. For example, if the resource is only used half the time, then enter 50%.

Click image to view full size
-
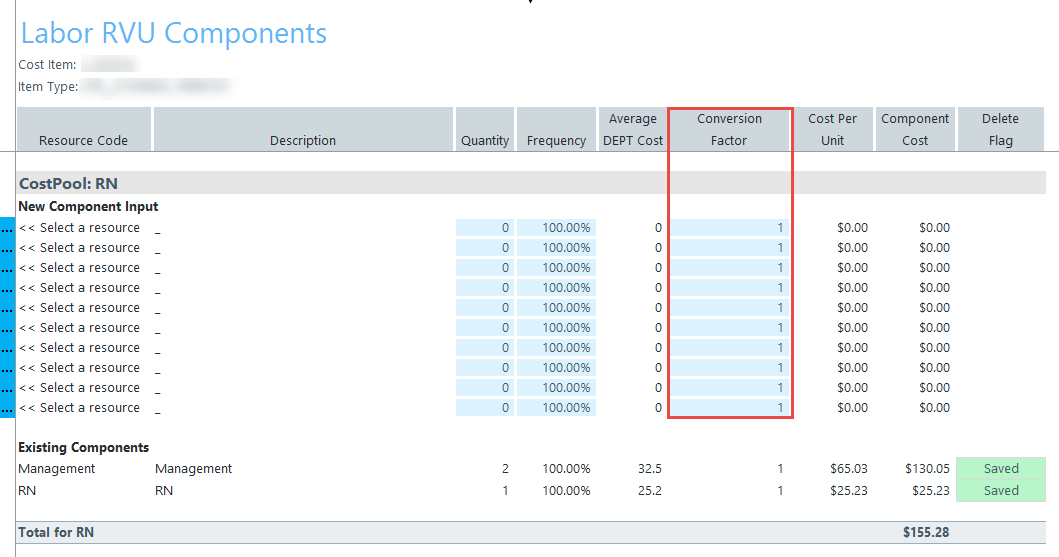
In the Conversion Factor column, add the factor needed to convert the cost per unit identified as the issue cost to a per-unit basis being consumed or used by the for this cost item. For example, to convert into minutes, then enter a conversion factor to 60, to convert the hourly rate to minutes per unit.
For example, to convert the average hourly rates loaded into the Resource table from the payroll data into a cost per minutes. This assumes that the quantity is expressed in minutes. If not, then you would enter a 60 conversion factor to convert the hourly rate to rate-per-minute. In another example, a box of 50 items is issued to a floor or department, but the items are consumed one at a time. In this case, you need to use a 50 conversion factor to ensure the appropriate costs are calculated as a basis for the RVU calculation.
After you press Enter or Tab to move to the next field, the system displays the actual calculated costs per unit for the item using the conversion factor and the total costs for the component.

Click image to view full size
-
To delete the resource from the CostComponent table for the CostItem, in the Delete Flag drop-down, select Delete.

-
To save your changes to the database, click Save.
NOTE: Any resources marked as Delete are deleted from the database.